Shoe Bags and a Project Bag

Hi habibis!  Happy Wednesday!

Today I’ve got more bags to show you.  First, I made some shoe bags.  I saw this post on Kellita Makes and I thought shoe bags would be a great idea for traveling.    I went back to the post a couple of weeks ago and clicked through – in October Kellita posted links to several tutorials and I chose this one.  I didn’t follow her instructions 100%.  When you fold the top down to sew the space for the ribbon, she sewed two seams, one at the very top to form a tube.  I skipped the top seam and simply sewed the one bottom seam.

One of these bags was a present for Spry.  I used this cute red check print – gifted to me by our mutual friend Nikki – and rather than ribbons I used (no joke) the straps from my bridesmaid’s dress for my brother’s wedding.  We never used the straps, and when I went to throw them away I thought perhaps I could use them instead.  I ripped the little garment hooks off the straps and threaded them through.  I love the pop of blue against the bright red.

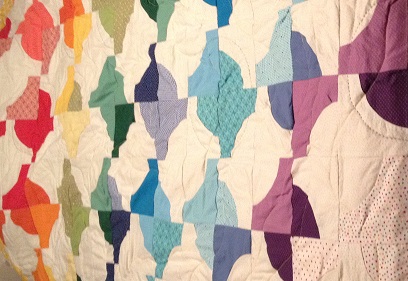
I made two shoe bags for myself, using leftover green fabric from my brother’s wedding quilt.  I made a third bag that’s extra big, for boots or for laundry.

I made a slightly more complicated bag for my projects.  I’m slowly progressing through an embroidery sampler T-Rex gave me, and I wanted a bag large enough that I could just slip it in, with a pocket to carry around my embroidery thread and other little notions that go with it.  I decided to use the leftover green fabric, as well, but I wanted to use a lining just in case, on the off chance that the dark green might bleed onto my projects.  (Paranoid?  Probably.)   The bag is lined in a cream print with little crescents and the pocket is lined in scraps of yellow I’d used to back my grandma’s yellow and orange quilt.

I used batting scraps to make it sturdier.  I quilted the layers to hold them together.

I made this little pocket for notions and I used ribbon and the buttons from my Aunt D for closures.


Spry: Rock Show Shirt

Hello lovelies! I’m the Sprite[in the]Stacks, or Spry here.

I am the Deconstructionalist of the group, and am enamored with all things Upcycling and DIY.  This past year I participated in the Great American Apparel Diet, and although I admit I cheated twice, it spurred me to figure out how to refurbish my clothing. Figuring out how to actually wear that thing I bought but really can’t pull off.. it’s a good feeling when it succeeds. (And if it doesn’t, it feels good to put it in the donation bin too.)

My first forays into clothing-remixes were deconstructing T-shirts. This was before I got my sewing machine, so they were all no-sew projects. Which are easier to share!

This is my Rock Show Shirt: this project works best with a shirt one size too big on you. It was originally a band shirt I bought 10 years ago, in my awkward teens, when I wore clothes too big for me, which are bigger for me now. It had been sitting in my closet for 10 years, partially because it was a RELIC to me and I didn’t want to wear the shirt out, ever. Partially because I realized it was unflattering, despite it’s awesome colors. Well, it was time to drag it out into the open, because I wanted something to wear to a Rock Show (and everyone wears other-band shirts to shows).

First, take the big shirt and cut off the sleeves and open up the neck. Rock Shows are hot, stuffy places, and a tanktop is the way to go. I made one shoulder a thick bunch/flower of fabric, and the other shoulder a two-strap affair. All by cutting holes into the shirt and tying knots with the strips of leftover shirt (evtl I will have a more in-depth post on shoulder strap options).

If you like a loose shirt, you can be done with funky shoulders. Wear it layered with another tank. I didn’t want to multi-layer, so I tightened the shirt up.

Put the shirt on. Mark with pins or chalk where your bra hits your back. This is where the ties in the back will go, which means you can wear a bra and it won’t show. Pinch the excess fabric on the sides to eyeball how much tighter the shirt needs to be.

Now (after you take the shirt off) cut the back of the shirt up the middle. Where the mark of your bra-back is, make three horizontal cuts, to create two straps, about an inch thick. Cut the straps about the amount you pinched on each side. Knot the straps (I knotted them so they criss-crossed for a nice cinch).

I put the shirt back on and realized that there was a lot of fabric above the knot that needed to be cut. I just cut it down into a V, from the shoulders to the knot. I’m sure you can make fun thin strips of this fabric too, so there are knotted patterns down your shoulder blades. The extra fabric below the knot overlaps each other nicely, so the area is covered, but well-ventilated. I didn’t bother modifying it, but feel free to, if you have the time before rolling out!