Christmas Presents: Apron

I cut the fabric for this apron over the summer when I went on a major cutting spree and cut fabrics for a bunch of projects. My plan was to make it for my dad’s birthday, but that never happened. So I pushed it back to Christmas.

I have a lot of dog-themed fabric. Some I bought in bundles a long time ago and some I must have bought separately. I used different prints for the top and bottom of the apron and the straps and pocket.

I was going to make it one sided and fold the edges under, like I’ve done with the last couple of aprons I’ve made, but I don’t like having the rough edges you get from the seams. So I decided to make it two-sided. I pulled out this cute border collie fabric. My parents have border collie mixes so the fabric is perfect. I used this plaid for a pocket and sewed it all together.

Blurry picture of one side:

Picture of the other side:

I didn’t quilt it.  I also didn’t take any pictures of me modeling it.  The neck strap is too long, even more so than usual.  I made it long with the understanding that my dad or my brother might end up wearing it at some point, but the rest of us would need to knot the neck strap.  I think the apron is super cute, and Mom and Dad really liked it.

Apron for my cousin C

Happy Fourth of July! I hope you’re having a wonderful holiday!  To mark the occasion, I’ve decided to put up an extra post.  The charity quilt and Hunter’s Star quilt have been taking up most of my blogging time, but I have other things I’ve been working on in the interim, and I wanted to showcase one of them today.

My cousin C just graduated from college.  C loves to cook and bake and I wanted to make her an apron for her graduation because it would be easy for her to pack and move it, plus it’s useful.  (Always important considerations for new college grads, right?)  She loves purple and I bought a bunch of purple fat quarters when I was shopping with my mom before Easter.  (I have plenty of purple fabric, but these fabrics were so cute…I fail at not buying fabric.)  The apron is very similar to what I made my sister N for her birthday, except that I made a pocket for it.

I spent a while thinking about which monochrome purple to use on the bottom and which to use on the top.  I knew I would use the blue print for the pocket, so I ended up picking the monochrome purple print that I thought went best with the blue.  (I used the one with the little circles on the bottom and the one with the flowers on the top.)  It wouldn’t have really mattered if I’d done the reverse.  I used the green print for the straps.  At the time I thought I’d bought more fabric than I’d needed, but in the end I was glad I’d bought as much as I did; three feet of fabric isn’t all that much for an apron, when you think about it, considering I wanted to make a full apron and not a half apron.

I cut the green print into wide-ish straps (three inches? maybe) and I cut the pocket out of the blue print and then cut the remainder into thinner strips for the edges of the apron.  The blue fabric is directional – it’s plants with leaves on a purple background – so I cut the strips to maintain the directionality of the print, even though I doubt it would be noticeable if I hadn’t.  I lined up each strip of the blue against the edge of the purple, right sides together, and sewed along the edge.  Then I flipped the blue over and folded it in on itself, hiding the rough edge, and pinned it against the back of the purple fabric.  Then I sewed that down.  I made one mistake when I was doing the edges, and that is that I sewed the initial seam in white.  It doesn’t show up on the front, only on the back, but it still bothers me.  I did everything that would show on the front in purple, and eventually realized that I should sew all of it in purple thread, and the thread blended in completely.  I didn’t take a picture of the mistake and I don’t think I’m describing it well, but it’s there.

I added blue strips to all four edges of the bottom apron piece.  On the top apron piece I only did the top edge and the sides, not the bottom edge.  I folded the bottom edge up and sewed it to the bottom apron piece, overlapping them so that the rough edge was hidden.  I believe I did that seam twice, once along the top of where they overlapped and once along the bottom of where they overlapped.  (I’ve also been sewing two seams where I attach the straps, just to give it a firmer hold.)

Here’s the finished product (and me modeling it).

I hope between this post and the post about N’s apron I’ve explained my apron process pretty clearly.  As I mentioned before, I don’t use a pattern, but sometimes I refer to an apron I made for myself a few years ago.  The neck strap is always too long, but that’s not a big issue.  (I should probably start making two neck straps that can be tied, rather than one long one.)   They’re practical gifts and easy to whip up.  They’re also easy to personalize and a great way to use novelty prints if you’ve got a bunch lying around.  C really liked her apron.  I hope she’ll get lots of use out of it!


Dress adjustment

I’ll take a quick break from quilting just to show you a quick modification I did on a dress this weekend.

I went to a wedding on Sunday and the dress code was black tie optional, which is a little bit fancier than my wardrobe.  I have some nice cocktail dresses, and I decided on this navy one:

The neckline was always a bit gaping – that’s just how the dress was designed – but I’ve lost a little weight since I bought the dress and now I fill the top out even less.  It wasn’t flattering or appropriate so I decided to just sew it up a little higher.  It actually doesn’t look so bad in the above picture, but it has a tendency to slip off my shoulders, among other issues.

I tried it on, pinned it, had my roommate check to make sure my pinning looked even, and then I sewed it closed with matching navy thread.  The stitches are almost invisible.  I did more stitching on the wrong side to secure it, and I managed to do that with all but one stitch not showing through the outside.  (The fabric is doubled in the bodice and I was being very careful to only catch the inside layer.)

Voila!  No more gaping.  It’s such a pretty dress, with what I think of as a Grecian draping-inspired design.  It’s also very comfortable, which is the reason I chose it in the first place.  It was a quick fix – it took me less than fifteen minutes.  I thought about taking in the arm holes as well, but I didn’t want to mess up the draping there so I left them alone.  They don’t show anything so it didn’t matter.

Much better, right?

Moose apron for my sister

I wanted to make an apron for my sister for her birthday.  I still have moose fabric floating around, so more moose for her! (To my chagrin, I couldn’t find all of it, which I’m sure means that it’ll all pop up in four months when I’m looking for something else I can’t find.)

I chose this moose fabric, plus these coordinates:

I have made a couple of aprons before, so I feel sufficiently confident that I don’t need to go from instructions.  In this case I went off of the apron I made myself a couple of years ago (https://habibihomemade.wordpress.com/2011/09/15/rozsamaria-apron-project-updated/) and I kind of eyeballed the measurements.  My sister is taller than me, but not so much taller that the measurements had to be drastically adjusted.

I spent a lot of time thinking about how to use the three fabrics to best effect, and I finally decided to use the moose fabric for the torso/bodice of the apron (what’s the word for that?), the metallic-y brown for the bottom half of the apron, and the trees for the border and straps.  I didn’t make a pocket this time.

I cut the tree fabric into strips. I was careful to match the directionality of the trees when I was sewing the strips to the rectangles of the top and bottom.

I folded over the edges and sewed them down.  I took the top part of the apron and folded it under the top edge of the bottom part of the apron and sewed that down.

I cut wider strips to make the waist ties and the neck strap.  I folded each strip in half, right sides together, and sewed along the long edges.  For the waist ties, I also sewed one end of each strap closed.

Here are the ties for the waist:

I took the open edges of the straps, folded them under, pinned them where I wanted, and sewed them down.  The neck strap is a little long, but I always err on the side of too long because I worry about getting it over your head.

Here’s the finished apron.  I think it came out so cute!  It matches the pot holders I made for N at Christmas (https://habibihomemade.wordpress.com/2013/12/21/pot-holders-part-vi/).

Blog tags

I want to make the blog more reader-friendly, and I realized that tags are a good way to do this.  I’ve gone through all of my posts and added tags based on various themes. I’ll tag this post with all of them so you can more easily find anything you’re interested in, and my goal is to be more conscientious about tagging in the future.

In the course of doing all my tags, I realized that I posted twice about the Storm at Sea runner I made my parents, once in 2011 and again last December during my Advent posts.  Perhaps if I’d had a better tagging system I would have remembered that I’d done it before!  It was fun to go back and look at the old posts – I’d forgotten what some of the blocks were called and I had to read the posts to see which quilt I was writing about.  Most of my pre-blog quilts are on here, although I know of at least four that aren’t.  Perhaps those will be fodder for Advent 2014!

The tags fall into several categories: block type, type of item if it’s not a quilt, language if I was quilting in something other than English, etc.   The blocks I have thus far are as follows:

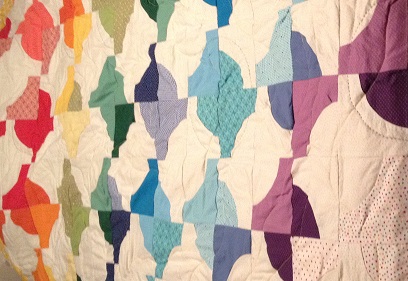
Drunkard’s Path – Storm at Sea – Hunter’s Star – Lone Star – hexagons – pinwheels – Steps to the Altar – Rail Fence -Windowpane – Log Cabin – “Elegance” fan block – Korean patchwork – Amish Square – Bow Tie block

If you happen to notice that I have the wrong name for a block or if there’s another name for it, please let me know!  In one case – the wedding quilt I made for my friend N last year – I’m not sure if there is a name for this kind of quilt.  (https://habibihomemade.wordpress.com/2013/07/16/wedding-quilt-for-n-and-a-part-i/)  If there is a name, please share it with me.

I made a tag for doll quilts, since I make so many of them, and if I used a particular block I tagged that as well.  I may have missed some, so leave a comment if you notice that a block went untagged.

Tags for non-quilts include, in no particular order: pot holders; kitchen/household; holiday; decor; pillows; napkins; clothing; ornaments; aprons.

I’d forgotten how many pillows I’d made, for example.  Kitchen/household covers pot holders, napkins, and aprons; aprons fall under clothing, too.  Decor includes pillows, runners, and wall hangings, but runners and wall hangings don’t have separate tags.  Holiday includes ornaments and stockings, the latter of which also don’t have a separate tag.  If you think it would be helpful for me to make a runners tag or a wall hangings tag or a stockings tag, let me know.  If you see anything I haven’t tagged that you think I should – a quilting design or a specific stitch or whatever – just leave me a comment.

Hopefully this way my blog will be much easier to navigate.  I like to read other quilters’ blogs and I’ve learned not just from what other people are making but from how they’re blogging about it.  Tagging struck me as a relatively easy way to be more accessible.  This is for you, so feel free to give me your input.  If you want a “wedding” tag or a “birthday” tag or some other category that you think would be useful, I want to know about it.

Enjoy!

Quilted shawl for my grandmother

For my grandmother’s birthday I decided to make her a quilted shawl.  She’s frequently cold and I knew she’d like something she could just drape over her shoulders.  My mother’s family is Hungarian and a while ago I bought a set of “Hungarian print” fabrics.   (They’re inspired by traditional blue-on-white Hungarian prints.)  I decided to use them for her shawl.  I supplemented them with other prints in coordinating shades of blue.

I cut the fabrics into six-inch squares and set them on point.  I cut some of the squares in half to make a few triangles, where the design required.

I sewed the squares and triangles into strips running along the diagonal.  Then I sewed the strips together to form the top and I added a border around the edge.  I used blue fleece for the back, to make it nice and warm.  For the quilting I just did straight lines running parallel to the strips I’d sewn, using blue thread.  You can see the quilting in the picture below.  I wanted something quick and simple.  It adds some texture, too.  The whole project was completed in less than a day.

Sadly, I don’t have any creative pictures of her modeling the shawl like I do with my brother hooding himself with his quilt.  You’ll have to take my word for the fact that it looks lovely on her, and she was delighted with it.

Costume Party: Dolly Levi

Recently the habibis had a reunion!  Said reunion included a costume murder mystery party.  After much deliberation, I chose Dolly Levi of “Hello Dolly!” as my costume.  I was going for the dress Barbra Streisand wore in the Harmonia Gardens scene of the movie, i.e. this fabulousness:

I want that dress.  I want to wear it to the grocery store and church and work and the subway and everywhere.  I grew up watching “Hello Dolly.”  It’s my favorite musical.  I want to be her.

I wanted a dress with that silhouette, but no maxi dress would’ve looked right.  I searched online and then I decided to alter one of my dresses instead.  I decided to pick a cocktail dress with the right silhouette and add fabric to recreate the skirt/train.  The original plan was to use this dress:

(Apologies for the weird cropping but I couldn’t find any other pictures of me in it on short notice.)

The dress is champagne-colored under black lace.  However, I realized that the dress was at my parents’ house and I wouldn’t have time to get it prior to our habibi reunion.  Instead, I went with this dress (I didn’t take a before picture so I decided to badly crop a picture after I’d added the lace):

The dress is an icy blue color.  I ordered two yards of silver lace and two yards of pale blue, since I wasn’t sure what would match better.  The silver matches nicely.  I doubled the lace and sewed it around the hem, leaving a bit of a train at the back.

It involved a little tweaking.  I doubled the lace again in the front so it was short enough to walk.  In the back I sewed one of the loose ends to the hem, too.  It’s not a bustle but it worked.  I had originally planned to take the skirt in around the knees to more closely imitate Barbra’s dress, but I ran out of time.

I could not afford/justify the expense of a giant feathered headdress, so I bought a modest pink feather fascinator.  I’d ordered a feather boa but it was real feathers, which grossed me out.  (The phrase “sanitized turkey feathers” does not describe something I want to touch my skin.)  Happily, Anlichan lent me a scarf her sister had knitted her that resembled a boa.

I bought elbow length gloves and I wore the dress with pearls.  I wore my hair in some kind of spiky bun thing.  I wore icy blue eye shadow and blue eyeliner, which did not look garish.  (Granted, as a Jersey girl, blue eyeliner is one of my favorite things and my definition of garish may be different than other people’s, but I think the habibis will back me up that my makeup looks pretty.)  Overall, success.

The question remains what to do with the dress now.  Although I love it as a costume, I actually don’t love the dress on its own.  I don’t think the bodice fits me properly – it’s a bit too loose.  I rarely/never need a costume, so I’ll likely remove the lace and give away the dress.

Barbra sets the bar high, and the habibis reminded me that her Harmonia Gardens was one of the most expensive movie costumes ever.  I didn’t feel quite as fabulous as her in my homemade costume, but I felt pretty fabulous.  It was the perfect costume for the event.


Fixing skirts

I have an annoying problem that is probably annoying for other people to hear about, which is that I have lost several pounds over the last several years and now some of my clothes are too loose.  It bothers me because I feel like it looks unprofessional, but I don’t want to spend a lot of money to have everything taken in, and I don’t necessarily have the skill to take things in myself.  I have been meaning to start going through my wardrobe for some time now, and finally one day I decided to start small, with a couple of skirts that would be easy to do.

The skirts are identical, but different colors.  They were sitting lower on my hips than they should have, which meant they felt below my knees (and made me look stumpy!).  Also, again, I don’t like my clothes to be loose in the waist or chest.

before shot – note how low the skirt sits

there’s a ton of room in the waist

The skirts are pleated and lined.  They have side zippers, so I took them in on the opposite side.  With one skirt, I pinned everything from the inside and just sewed, so the pleats don’t match up perfectly.  With the other skirt, I took in the lining and then took in the top, matching up the pleats.  That’s the blue skirt – I had blue thread that matched and I could sew the pleats on the outside of the skirt.  I apparently don’t own taupe thread, so the taupe skirt had to be sewn on the wrong side only, making matching up the pleats a complicated endeavor and one I kind of failed at.  (Also, I did the taupe one first so that was more trial and error.)  Since no one at work looks that closely at my clothing, no one will notice.  I will say that the taupe one is a bit more fitted than the blue skirt, although the blue skirt looks better.  Below see blurry photos of the process and results:

The pleats have been pinned.

This shot sort of shows how much I took in.

You can see how messy the seam is at the top, where it’s all bunched.

Success! It’s messy, but the skirt now sits just below my navel.

This shows how much of the blue I took in – also, I think you can see that it’s neater than the taupe.

Final shot of the finished blue skirt

I didn’t cut out the extra fabric because that seemed unnecessary.  The skirts are pretty full so it’s not like they’re bunchy.  I think I’ve worn at least one of them since then.  I’ll wear them more in the fall.

rozsamaria: apron project – UPDATED

UPDATED – now with photos.  I should still apologize for the quality of the pictures, which I took with my phone.

First off, I’d like to apologize for the lack of visuals accompanying this post.  I have misplaced my camera cord.  As soon as I find it, I promise to update the post with explanatory pictures, and in the meantime I hope the instructions are clear enough without them.

As anlichan’s birthday present is still in production, this post will be about a previously-completed project of mine, an apron I made for myself.  Papa S’s mother gave me a plastic apron when I moved into my first apartment, but that was a few years ago and it’s ripping.  I wanted to make myself an apron, and I had lots of cute bright fabrics in my stash.  I picked two cherry prints and, to mix it up, a kiwi print.

I made a reversible apron for Mama S in a sewing class in middle school, so I’d done this before, albeit many years ago.  Reversible is more of a pain to make, but it’s cute and I don’t like when the seams show on the back.  I didn’t bother to use a pattern because I’m lazy.  I just had a vague idea of how large it should be on me and I used a measuring tape to measure myself several times.  I cut out the two bodice pieces and sewed each one to a larger bottom piece.  I cut strips to serve as the waist ties and neck strap.  I folded each strip in half so that the wrong side of the fabric was on the outside, sewed it lengthwise, and turned it right side out, then ironed it flat.  I then had three flat tubes of fabric.  For each of the waist ties, I took one open end and folded the fabric in on itself so none of the rough edges were showing, and then sewed straight across that short edge to close it.

Prior to assembling the whole apron, I made myself pockets.  One is small and mostly decorative.  The other one is larger and I plan to actually use it.  I folded down the top side of each pocket to hide the rough edges and sewed it down.  Then, I folded and ironed the other three sides, pinned each pocket where I wanted it, and sewed it down.  The ironing isn’t necessary but it helps the edges stay in place better prior to sewing.  (Note: I attached the pockets to their respective apron sides prior to putting the two sides of the apron together.)

The final assembly:  I put the two apron halves together, with the right sides of the fabric inward, and pinned them together.  I pinned the neck strap and waist ties in place so that the straps themselves were inside the apron halves (between the right sides of the fabric) and the rough edges at the ends were sticking out, if that makes sense.  I sewed all the way around the pinned edge, leaving a gap at the bottom large enough for me to turn the apron right side out.

When the edges were all sewn, I turned the apron right side out and hand-sewed the hole at the bottom.  Voila!  An adorable apron.

The proportions aren’t perfect – the torso is a bit too long, as is the neck strap – but that’s my own fault for not measuring more carefully.  I’ll have to remember for next time to think about where the straps will hit me.  Of course, it wouldn’t be one of my projects if I didn’t measure something incorrectly.   Anyway, it looks cute and it has served me well so far, and that’s what matters.

End of the waist strap, with the fabric folded in on itself and sewn down
Large (useful) pocket

Smaller (decorative) pocket

Side of the apron with kiwi/cherry prints

Side of the apron with cherry/cherry print

rozsamaria: apron project (sadly, photo-less)

First off, I’d like to apologize for the lack of visuals accompanying this post.  I have misplaced my camera cord.  As soon as I find it, I promise to update the post with explanatory pictures, and in the meantime I hope the instructions are clear enough without them.

As anlichan’s birthday present is still in production, this post will be about a previously-completed project of mine, an apron I made for myself.  Papa S’s mother gave me a plastic apron when I moved into my first apartment, but that was a few years ago and it’s ripping.  I wanted to make myself an apron, and I had lots of cute bright fabrics in my stash.  I picked two cherry prints and, to mix it up, a kiwi print.

I made a reversible apron for Mama S in a sewing class in middle school, so I’d done this before, albeit many years ago.  Reversible is more of a pain to make, but it’s cute and I don’t like when the seams show on the back.  I didn’t bother to use a pattern because I’m lazy.  I just had a vague idea of how large it should be on me and I used a measuring tape to measure myself several times.  I cut out the two bodice pieces and sewed each one to a larger bottom piece.  I cut strips to serve as the waist ties and neck strap.  I folded each strip in half so that the wrong side of the fabric was on the outside, sewed it lengthwise, and turned it right side out, then ironed it flat.  I then had three flat tubes of fabric.  For each of the waist ties, I took one open end and folded the fabric in on itself so none of the rough edges were showing, and then sewed straight across that short edge to close it.

Prior to assembling the whole apron, I made myself pockets.  One is small and mostly decorative.  The other one is larger and I plan to actually use it.  I folded down the top side of each pocket to hide the rough edges and sewed it down.  Then, I folded and ironed the other three sides, pinned each pocket where I wanted it, and sewed it down.  The ironing isn’t necessary but it helps the edges stay in place better prior to sewing.  (Note: I attached the pockets to their respective apron sides prior to putting the two sides of the apron together.)

The final assembly:  I put the two apron halves together, with the right sides of the fabric inward, and pinned them together.  I pinned the neck strap and waist ties in place so that the straps themselves were inside the apron halves (between the right sides of the fabric) and the rough edges at the ends were sticking out, if that makes sense.  I sewed all the way around the pinned edge, leaving a gap at the bottom large enough for me to turn the apron right side out.

When the edges were all sewn, I turned the apron right side out and hand-sewed the hole at the bottom.  Voila!  An adorable apron.

The proportions aren’t perfect – the torso is a bit too long, as is the neck strap – but that’s my own fault for not measuring more carefully.  I’ll have to remember for next time to think about where the straps will hit me.  Of course, it wouldn’t be one of my projects if I didn’t measure something incorrectly.   Anyway, it looks cute and it has served me well so far, and that’s what matters.  (Since this post is currently picture-less, you’ll have to take my word for its cuteness.)  Once again, apologies for the lack of photos – they’ll be added as soon as I straighten up my apartment and locate my camera cord.