Quilt for me! – Part III

I’ve started pinning and sewing the curved parts of my blocks.  It takes so much longer to pin and sew the curved pieces than a straight edge would take.  If I did my math properly, I need to make 192 blocks.  So far I’ve got forty-something blocks pinned and sewn, so it’s slow progress.

As I noted in my last post, I hadn’t used both templates for the Drunkard’s Path pattern, only the one template.  I noticed that the templates don’t fit each other exactly and I wondered how it would work out when I hadn’t used both templates.  When I pin my pieces together, I end up with a little bit extra on both sides:

IMG_1115

So I guess my blocks will end up smaller than I’d expected, but that’s not the end of the world.

As you may observe, I pinned these a LOT.  I realized after several tries that 9 is approximately the right number of pins.

Here’s my completed pile so far:

IMG_1118

Here’s what I have left (not counting the blocks with the white centers and the assorted colors on the outside – I’m working my way through the blocks with the colored centers first):

IMG_1121

At this rate, it’s going to take me a long time to get through all 192 blocks.
Quilt for me! – Part II

Progress on my quilt!  I have now cut all of the squares, and I cut them into the curved pieces I’ll use for the Drunkard’s Path blocks.

I bought a Drunkard’s Path template online.  It came with four-inch, five-inch, and six-inch templates.  The instructions said to cut the fabric an inch larger than the templates, but since I had already cut my squares I just used the six-inch template.  I was surprised to see that the templates didn’t fit together perfectly:

IMG_1104

So maybe cutting with these templates would provide better blocks than what I’m going to end up with, but that doesn’t bother me.  The quilt is for me, anyway.  I just took the smaller piece and cut along the curve with my rotary cutter.

IMG_1102

Here are all my cut squares:

IMG_1107 IMG_1106

Next up I need to start sewing the pieces together.  I’ll sew each colored polka dot piece to one of the white polka dot pieces (with the pale lavender dots, although I’m not sure that’s visible in the picture).  That should make 96 blocks, hopefully.  (I can’t rule out the possibility of counting wrong.)  That’ll be the next step!

Stockings for charity

My quilt guild makes stockings for charity at Christmas.  They provide the fabric and a pattern.  Putting the stockings together was a breeze!

First, I traced the pattern.

IMG_0964

The guild had samples with ribbon trim on them, and I didn’t want to make subpar stockings.  So, having cut out the stocking pieces, I then pinned ribbon to them.  The ribbon pinning was actually the hardest part.

IMG_0977 IMG_0978

I also folded the top edge under twice to hide the raw edges, and pinned.

IMG_0979

Then I sewed the top edges and the ribbons down.

I made little hooks by sewing a long thin piece of fabric lengthwise to make a tube and turning the tube inside out.  I used a safety pin to turn it inside out.

IMG_0974 IMG_0975 IMG_0976

I pinned the matching sides of each stocking together with a hook.

IMG_0980

I sewed around the edges and then turned the stocking inside out.

IMG_0984

I was able to make several stockings with the fabric the guild had provided me.  I ended up with enough large scraps to make one more stocking.  I sewed all the large scraps together to make pieces of fabric large enough for the patterns.

IMG_1002 IMG_1005

I cut the stocking pieces and did the same thing I had done with the other stockings.

IMG_1008

It was fun and easy to put the stockings together.  Such a breeze.

Dog pillows

So, I made dog pillows.  They are pillows.  For dogs.  I made them for a local shelter.  I do not have good pictures of them because, probably, soon after I made them I packed up all of my fabric and moved and I forgot to take pictures of them.  So you only get to see in-progress photos.  Also, I made three, but I only have pictures for two.  Sorry!  (The third one was super weirdly shaped and lumpy and probably only the tiniest of dogs could actually sit on it, anyway, so you aren’t missing anything.)

I was replacing my bedroom pillows, so I decided to use them for a good purpose rather than throwing them away.  I cut fabric into strips and sewed the strips together to make pillowcases of sorts.  I made the “pillowcases” longer than the pillows so that I could then sew up the open fourth side with the pillow inside.

The third pillow is made out of sweatshirt scraps and stuffed with scraps of batting and other random pieces.  It came out really weirdly shaped.  There are no pictures, and that’s probably for the best.

My parents have a neighbor who works at an animal shelter, and she said they also need pillows for large dogs, so I may be making a large pillow at some point.

Quilt for me! – Part I

I am making myself a comforter.  I have wanted to make myself a comforter for months, if not a year.  The comforter I currently use is a decade old, and I want something that my parents didn’t buy me when I want to college.

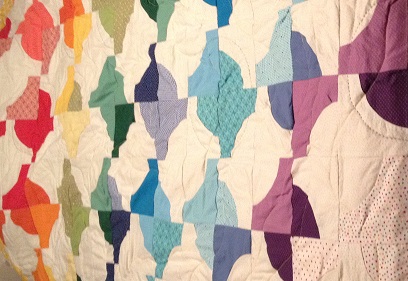
My love of polka dots has, I believe, been documented on this blog.  If it has not, then let me state it here, unequivocally: I LOVE POLKA DOTS.  I love anything with polka dots.  The amount of polka dot clothing I own is far above average.  The amount of polka dot fabric I have bought is, likewise, extensive.  I decided I wanted to make myself a comforter with polka dots.  (Again, I made this decision months ago; I’m only just getting to it now.  In my defense, I made four quilts this year and I moved.)  I also wanted to practice my curved piecing, because I figured if I practiced on something for myself I could make mistakes and improve before I used curved piecing on presents.  I chose the Drunkard’s Path pattern for that very reason.  Probably a Drunkard’s Path quilt made all of polka dots will make other people feel drunk when they look at it but I don’t care.

I have bought polka dot fabrics purposely for this quilt, specifically a white print with tiny lavender dots and a yellow print with large white dots.  (Actually, I think I already had the yellow, now that I think about it.)  The yellow will be the backing.  The white print will be the base for my Drunkard’s Path patches, and the other half of each patch will be some polka dot print.

IMG_0963

I’m not sure you can tell from this picture that the polka dots are lavender.  I’m not completely sure my camera is 100% true to color.

I have so many polka dot prints to choose from that I won’t even be using all of them in this quilt.  I’m not joking; I cut out 96 6″ squares from 24 different fabrics, and a couple of days later I found more polka dot fabrics I hadn’t touched.

Here are all the fabrics:

IMG_0991 IMG_0990 IMG_0989 IMG_0988 IMG_0987 IMG_0986 IMG_0985

The plan is to cut each square on a curve, like below:

drunkard's path

I am planning to just use a plate to trace the curve, but I haven’t tried it yet.

I will cut 96 6″ squares from the white print with the lavender dots and also cut them along the same curve, then mix and match.

Updates will come in the future!