Octopus Baby Quilt – Part IV

Hi habibis!  Welcome to part IV of my octopus baby quilt posts, the last post, covering the quilting.

I put a lot of thought into the quilting.  I wanted to evoke a lot of motion.

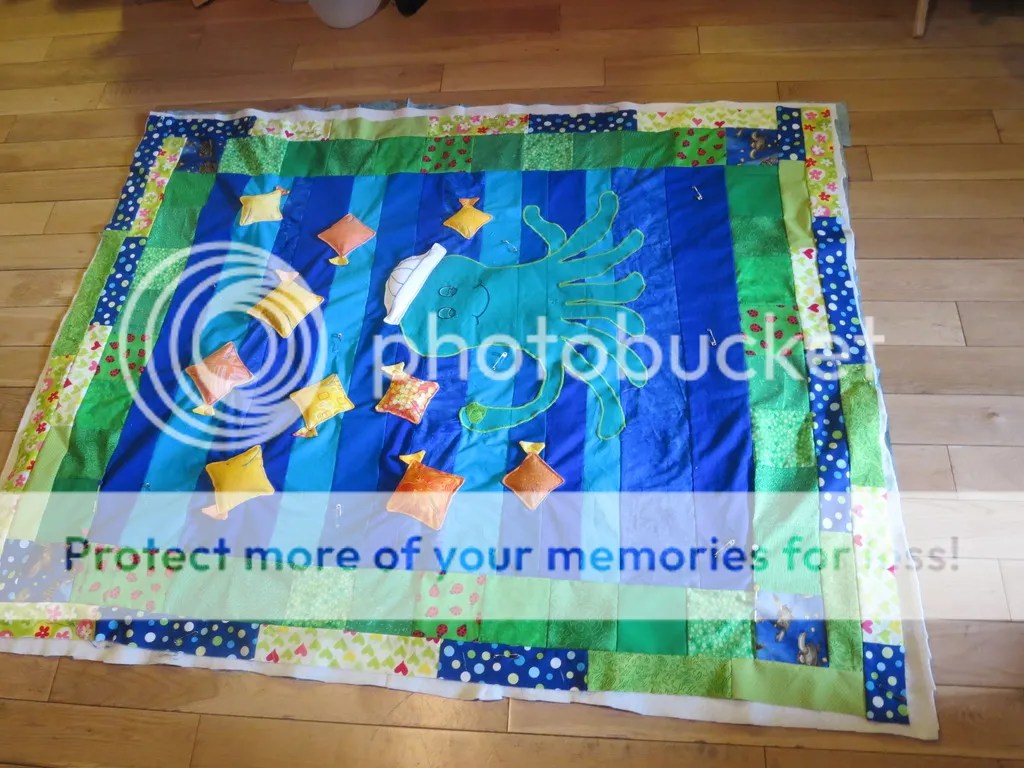
I started with the fish.  I quilted a couple of little wavy lines in blue behind each fish’s tail to make it look like the fish was swimming and creating a tiny wake behind itself.

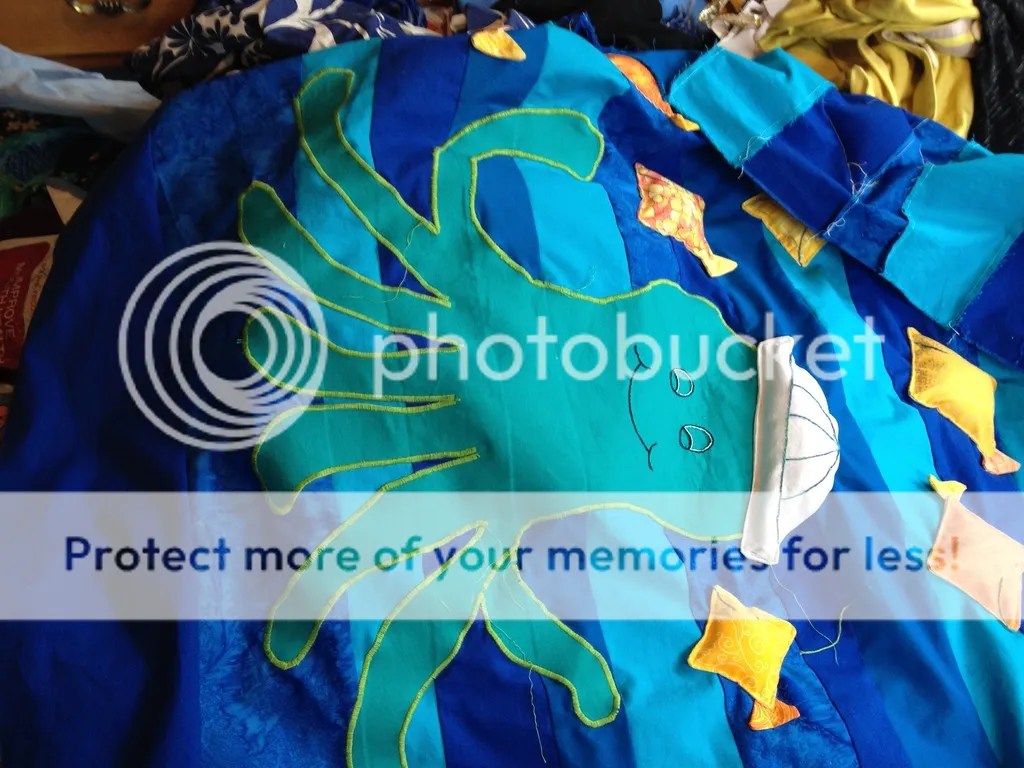
Then the octopus: I quilted three curved lines around the end of each tentacle, again to try to evoke movement.  For the tentacle that’s raised – it’s supposed to be waving hello – I quilted lines to the left and right of the tentacle.  The thread is a dark greenish blue.

I quilted waving lines across the quilt in lighter and darker blue, to mimic the movement of water.  I extended the lines into the borders on the sides and the border at the top.  I varied the thread colors based on the shades of fabric I was covering – the darker thread on the darker fabric and the lighter thread on the lighter fabrics.

Finally, I quilted seaweed at the bottom of the quilt in green thread.  The seaweed also grows out of the bottom of the border up into the empty space around the octopus.  I was pleased with how that turned out.

For the hand quilting, I did the baby’s initials in a blank space.

I was concerned that the area around the octopus wouldn’t hold together enough, so I quilted all the way around the outline, which will hopefully help.  It’s a lot of space to not be quilted, especially in a baby quilt, and I make my quilts to be used.  I hope it’ll hold together.

The binding is scrappy, in yellow, orange, and green.  The yellow and orange echo the fish and are significant colors – meaningful for the baby’s mother and me.  The green, as I think I mentioned before, is the mother’s favorite color.


Octopus Baby Quilt – Part III

Happy May, habibis!  The weather has finally gotten so nice, so lovely here.

Today I want to show you the borders I put on the octopus baby quilt and the pieced back.  I apologize for the lack of pictures – I could have sworn I took more!

I started with green squares, all in similar values of green, with 4 squares of green turtles on a blue background for the corners.   Then I cut 3″ (2.5″? now I can’t remember) strips of bright green prints with a blue with green polka dots mixed in.  I used those strips to make a narrower border, and then I added an extra row of strips across the top and bottom.  It looks cool, right?

I realized that the quilt warped somewhat when I stuffed the fish and octopus.  I didn’t try to square it up before I added the borders.  When I tried to add the borders, I realized that it wasn’t a perfect rectangle.  My attempts to mitigate that failed.  (Confession: The quilt remains 3″ longer on one side than the other, even now after it’s finished.  Oh well – it still looks cute!)

I pieced the back of the quilt.  I used leftover forest green fabric from the backing from my brother R’s wedding quilt, mixed in with a lighter green flannel.  The flannel print shows old fashioned ships over maps with little pirate flags.

I made a scrappy binding but I can’t find pictures.  Maybe it’ll show up in my pictures of the quilting – check back in tomorrow to see them!


Octopus Baby Quilt – Part II

Hi habibis!  Welcome to part II of the octopus baby quilt I made: applique.

I traced a piece of white fabric in my best approximation of a sailor hat.  I sewed it, right sides together, to a scrap of muslim or some kind of light fabric.  Then I cut a slit in the muslin and turned it inside out so I’d have finished edges.  I embroidered the lines in a variegated blue thread.  Then I machine appliqued it using white thread.

When I got close to finishing the applique I stuffed batting in and then sewed it closed.  I hadn’t done this before – I made it up as I went along – and I’m sure there are better methods of doing this, but it worked.

Next I moved on to the fish.  I used all yellow and orange fabric scraps.  I cut them into various sizes of squares.  I sewed them to more little scraps of muslin, same as with the hat, and used the same method to turn them right side out and get the finished edges.

I embroidered little eyes and smiling mouths using the variegated blue thread.

I made little tails out of scraps of yellow and orange fabric.  I folded small squares or triangle scraps, right sides together, to make a smaller triangle and sewed around the edges, leaving one side open to turn them inside out.

I sewed the open sides of the tails closed.  Then, once I decided the layout of the fish, I pinned the tails appropriately, matching yellow to yellow and orange to orange.  Using coordinating thread, I sewed down the center of each tail, so the side points aren’t attached to the quilt.

Next I appliqued the fish.  I sewed three quarters of the way around each fish, attaching it to the quilt stop.  I stuffed batting into the opening, and finally I sewed the fourth side closed.  (Again, using coordinating thread – yellow for yellow and orange for orange – because I wanted the thread to blend in, not to highlight the applique method.)

Lastly, I covered the rough edges of the octopus in a zigzag with lime green thread.  I think I’m getting better at the zigzag/satin stitch on my machine – look, I’m even using the right foot!  (Boy, does that make a difference.)  I started doing a satin stitch by hand, but it took way too long, so I went back and did the zigzag all the way around, covering my initial stitches.  (I’d done the left side of the head and part of a tentacle, and that was it.)  I hand stitched the one line below to delineate between two different tentacles, one behind the other.

The center of the quilt with all the applique finished:

Tomorrow I’m going to post about my incoming/outgoing totals for the month of April, and next week I’ll post more about this quilt.

Octopus Baby Quilt – Part I

I’ve been working on this quilt since January!  Now I can finally share it with you.  In this post, I’ll share the design  of the quilt and the applique I did.

I’ve known for a long time that I wanted to make an octopus quilt for this baby.  When Sew Fresh Fabrics was closing and having its big sale, I bought a ton of blue Kona solids and some green for this quilt.  I used Kona’s Jade Green for the octopus.  The blues for the ocean background are various shades of Kona solids and one batik-y blue that I had in my stash.  I envisioned the ocean background being more improv pieced and wonkier, but I guess (being relatively new to that) I manage that better working with scraps than when cutting from yardage.  I wish now that I had cut much small pieces to do the improv piecing, but instead I cut long strips.  Some of them are angled but not enough to really look intentional.  Oh well!  It still looks pretty cool, right?

The octopus is appliqued using fusible applique.  I traced the octopus shape I wanted on the my fabric, then cut it out and laid it onto the applique paper and cut it out again.  I know that’s not what you’re supposed to do, but the octopus was larger than one sheet of paper.  It worked out alright, except some of the edges weren’t covered 100%.

Before I appliqued the octopus, I traced the eyes and then embroidered them.  It’s just the outlines.  I’d considered filling the outlines in but I decided I liked how it looked.  I embroidered a smiling mouth, too.

Next week I’ll share more about the applique!