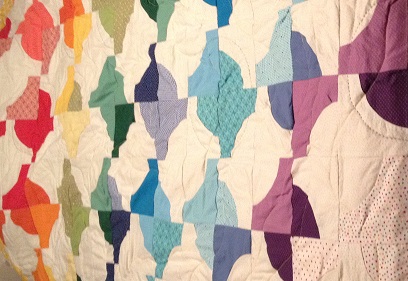
Stash Bee January Blocks

Hi habibis!  We’re having a double post today because, honestly, if I don’t start doubling up I’ll be posting about Christmas presents – and only Christmas presents – until the end of February.

I had a great weekend, with lots of sewing.  I made some dog pillows, went to my guild meeting with my mom, and finished up my Stash Bee January blocks. #stashbee

Heather of A Reformed Heath’n is our queen for the month and she asked for scrappy Hunter’s Star blocks.  (See her post here.)  Heather wanted a four-patch blocks made of four Hunter’s Star blocks.  She asked us to think about contrast when it came to pairing our fabrics.  I made two blocks  because I had fun picking out the fabrics!  I focused a lot on contrast (but worried that I didn’t get enough variation between light and dark in a couple of my pairings – some of my prints are similar saturations of very contrasting colors).

I messed up a teeny bit when it came to pressing my seams (I pressed a few open that should have been pressed to one side), and I am not great at pressing my seams open.  I tried really hard to keep my points precise and sew extra carefully, since the blocks are for someone else.

Here are my two blocks!  They went in the mail yesterday.  I hope Heather likes them!

Heather asked us what our favorite home-cooked meal is, and I guess my answer is that it depends who is doing the cooking!  When I’m cooking, I like to make stuffed shells in a red wine sauce with a nice goat cheese arugula salad for Z and myself, or a macaroni and cheese casserole.  I love Hungarian food but it’s a lot of work to make, so that’s something I prefer when someone else is doing the home cooking.  🙂

Hunter’s Star Quilt – Part VII

I finally finished the Hunter’s Star quilt for my coworker M!  I gave it to him last Friday at work.  I was so excited to be done with it and to gift it, finally.

I finished the hand quilting – star after star.

Then came the binding.  I took navy thread and sewed it down with a running stitch.  I don’t know if that’s the stitch you’re supposed to use to sew down the binding but it was the easiest for me.

I realized that I made a mistake when I sewed the binding on – I don’t know how I managed it!  Look at the seam – it’s showing on the outside.

I debated whether to fix it and I finally ripped it all out, but then I panicked and thought I wouldn’t be able to put it back together properly.  I was so proud of myself when I fixed it!


Here’s the best picture I took of the back:

Here’s the front of the finished quilt:

I LOVE it.  I think it’s so gorgeous and the quilting looks great from a distance.  Z also likes how it came out, and M was very happy with it.

Hunter’s Star Quilt – Part VI

Today we’ll talk about the hand quilting I’m doing on the Hunter’s Star Quilt I’m making for my coworker M.

You saw some of my planned design in the pictures I posted last week.  I wanted to highlight the stars.  I traced lines half an inch around the border of each star and half an inch within each star.

The quilting is going very slowly.  I am not a speedy hand quilter.  I can do a whole star (inner and outer quilting) in about an hour and 45 minutes if I’m solely focused on quilting, and not checking email or surfing the internet or watching a TV show.  I’ve been working on it in the evenings after work, when I have time, and over the weekend – when I have time.  My goal is to be done with the quilt by the end of the month but I don’t think that’s enough time.

I am also planning to hand-sew my binding.  This is the first time I’ve done that on a quilt.  I’m using a navy binding, which I put on at the quilt retreat I went to.  I’m planning to hand sew it down to the back.  I have previously only bound pot holders (which I don’t think I’ve ever posted about…that’ll be a future post) and I did my charity quilt all by machine.  I’m a little nervous about how long that will take me, too.

Hunter’s Star Quilt – Part V

The Hunter’s Star quilt is back!  I neglected it while I worked on my charity quilt, but I have managed to make considerable progress anyway.  I did the machine quilting a month or so ago, and I’ve been slowly working on the hand quilting.  My goal is to be done by the end of the month but I think that’s overly ambitious.  I’ll do my best!

It’s been so long since we talked about it that I’ll link to my old posts.  (I looked back and I posted my teaser on it six weeks ago!  Sometimes I debate about which projects to post, especially right now when I’ve been working on two different quilts and other small things.  I decided to post continuously on the charity quilt for a while.)

https://habibihomemade.wordpress.com/2014/03/18/hunters-star-quilt-part-i/

https://habibihomemade.wordpress.com/2014/03/25/hunters-star-quilt-part-ii/

https://habibihomemade.wordpress.com/2014/04/01/hunters-star-quilt-part-iii/

https://habibihomemade.wordpress.com/2014/04/22/hunters-star-quilt-part-iv/

Today we’re going to talk about the machine quilting.  I spent a lot of time trying to decide how I wanted to quilt it, because I didn’t want to distract from the cleanness of the pattern and the two-color scheme.  It’s so rare for me to make a quilt like this – normally my quilts are scrappy patterned quilts and I don’t worry about distracting from anything.  I’d originally thought I might quilt only in white on the white parts and navy on the navy parts, but eventually I rejected that because what a pain would that be?!  I finally decided to quilt straight lines horizontally across the quilt, in white thread.  (I had been reading http://www.ohfransson.com/oh_fransson, I think, and she had mentioned that she thinks a light thread distracts less than a dark thread on quilts with varying shades, so I thought I’d try that, since I wanted to distract as little as possible from the pattern.)  I didn’t want to machine quilt over the stars, though – I decided to highlight those with hand quilting, as you’ll see in next week’s post.  (That’s the reason this is taking me so long.  I’m a slow hand quilter.)

On http://www.ohfransson.com/oh_fransson she had recommended quilting your quilt in sections or quarters, and that’s what I did with this one.  It worked out pretty well.  I would mark and pin only one quarter of the quilt and then quilt it from the center toward the outside edge.  It’s not completely flat but it worked nicely.

I traced the lines approximately an inch a part, so three lines in each row of squares.  Here’s the lines traces:

I was having a lot of trouble with quilting on my machine, more than I’d ever had before.  My machine doesn’t really have a walking foot and I started to fret that it really isn’t suited for quilting so many layers.  I was having to basically pull the quilt through the machine, resulting in very uneven stitches.  I don’t think M will notice or care, but I was feeling angsty about it.  Finally, after quilting the first three quarters, I went to sew something else – not quilting – and I still had the problem.  I decided to clean out the bobbin area and I realized that my feed dogs basically weren’t moving because they were so clogged with fuzz.  I cleaned out my bobbin area as best I could, and voila!  No more issues.  Quilting the final section went so much better.   I’ve had my machine for almost six years now and I probably need to take it in to the shop for a proper cleaning.

Here’s the quilt when I was in the process of quilting:

Next week: the hand quilting!

Hunter’s Star Quilt – teaser

I hope everyone had a great weekend!  Mine was lovely.  Unfortunately, I caught a bit of a cold, but since there seems to be something much worse going around, I’m grateful that I’m just tired and sniffly.  I was able to do a lot of work this weekend despite the cold, but I didn’t finish the machine quilting on my Hunter’s Star quilt.  I’ve decided to save the full post for when I’ve made more progress, but here’s a teaser:

Blog tags

I want to make the blog more reader-friendly, and I realized that tags are a good way to do this.  I’ve gone through all of my posts and added tags based on various themes. I’ll tag this post with all of them so you can more easily find anything you’re interested in, and my goal is to be more conscientious about tagging in the future.

In the course of doing all my tags, I realized that I posted twice about the Storm at Sea runner I made my parents, once in 2011 and again last December during my Advent posts.  Perhaps if I’d had a better tagging system I would have remembered that I’d done it before!  It was fun to go back and look at the old posts – I’d forgotten what some of the blocks were called and I had to read the posts to see which quilt I was writing about.  Most of my pre-blog quilts are on here, although I know of at least four that aren’t.  Perhaps those will be fodder for Advent 2014!

The tags fall into several categories: block type, type of item if it’s not a quilt, language if I was quilting in something other than English, etc.   The blocks I have thus far are as follows:

Drunkard’s Path – Storm at Sea – Hunter’s Star – Lone Star – hexagons – pinwheels – Steps to the Altar – Rail Fence -Windowpane – Log Cabin – “Elegance” fan block – Korean patchwork – Amish Square – Bow Tie block

If you happen to notice that I have the wrong name for a block or if there’s another name for it, please let me know!  In one case – the wedding quilt I made for my friend N last year – I’m not sure if there is a name for this kind of quilt.  (https://habibihomemade.wordpress.com/2013/07/16/wedding-quilt-for-n-and-a-part-i/)  If there is a name, please share it with me.

I made a tag for doll quilts, since I make so many of them, and if I used a particular block I tagged that as well.  I may have missed some, so leave a comment if you notice that a block went untagged.

Tags for non-quilts include, in no particular order: pot holders; kitchen/household; holiday; decor; pillows; napkins; clothing; ornaments; aprons.

I’d forgotten how many pillows I’d made, for example.  Kitchen/household covers pot holders, napkins, and aprons; aprons fall under clothing, too.  Decor includes pillows, runners, and wall hangings, but runners and wall hangings don’t have separate tags.  Holiday includes ornaments and stockings, the latter of which also don’t have a separate tag.  If you think it would be helpful for me to make a runners tag or a wall hangings tag or a stockings tag, let me know.  If you see anything I haven’t tagged that you think I should – a quilting design or a specific stitch or whatever – just leave me a comment.

Hopefully this way my blog will be much easier to navigate.  I like to read other quilters’ blogs and I’ve learned not just from what other people are making but from how they’re blogging about it.  Tagging struck me as a relatively easy way to be more accessible.  This is for you, so feel free to give me your input.  If you want a “wedding” tag or a “birthday” tag or some other category that you think would be useful, I want to know about it.

Enjoy!

Hunter’s Star Quilt – Part IV

Happy Easter and happy last day of Passover!  I’m so happy that it’s Easter.  I had a lovely weekend with my family.

Your Easter/Passover/random Tuesday in April present is another post on the Hunter’s Star quilt.

I decided to add a border to the quilt.  I had just enough fabric to make a narrow border in the blue or in the white, or both.  I decided on the blue, which I’m also going to use to bind the quilt.  (I know!  My first time binding a quilt!  I already went to the fabric store and bought another 3/4 of a yard of the navy to use as the binding.)  I cut 2.5″ strips and pieced them diagonally into one long, continuous strip because I decided it was easier to pin the long strip to one edge and cut it at the end, then pin to the next side, etc., as opposed to taking the strips and sewing them together and pre-cutting them into strips of the approximate necessary length.  I sewed the border around the edges.

I had decided on beige for the back, because M told me the colors he liked were blue/white and beige.   I gathered up my beige fabrics with subtle prints to make a pieced back, but as I started piecing it, I thought that it was going to come out to patchwork-y for the quilt.  It’s one thing for a patchwork-y back for a scrappy quilt, and most of my quilts are all full of crazy prints.  However, this quilt top is so beautiful with just the two solid fabrics.  The pattern is complex but the simplicity of the two solids appeals to me and I wanted to carry that over into the back. (That’s why the border is a simple solid border.)  I decided not to use the patchwork for the back. I kept piecing it and I’m going to save it for a charity quilt.  Instead, for the back I’m using a solid beige.  I don’t know where I got this wide beige fabric – did I buy it?  Did it come from my grandmother’s sewing things?  I have no memory of acquiring it – but it’s perfect for the back.  I cut approximately five feet of it, since my quilt top is around 55″.  That turned out to be really easy.  I probably should have just decided on that in the first place.

I cut the binding from the extra fabric I’d bought.  I cut six 3″ strips.  (I know that’s super wide, but it’ll be my first time binding a quilt and I wanted to have plenty of leeway.)  Then I sewed the six strips together, folded the long strip in half and ironed it.  I don’t seem to have taken a picture of it, though, so you’ll have to take my word for it!

I took a couple of days off last week and I spent Good Friday with my mom.  We went to the fabric store near my parents’ house – my mom is converted to quilting now! – and I quickly put M’s quilt together on the ping pong table.  It’s not too big and I safety pinned it, so it went pretty quickly.

I laid out the batting and then put the quilt top on top and rolled it up, but I didn’t take a picture.  Then I laid out the backing and unrolled the batting/top onto it and smoothed everything out.

I trimmed the edges and safety pinned them down.

I have been thinking a lot about how I should quilt it.  I had an idea and then I discarded it, and now I have a new idea.  I’ll be doing some machine quilting and some hand quilting.  I suspect I won’t be posting about it next week unless I get a ton of work done this weekend, but I have plenty of other things to share with you!


Hunter’s Star Quilt – Part III

Finally, I was ready for the actual piecing!

Each block has one blue square and one white square (the ones I’d set aside – what felt like weeks earlier) and eight half square triangles.  They have to be arranged in a specific layout – they reflect each other.  They look like arrow shafts to me (maybe that’s why it’s called a Hunter’s Star pattern, but probably not).  I found that even with a visual to reference I got mixed up with the layout, so I’d advise anyone trying it to check and double check your layout before you sew.  I only had to rip out a couple of small seams.

As I mentioned last week, I used this tutorial to put my Hunter’s Star quilt together: http://www.cascadequilts.com/2011/02/hunter-star-tutorial.html.  I found it to be really helpful.

I did the half square triangle subsections first. Toward the end, I figured out that it worked best if I laid them out in piles exactly as I was going to sew them, instead of picking two up and trying to match them the way I wanted.  If I laid them out in piles and counted as I did so, I could also guarantee that I was sewing the right number in the right layout.

Once I had all of my subsections sewn and ironed, I put them together with the solid squares.

I sewed the two halves together:

I completed 25 blocks and I had a ton of leftover pieces, including a lot of leftover half square triangles.  I measured my blocks and estimated that they would come out to about 8.5″ each once sewn together, which was also smaller than one I wanted.  I decided to make another 11 blocks so I’d have a six-by-six layout.  That last part went quickly.

I sewed my blocks into rows of six and then sewed the rows together.  I’d laid them out on my couch first to make sure I had them arranged properly.  I was careful not to let them get out of order.

It looks great, right?  J told me it’s her favorite of anything I’ve ever made.

I still have to figure out a border and piece a back for it.

Hunter’s Star Quilt – Part II

As I mentioned last week, I used this tutorial to put my Hunter’s Star quilt together: http://www.cascadequilts.com/2011/02/hunter-star-tutorial.html.  I found it to be really helpful.

I spent what felt like weeks and weeks (I think it was three weeks) cutting the pieces and sewing sections of the blocks.  I was planning to make 25 blocks in a five by five layout.  For that, I needed to cut 75 white squares and 75 blue squares, 150 squares total.  I believe, based on the weird surplus of pieces I ended up with later, that I doubled this and cut 150 of each color.

The instructions in the tutorial said to starch the fabrics before cutting them, but I misread that and cut my squares and then starched them.  I have never worked with starch before and I don’t like it.  I did my best to follow the instructions on the can but I may have done it wrong.  It made my iron sticky and I just didn’t like it.  I don’t plan to work with starch again if I can help it.

Here are a couple of pictures of ironing with starch.  Look at the all the residue on my iron!

The instructions said to take two out of every three squares, and set the third one aside.  I did that, and then I took my two-thirds pile and I stacked the squares in pairs: one blue and one white square each, wrong sides out.  I sewed around all four sides of each pair.  It feels weird to do that, instead of doing just one edge.

The next step was by far the most time consuming.  (Bear in mind, again, that I had done my math wrong and ended up with far more pieces than I should have, so I spent a lot more time doing this than anyone following the directions properly.)  I took my sewn-together squares and I cut them on the diagonal into four parts, using a ruler and my rotary cutter.  Then, I ironed them open, so I had small squares comprised of half square triangles. The squares were all approximately three inches square but not exactly so, and the instructions said to trim them all to 2 and 3/4″.  I thought this whole step (I guess it was really three steps) took forever.

Next week: the piecing!

Hunter’s Star Quilt – Part I

I’m moving away from doll quilts, possibly for some time, although I hope to keep making them with my scraps.  I have a couple of quilts I’m working on now – both works in progress, one more so than the other – that I’ll be blogging about for the next month or two.  First on the list is a hunter’s star quilt.

I went to a quilt show last year with my mother and my aunt and fell in love with a quilt in blue, white, and yellow.  It looked like it had little white and yellow stars at the centers of blue and white squares.  I’d never seen anything like it and I took a picture, thinking that one day I might be able to make something like that (after years and years of practice and improved quilting skills).

Fast forward to last month.  One of my coworkers, M, does carpentry as a hobby.  He says it relaxes him, much as my quilting does for me.  He made a table for another coworker and he was planning to make a big chest for a third coworker to use as a coffee table or something.  She’s moving at some point and he decided to wait until she moves to make it.  In the meantime, M decided to make me a chest, too, something I could store my quilts in.  How could I say no?  I told him I’d make him a quilt as a thank you.

I told Z about M’s offer.  Z is normally interested in my quilts because it’s my hobby, but he doesn’t get excited about them.  He admires them and he really likes the quilt I made him, but it’s a passive kind of thing.  He’s not involved.  However, he got very excited about the quilt for M.  Z knows that M looks out for me at work. (M and I joke that he’s my mentor, but it’s actually pretty true.)  Z is a little protective of me and he appreciates people who look out for me, plus he really respects M.  Z never ever makes design suggestions but suddenly he was throwing out ideas.  Since he was so interested, I let him help me pick the design.  I asked M what colors he likes and he said “blue and white, or beige.”  Blue and white has a more visual impact and I was thinking of doing one of the quilts in my lone star quilt book – I thought a big star quilt in blue and white would look great.  Z didn’t love the patterns, though.  I finally showed him the picture of the quilt I’d seen at the quilt show and he loved it.

After some internet research, I figured out that it was called a Hunter’s Star pattern.  I also figured out that it was much more complicated than one of the lone star patterns.  (Moral of the story: Let a non-quilter choose your quilt pattern at your own risk!)  I had leftover white fabric from R and M’s engagement quilt (white on white with a star print) and I went to my local quilt store to buy navy fabric.  (It was $15 a yard!  I’m never going there again.  From now on, I shop online or buy when vendors come to my guild meeting.)  I found this tutorial from Cascade Quilts in my Googling, and I relied on it heavily: http://www.cascadequilts.com/2011/02/hunter-star-tutorial.html.

Hunter’s Star quilts are much more complicated than what I’m used to.  M finished the chest before I’d even finished cutting all of my fabric.  Look how gorgeous it is:

M put cedar inside, so everything smells lovely.

I don’t have any quilts to put in the chest, so instead I’m putting my linens in it.  I have a linen chest now!  How fancy is that?  (I live in a rather small city apartment – I’ve mentioned that before – and there is no linen closet.  Each bedroom has one tiny closet and the landlord built a small coat closet when we moved in.)  I filled the rest of the chest with all of the leftover batting pieces I had stored in the apartment.

I took the opportunity to reorganize my stuff a little bit once I filled the chest, and I’m making a lot of progress.  I wish I were more organized.  Thankfully J (my roommate) is very patient with my mess.  (She told me I’m better than I was in my old apartment, when I was living by myself, which is sadly true.)  I’m working on it!

This is such a long post already that I’m going to wait until next week to post about the quilt itself.  It is decidedly still in progress.  It felt like it took forever just to get all the pieces together, although in my defense I was working on a second quilt at the same time (and not in my defense, I definitely made a mathematical mistake – it wouldn’t be a rozsamaria quilt without a math issue, right?).

Next week (and probably the week after – and maybe the week after that, since I’m going to piece the back) will cover the piecing.  I won’t be able to assemble the quilt until Easter, because I need to do it at my parents’ house, so after I’ve finished blogging about the piecing I’ll switch and blog about the quilt I’m making for myself.