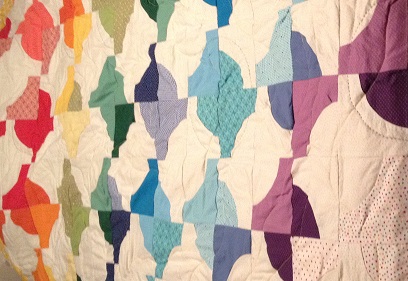
Medallion baby quilt for P and J’s baby – Part I

Hi habibis!  The month of May has been quite busy so far and I never got around to my second post last week, nor will I be participating in the Bloggers Quilt Festival this spring. It’s just too much.  I hope I can make up for it with this bright and cheery baby quilt I made!

My friend P and her husband J just had their first baby!  Baby S is adorable and I was so excited to make her a present.  I decided to use some of the scraps from P and J’s wedding quilt, which are lime and teal, and add some pink and a little orange.  They live in a tropical place and I wanted bright tropical colors.

I mentioned in my Handstitched posts that I’d always wanted to make a medallion quilt, and I started with making the dogwood blossom center for this one, too, in solid teal on a lime and teal print.  (This is the one where I had trouble with the wax paper applique.)  Then I added a border in the same lime and teal print.

For the next border I pulled out my scraps from P and J’s quilt.  It was a hexagon quilt, so I ended up with a lot of little triangles leftover from cutting out the triangles.  I sewed the triangles together in pairs to make little rectangles.  I cut them down to all be the same size and sewed them into strips.  I added a bright print at the corners.

I used a cute print from my Aunt D’s stash with the lime and teal print for the next border.

I had two leftover pinwheel half hexagons from P and J’s quilt, which I used as the centers for the next border, framed by a cherry blossom print and a coordinating coral print from the same set.  (I kept sewing them at the wrong angles and having to rip them out.)

For the fifth border, I used lime and teal solids.

The sixth and final border is strips of orange, yellow, green, and teal.

It’s pretty cool-looking, right?  It’s crazy busy, but my quilts generally are.   I think the center and the first three borders are cohesive, and then the outer three borders are less so, but I like it anyway.


Blog tags

I want to make the blog more reader-friendly, and I realized that tags are a good way to do this.  I’ve gone through all of my posts and added tags based on various themes. I’ll tag this post with all of them so you can more easily find anything you’re interested in, and my goal is to be more conscientious about tagging in the future.

In the course of doing all my tags, I realized that I posted twice about the Storm at Sea runner I made my parents, once in 2011 and again last December during my Advent posts.  Perhaps if I’d had a better tagging system I would have remembered that I’d done it before!  It was fun to go back and look at the old posts – I’d forgotten what some of the blocks were called and I had to read the posts to see which quilt I was writing about.  Most of my pre-blog quilts are on here, although I know of at least four that aren’t.  Perhaps those will be fodder for Advent 2014!

The tags fall into several categories: block type, type of item if it’s not a quilt, language if I was quilting in something other than English, etc.   The blocks I have thus far are as follows:

Drunkard’s Path – Storm at Sea – Hunter’s Star – Lone Star – hexagons – pinwheels – Steps to the Altar – Rail Fence -Windowpane – Log Cabin – “Elegance” fan block – Korean patchwork – Amish Square – Bow Tie block

If you happen to notice that I have the wrong name for a block or if there’s another name for it, please let me know!  In one case – the wedding quilt I made for my friend N last year – I’m not sure if there is a name for this kind of quilt.  (https://habibihomemade.wordpress.com/2013/07/16/wedding-quilt-for-n-and-a-part-i/)  If there is a name, please share it with me.

I made a tag for doll quilts, since I make so many of them, and if I used a particular block I tagged that as well.  I may have missed some, so leave a comment if you notice that a block went untagged.

Tags for non-quilts include, in no particular order: pot holders; kitchen/household; holiday; decor; pillows; napkins; clothing; ornaments; aprons.

I’d forgotten how many pillows I’d made, for example.  Kitchen/household covers pot holders, napkins, and aprons; aprons fall under clothing, too.  Decor includes pillows, runners, and wall hangings, but runners and wall hangings don’t have separate tags.  Holiday includes ornaments and stockings, the latter of which also don’t have a separate tag.  If you think it would be helpful for me to make a runners tag or a wall hangings tag or a stockings tag, let me know.  If you see anything I haven’t tagged that you think I should – a quilting design or a specific stitch or whatever – just leave me a comment.

Hopefully this way my blog will be much easier to navigate.  I like to read other quilters’ blogs and I’ve learned not just from what other people are making but from how they’re blogging about it.  Tagging struck me as a relatively easy way to be more accessible.  This is for you, so feel free to give me your input.  If you want a “wedding” tag or a “birthday” tag or some other category that you think would be useful, I want to know about it.

Enjoy!

Wedding quilt for P and J – Part III

Last but not least, the hand quilting:

I had two things I wanted to hand quilt.  First, their names, and second, a meaningful phrase.  (I had originally wanted to quilt their wedding date and two meaningful phrases, but I ended up limiting myself.  I had plenty to do already.)  I chose a variegated thread that’s in beautiful shades of teals – it matched the border fabric perfectly and because I did a whip stitch it was a thicker line and it didn’t blend in.

IMG_7592

I quilted their names and then I quilted a Latin phrase, “Ubi caritas et amor, Deus ibi est.”  It means “Where there’s charity and love, God is there.”  When P and I were in college, we used to sing a song with that phrase at mass.  It’s perfect for P and J, who are both very strong in their faith and who met doing service work.

IMG_7604

Here’s the finished phrase:

IMG_7646 IMG_7647 IMG_7648 IMG_7649

I kind of used a bubble print.  I intended a fancier script but it didn’t quite happen.

I made a quilt tag on the back of the quilt with their names, the date they got married, and my name.   I mailed it to them, only three months after the wedding, and I am pleased to report that they loved it.  By choosing their favorite colors I managed to match their decor without even seeing it.  🙂

Wedding quilt for P and J – Part II

Part 2: Machine quilting!

Once I had P and J’s quilt all assembled, I started on the machine quilting.  I wanted to quilt each pinwheel.  I used three different quilting patterns.

One: I sewed across each “pin” of the pinwheel.

Two: I sewed down the center of each equilateral triangle.

Three: I sewed around the inside of the wheel, from inner corner to inner corner.

I used a teal thread on all of them, I think, although it shows up slightly darker in some of the pictures.  I made some kind of pattern with the three different styles of quilting but I don’t remember what the pattern was.  Here’s a bunch of pictures of the machine quilting:

Here’s the fabric I used for the back:

I think it’s beautiful.  You can sort of see the way the quilting shows up on the back.

Next time I’ll cover the hand quilting!

Wedding quilt for P and J – Part I

My friend P got married in January.  P was very good friends with my friend F who died – the friend I made my very first quilt for.  (In fact, and I didn’t know this in advance, F’s mother and sister attended P’s wedding, and it was so wonderful to see them.  They’re lovely people.)  I decided for P’s wedding quilt I wanted to use a pinwheel pattern to mirror what I had made for F.  Fortunately, one of my quilting books actually has a pattern, which is far easier than what I remember doing the first time.  (I think the first time I cut out dozens of tiny triangles – very time consuming.)  The book is “Sensational Small Quilts,” and the instructions are “Glowing Stars,” written by Priscilla Bianchi. The book recommended using 3/4 yard cuts of 34 different prints, 17 of one type and 17 of another type.  I asked P about colors and she said their favorite colors are blue and green.  That’s perfect, since I have tons of green and blue fabrics.  I followed the directions in the book, which said to cut two 3” strips from each print.  I think you needed to cut the 3″ strips along the long edge (since most fabrics are approx. 40-44″ wide) instead of along the 3/4 yard edge, so my strips weren’t long enough.  (In hindsight, this makes a lot of sense.  I thought some of the instructions were unclear but that misunderstanding is definitely my fault.)  I ended up with 68 strips total.  Then, I matched up the blue and green prints.  I sewed the strips with the green on the left and the blue on the right (always matching up the same prints).

Next, I cut equilateral triangles from the strips.  The book provided a template that I traced onto a piece of light card stock (I used one of those postcard things advertisers send in the mail).  Sewing the strips together and cutting the equilateral triangles saved a lot of time.  There was less to trace. The instructions said to cut nine triangles from each set of strips.  Since, as I’ve mentioned, I cut my strips wrong, I couldn’t make nine triangles out of each set.  I could only make six to eight triangles from each set.  I ended up having to go back and sew the remnants from my strips together to make more triangles.  (I’m not sure that even makes sense.  If you don’t make the same mistake I did, you won’t have this problem!)   I should have realized that cutting only six triangles instead of nine would yield fewer triangles than I needed, but I wasn’t thinking about it.

I took each set of six triangles from matching blue/green strips and sewed three into one half of a hexagon and three into the other half, like below.  The green halves of the triangles form the pinwheels.  (The instructions call them stars.)

At this point I realized I still didn’t have enough hexagons for the size quilt I wanted to make.  I cut more strips of blue and green, and then more triangles. Finally I had enough hexagons to make an acceptable quilt.  (It’s still on the small side, but most wedding presents I make for people are lap-sized quilts.)  The way to sew the hexagons is in horizontal rows.  I laid all the half hexagons out on my couch and spent some time rearranging them, trying to figure out the best lay out.

The book provided instructions for a border.  As you see above, the hexagons don’t form a solid vertical border, so you need small triangles on the edge of each row.  I used navy, as the book instructed, since it provided a nice contrast with the brighter blues and greens in the hexagons.

The quilt still wasn’t as big as I wanted.  I also knew I wanted to do some hand quilting – their names and maybe the date of the wedding and some meaningful phrases or something – so I added an extra border pieced from teals and greens.  I took three teal fabrics, which I think were all from the same set of fabrics, and I cut them into strips.  Then I sewed the strips together, and cut horizontal strips from that to make a striped border.  I added greens to the corners of each border.

Next time I’ll talk about the quilting I did.  Yay quilting!

My first quilt

I had originally intended to make today’s post about Spry’s wedding present, except it’s not done and I don’t want to put it up until I’ve given it to her.  Then I intended to post about one of my little side projects, but as I was in the shower I realized that today is the anniversary of my friend F’s death.  I made my first ever quilt for her mom.

F was a friend from college.  I don’t know if the other girls knew her, but if they didn’t I wish they had.  She was such a sweet, loving, giving person.  She died in a car accident several years ago. I’d never lost someone who wasn’t old before.  I was only working part time that summer and I didn’t have much to distract me from my grief.  I would wake up at 6 or 7 in the morning for no reason, with nothing to do until nine.  I baked a cherry pie from scratch the week after she died because I was straining to find ways to fill my time.  One day I decided that I would make a quilt to give to F’s mom as a memento.  I don’t know why I decided I should make a quilt.  I could sew, of course, but I’d never completed any project more ambitious than pillows, and I didn’t have a good sense of what quilting itself – not the piecing, but sewing the layers together – really entailed.  I have a history of decided that something I haven’t tried yet “can’t be that hard” and then being too stubborn to quit even when it does, indeed, prove to be that hard.  I ended up with one of my college majors that way.

I researched quilt blocks online and picked a pinwheel.  It looked relatively simple, although I suspect I should have chosen something else.  I spent the summer acquiring fabrics and cutting them by hand, with scissors.  My parents gave me a sewing machine for my birthday.  It’s so long ago I barely remember the process, only that I spent far too much time acquiring fabric and far too little sewing because I was busy with grad classes by the time I got my sewing machine.

It was a difficult semester.  Classes were overwhelming.  I was also helping with the memorial for F that we held on campus.  I was miserable for a lot of reasons.  The quilt may have added to my worries, but it was the project I needed, something into which I could channel my energy and my sorrow.  I thought of her, piecing together each colorful pinwheel- not knowing or remembering F’s favorite color, I chose bright prints instead.  She had always worn brightly colored hijabs and I wanted the quilt to remind everyone who saw it of her sunny personality and penchant for bright colors.  I wanted it to be like her.  The outsides of the hexagonal patches are in cool colors, purples, blues, and greens.  The pinwheels are in warm colors, yellows, oranges, and pinks.  All of the prints were whimsical and bright.  I keep using bright – I suppose I ought to come up with a synonym, but I won’t bother.  Like all of my quilts, it’s very busy.  I like to use a lot of prints.

I appliqued her name and the words “She will remain in our hearts” in Arabic.  I got scolded by one of my professors because my friend M’s Persian uncle had written out the script for me and he’d left a couple of dots off of F’s name that wouldn’t be there in Persian but should be there in Arabic.

I photocopied the calligraphy as he’d written in out, then cut out the words and pinned them to the fabric I wanted to use.  I traced along the edges and then cut each word.  I didn’t know how to finish the edges so I treated then with clear nail polish and then appliqued them with a straight stitch.  I now know that this is definitely not the way to applique something, but back then I had no idea.

I didn’t actually know anything about quilting, as I’d said.  I had a book – I think our friend A gave it to me for my birthday.  It talked about different techniques and I chose tying.  I’m sure I didn’t do it very well.  I remember only that I was rushing to get the quilt done.

We featured the quilt at the memorial service for F.  Everyone was sworn to secrecy, as I wanted to surprise her mother with it.  I mailed it to her just in time for an Islamic holiday – either Eid al-Fitr or Eid al-Adha.  I can’t remember which; it would have been a couple months’ difference.  I think I wanted to get it to her for Ramadan but didn’t manage, so it was probably Eid al-Adha.

I can’t believe she’s been gone so long.  In some ways, it seems like it’s been forever, but in other ways it doesn’t seem possible that I haven’t seen her in years.  The quilt was my tribute to her, the only thing I could think to give to her mother, to show her how beloved F was and how much joy she brought into other people’s lives.  The words are as true for me today as they were then.  I think about her every day and I pray for her every day.  I know she’s in heaven.  الله يرحمها

Sorry the Arabic is sideways; I don’t know how to fix that so I’m just going to leave it.