Quilt for me! – Part IV

Today we return to the polka dot comforter I’m making for myself.  I had neglected it for some time in order to finish Christmas presents and Z’s quilt, but I’d hoped to get the whole top done before Christmas.  Sadly, I didn’t manage it.  However, I made considerable progress in top assembly, some of which I’ll show today.

When you saw the quilt last, it was October and I was still plodding away at assembling each block.  The curved piecing took longer to pin and has to be sewn at slower speed.  Plus, I was making 192 blocks.  I finally managed to make all the blocks – in fact, I made too many and I had to take some out.

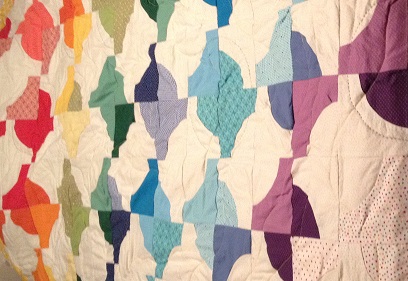
Here are the finished blocks, organized by color:

The next step was to lay them out the way I wanted.  I had a lot of design possibilities, some of which I had drawn out for myself.  That’s the nice thing about the Drunkard’s Path pattern – there are a lot of different visual effects you can create.

I eventually settled on this one, where the blocks alternate directions.

I also wanted to slowly progress through the color spectrum, and so it took awhile for me to arrange all the blocks the way I wanted.  I know I made one mistake in the layout, but I figured it out way too late to deal with it, so it’ll be in there.  (By the time I figured it out, I was ready to start sewing and I didn’t want to spend more time rearranging everything.)

I started with the black polka dot print, then the colors on white, then purple, blue, green, through the spectrum to pink and red at the opposite corner.

As you can see, they’re alternating in direction and in light/dark (except in the far right corner of the bottom row and the far right corner of the top row, which are the two that I messed up).

It looks pretty cool, right?  I tried to also mix up the colors a bit as I progressed through the spectrum, and I tried not to put too many blocks of the same shade next to each other.

Next week I’ll show the assembly.  Enjoy your New Year’s Eve, however you choose to celebrate it, and may the coming year be full of joy, color, and fabric! 🙂
Stocking for J

Merry Christmas!  This is my bonus post.  I decided to make a stocking for my roommate J because I had hung one up and I thought she should have one, too.  I used the same pattern I’d used to make the charity stockings – I saved the pattern my quilt guild had given me.  I chose poinsettia fabric and traced the stocking onto the fabric.

I used a little scrap to make the hanger.

I folded down the top edge of each stocking piece and sewed it to hide the rough edges.

I didn’t bother adding decorative ribbon like I had on the charity stockings, so this time around the assembly went even faster.  I just sewed the two sides together, with the hanger pinned at one corner, and I had a stocking.

J was delighted with the fabric and hung the stocking up on her door.

Thank you for joining me on my Advent calendar blog post adventure.  Come back next Tuesday for my regular posting schedule – I’ll be featuring the polka dot quilt I’m making for myself.

Wine bags

I made two wine bags for my parents for Christmas.  Z is giving them wine and I thought it would be nice to make special bags for them.  I had bought wine-themed fabric, originally to make them an apron (my parents only have two aprons at their house, which isn’t enough for the whole family when we’re doing a lot of cooking).  I have plenty of the fabric left, so I may still do that.

I measured a wine bottle and estimate the size of the wine bags based on that, plus the sizes of wine bags listed for sale online.  I wasn’t sure quite how to make the space at the top for the ribbon, and I ended up making each bag slightly differently.

For the first bag, I folded the fabric in half lengthwise and sewed it closed on two sizes, leaving one short side open.

Then, I folded over the edges of the open end and pinned.  I sewed the edges down, leaving a gap open where I could thread the ribbon through.

For the other bag, I made the space for the ribbon first.

Then, I folded the material in half lengthwise and I sewed along the bottom and the long edge.  I sewed up to but not over the folded-over fabric on the top.  (If I’d sewn all the way up, I’d have sewn over the opening for the ribbon.)

In the first case, the ribbon has to be threaded through the inside of the bag, and in the second case, there are rough edges where the ribbon comes out on top.  Either way, it’s not a perfect solution.  (What I could have done was cut the pieces wider and then folded each long edge in about an inch, sewn it down, then sewn over the top edge, and then sewn the long edges and the bottom together.  That would have been an extra step and would have required more forethought.)  I threaded green ribbon through the top of each wine bag and then I was done.

It’s Christmas Eve, and our Advent calendar is now over.  I hope you enjoyed my daily posts.  Toward the end of the month – when things got the most hectic – they were admittedly a bit time consuming, but overall it was fun and I think I’ll miss going back to weekly posts.  With that in mind, I’ll have one more post tomorrow for Christmas Day, just for the fun of it.

Pillow for Roomate J

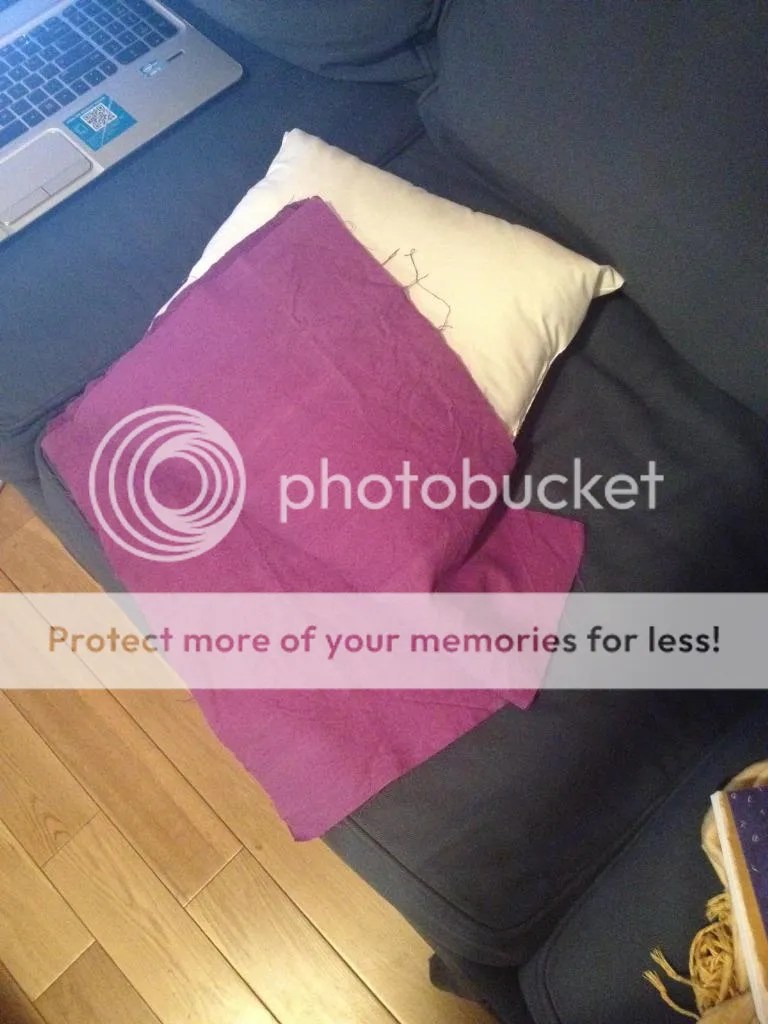
We’ve got a change of pace today – no more pot holders.  Today I’m writing about the pillow I made for my roommate J for Christmas.  J is a high school teacher and she has a student who likes to come into the classroom and say “This class is poppin’!”  J and I were joking that it should be on a pillow, and then I said “I’ll make you a pillow with that on it for Christmas!”  (A week or so later I checked with her to confirm that she did, in fact, actually want a pillow for Christmas, just in case.)  I asked J if she had color preferences and she said yellow so it would “pop.”  I chose purple fabric and embroidered it in yellow.  J also approved the fabric choice.  Since she already knew what she was getting, it made sense to make sure she liked everything.

My original image of the pillow was a cross stitch-style motto, like old fashioned pillows.  However, I’ve never done cross stitch before and I didn’t trust myself to make nice, neat little crosses.  I was afraid it would look messy, so I abandoned that and did one of my regular stitches.

I traced out the letters first and then I embroidered the front piece of fabric.

Once I finished the embroidery, I pinned the front and back pieces together.

I left a gap when I sewed around the edge, but it wasn’t a wide enough gap to push the pillow through.  I ended up having to rip out a couple more inches.

I sewed the gap closed one my machine with purple thread.

The finished product:

Pot Holders – Part VII

Happy fourth week of Advent!  It’s a pretty short week – Christmas is almost here.  We’ve also reached the end of the pot holders.  Somehow a full week of pot holders seems fitting.

This final set of pot holders is for my Aunt D and my Uncle S.  Aunt D loves bees and the whole idea of making the pot holders came from an idea I had to make her two pot holders, one with a bee hive on it and one with a bee on it.  I scrapped the bee hive idea and instead made one pot holder that I hand quilted a bee onto, and another pot holder in a blue and yellow print. Aunt D uses those colors in her home decor so I thought it would match.  I’ve saved this post for last because I only finished the hand quilting on the bee on Wednesday or Thursday and I didn’t actually finish the pot holder until Friday.  I was going to split it into two posts, but I’ve been trying to do a longer post each Sunday and I figured we can have an extra long post on our last Sunday.

Here are the fabrics I started with.  I think I mentioned at some point that I had intended to make little loops for hanging the pot holders out of ribbon, hence the ribbon in the picture below.  (I later discarded the idea.)

Assembly:

I’ve marked out the bumble bee in silver pencil.  You may note that the final design differs slightly; when I described it to Z, he felt very strongly that a bee should have a stinger, so I added a small stinger, as well as antennae, none of which appear in my drawing.   It’s obviously not a very accurately drawn bee, but I think it’s cute.

For the blue and yellow print, I originally chose the same crisscrossing design I’d used on some of the others.  You’ll see later that I changed this design slightly, too.

I chose a royal blue thread for the blue and yellow print.

At this point, I decided that the royal blue looked navy.  (You may remember that I felt the same way making T and B’s pot holders.)  I switched threads to a brighter blue that matched the print better.  I also changed my design slightly.   I don’t know if it shows up in the picture, but I decided that rather than using the crisscrossing pattern, I would quilt the square on point that the pattern had created at the center of the pot holder.  I then drew lines where the on-point square hit the big X, making another square inside the square on point.

Those are my Yankee pajama pants (and feet) in the background.

I did the machine quilting with the lighter thread in one continuous movement.  I would do the square on point, then the inner square, then the square on point, then the inner square, all the way around twice.  I think you can see what I mean in the picture.

Here’s all the quilting done:

Now, the bee:

Here’s the little stinger.  I made it very small on purpose.  I wanted it to be cute, not threatening.

The finished bee:

I added the strap:

Finally, all of the pot holders are finished!

Pot Holders – Part VI

More pot holders!  This set is for my sister, N.  She loves moose.  I made her a moose quilt once.  I collected moose prints for several years and finally for her birthday a few years ago I made her a quilt entirely out of moose fabric.  I’m not sure I ever blogged about it – I’ll have to look into that.  Anyway, I had so much moose fabric that there’s still some leftover, which I used for the pot holders.

The fabrics:

In progress:

Marked for quilting – as you can (hopefully) see in the picture, I marked a square in the center of each pot holder.  I went with the simpler quilting pattern in order to show off the prints.

I quilted them with a light green thread that matches the grass/background on both prints nicely.

I’ve only got one more set of pot holders – probably everyone is sick of reading about them by now.  Personally, I’m excited to gift them!

Pot Holders – Part V

Today, I’m showing pot holders for my cousin T and her husband B.  You may remember from the quilt I made for them a couple of years ago that T’s favorite color is green and B’s favorite color is blue.  I wanted to make them pot holders with their favorite colors, but I wanted them to kind of match – like Aunt M’s did.  I ended up picking fabrics from a 6-piece fabric collection I’d bought with a peacock theme.

Aren’t they beautiful?  I love these fabrics.  I will definitely be using these again.

I went with the simpler quilting again, just the square in the center.  I chose royal blue thread but it came out more like navy, so I wish I’d picked a more vibrant blue.

They look great, don’t they?

Pot Holders – Part IV

This is truly the week of pot holders.  Today I’m featuring the pot holders I made for my brother R and his fiancee M.  You may recognize the fabric – I used it to make napkins for Anlichan’s brother and his wife when they got married back in the spring.  (https://habibihomemade.wordpress.com/2013/04/23/wedding-present-for-anlichans-brother/) I’m reusing it here because a) it’s beautiful fabric and b) M has a very sophisticated, classic decorating style and I think this fabric matches that.  You may also note that this fabric is the same as one of Aunt M’s fabrics but in a cream/red palette instead of a cream/purple palette.

First, the fabric:

Like I said, gorgeous.  I love it.  I wish I had more.  🙂

I made my sandwiches:

I marked them for quilting using silver pencil.  I used the same crisscrossing geometric pattern I’d used for Aunt M’s pot holders – basically, I drew a square one inch from the edge.  Then I drew diagonal lines from corner to corner.  Then, I drew lines parallel to each corner-to-corner diagonal, two inches apart.  That created the crisscross.

I quilted with a cream colored thread.

Here’s a picture of the partial quilting:

Here’s one of the pot holders, completely quilted:

I had to do a little more work to make my straps because the fabric I had leftover wasn’t wide enough.  I had to sew together two narrower strips to make one strip that was sufficiently wide enough.  These are the finished strips, ready to be sewn again lengthwise to form the straps on the pot holders.

Here’s a finished pot holder:

Pot Holders – Part III

Today I’m featuring the pot holders I made for my Uncle P.  I used plaid fabric because that’s neutral and masculine.  (Uncle P isn’t married; most of the pot holders I made were for couples and, honestly, I chose my fabrics based on the female half of the couple’s aesthetic preferences.)

I followed the same procedure as before: I made my little sandwich of fabric, batting, and insulating batting, and then I sewed around the edges.

Once I turned the pot holders right side out, I quilted them.  I did a simpler design than for Aunt M’s potholders – just a square, drawn two inches in from the outer edges.  I used blue thread.  The only problem I had was that the fabric is woven and it stretches more easily than non-woven fabrics do, so my traced line for the quilting moved a bit as I went along.  I think you can see that in the picture.  Lastly, I sewed on the straps.

I think my pot holders look really cute, but they’re larger and stiffer than most pot holders and I’m afraid that might make them hard to grip.  If that’s the case, people can always use them as hot plates (trivets) instead.


Pot Holders – Part II

I apologize again for the technical issues I’ve been having.  Yesterday we stopped right before I did the quilting on Aunt M’s pot holders.

Here are the crisscrossing patterns I did:

IMG_1362

IMG_1363

Then I wanted to add the the straps.  I cut out extra pieces from the fabrics I’d used, approximately 6″ wide and 11″ long (maybe a little longer).  I folded them in half lengthwise and sewed along the long edge, then turned them inside out and ironed them flat.

I took my pot holders, now quilted but still with the openings on parallel sides.  The battings were poking out a little bit and I cut them down so that I could fold the fabric in.  I inserted one end of each strap into each opening and pinned, then sewed down.  I made sure that the strap was on the non-insulated side.

IMG_1364 IMG_1365

Voila!  Pot holders.