Blog tags

I want to make the blog more reader-friendly, and I realized that tags are a good way to do this.  I’ve gone through all of my posts and added tags based on various themes. I’ll tag this post with all of them so you can more easily find anything you’re interested in, and my goal is to be more conscientious about tagging in the future.

In the course of doing all my tags, I realized that I posted twice about the Storm at Sea runner I made my parents, once in 2011 and again last December during my Advent posts.  Perhaps if I’d had a better tagging system I would have remembered that I’d done it before!  It was fun to go back and look at the old posts – I’d forgotten what some of the blocks were called and I had to read the posts to see which quilt I was writing about.  Most of my pre-blog quilts are on here, although I know of at least four that aren’t.  Perhaps those will be fodder for Advent 2014!

The tags fall into several categories: block type, type of item if it’s not a quilt, language if I was quilting in something other than English, etc.   The blocks I have thus far are as follows:

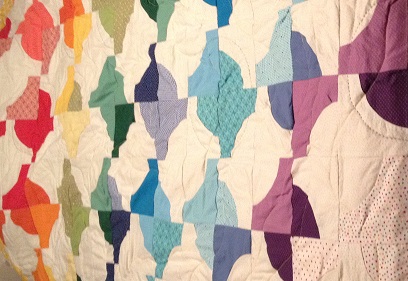
Drunkard’s Path – Storm at Sea – Hunter’s Star – Lone Star – hexagons – pinwheels – Steps to the Altar – Rail Fence -Windowpane – Log Cabin – “Elegance” fan block – Korean patchwork – Amish Square – Bow Tie block

If you happen to notice that I have the wrong name for a block or if there’s another name for it, please let me know!  In one case – the wedding quilt I made for my friend N last year – I’m not sure if there is a name for this kind of quilt.  (https://habibihomemade.wordpress.com/2013/07/16/wedding-quilt-for-n-and-a-part-i/)  If there is a name, please share it with me.

I made a tag for doll quilts, since I make so many of them, and if I used a particular block I tagged that as well.  I may have missed some, so leave a comment if you notice that a block went untagged.

Tags for non-quilts include, in no particular order: pot holders; kitchen/household; holiday; decor; pillows; napkins; clothing; ornaments; aprons.

I’d forgotten how many pillows I’d made, for example.  Kitchen/household covers pot holders, napkins, and aprons; aprons fall under clothing, too.  Decor includes pillows, runners, and wall hangings, but runners and wall hangings don’t have separate tags.  Holiday includes ornaments and stockings, the latter of which also don’t have a separate tag.  If you think it would be helpful for me to make a runners tag or a wall hangings tag or a stockings tag, let me know.  If you see anything I haven’t tagged that you think I should – a quilting design or a specific stitch or whatever – just leave me a comment.

Hopefully this way my blog will be much easier to navigate.  I like to read other quilters’ blogs and I’ve learned not just from what other people are making but from how they’re blogging about it.  Tagging struck me as a relatively easy way to be more accessible.  This is for you, so feel free to give me your input.  If you want a “wedding” tag or a “birthday” tag or some other category that you think would be useful, I want to know about it.

Enjoy!
Rozsamaria: Completed quilt

I’ve finished my quilt for my cousin T and her husband B, just in time to give it to them at Thanksgiving.  I had the top assembled last time, but now it’s completely done.

I bought fleece to use as the backing for my quilt.  I bought green and blue felt (green is T’s favorite color and blue is B’s favorite color).  I was hoping to use only green for the back, but I didn’t have enough, so I cut two large squares from each and sewed them together.  Then, I laid the top over the back, right sides out, and pinned them together, beginning from the middle patch and working my way outward.  It didn’t come out completely smooth, but my pinning never does.

Once I had the layers pinned, I pinned the edges under and sewed them together.  Then I started the quilting.  I had alternated patched blocks with solid blocks, and I decided to do the quilting on the solid blocks.  With each block, I either quilted the outline of a graphic on the block or I traced a shape onto the block and quilted that.  For example, one patch had leaves on it and I quilted an outline of the leaves.  On other patches, I traced a flower or a heart shape from a quilting book (“Material Obsession: Modern Quilts with Traditional Roots” by Kathy Doughty and Saray Fielke) and used that as my design.  I bought special chalk pencils that are supposed to be water soluble and used that to do my tracing.  (Naturally, they aren’t quite water soluble, but I’m sure I’ll get used to working with them.)   I used different threads to pick out the colors in the patches.  Pictures below:

I outlined the hibiscus flower in navy thread.

I sewed a heart using blue thread slightly darker than the blue in this patch.

I outlined a couple of the stars in matching green. I'm not sure it shows up in this picture.

I quilted a flower in a deep pink to match the hibiscus flowers.

I used a pink thread that matched the lanterns in this print.

Again, I matched the pink thread to the flowers in the print.

I don't know if the blue thread shows up in this picture.

I outlined the scroll in a matching green thread.

I wanted to outline one of the birds, but I didn't think I'd be able to do it properly - I don't do that well with sewing on a curve - so I simply chose green thread and quilted a flower.

I outlined the leaves in green.

I did a flower in matching blue thread.

I quilted a star in gold thread.

I’m really pleased with the way it came out, especially since I finished it in time for Thanksgiving.

Quilt in progress! – Rozsamaria

Finally, I have a new project to share.  I’m making a quilt for my cousin T and her husband B.  I usually make a quilt when people get married or have a baby.  However, when they got married last year I didn’t have time to make them a quilt because I was working on a quilt for a friend’s family.  To make up for it, I’m making them a quilt for their birthdays and belated anniversary.  It needs to be finished by Thanksgiving, which is when we’ll be celebrating T’s birthday.   I was reluctant to include it in the blog because I didn’t want to ruin the surprise, but Thanksgiving is only a couple of weeks away and I figured T wouldn’t see the post before then.

T and B gave me a book about quilts (“Quilts Around the World” by Spike Gillespie) for Christmas last year, complete with patterns for 20 different patches.  I wanted to make a sample quilt, with one of each patch, but I didn’t have time.  I picked a few patches and did several of each, then filled the rest with 9” squares.   I made two patches using the bow tie pattern, six using the Amish squares pattern, and five using the Korean patchwork pattern.  T’s favorite color is green and B’s favorite color is blue, so those are the colors I used for the quilt.

The Korean patchwork pattern

A picture of the Korean patchwork pattern

The Amish squares pattern

The Bow Tie pattern

I used the same fabrics for each set of patches, so they coordinate.  The following are pictures of the different patches I made.

The bow tie patches:

The bow tie pieces partially assembled

The Amish square patches:

The Amish patchwork pieces, in assembly

The pieces for one of the Amish square patches

A closeup of another Amish square patch in assembly


I’m having some issues with WordPress, so I’ve only included pictures of two of the six Amish square patches.  Sorry!  Wordpress keeps eating my pictures.

The Korean patchwork patches:

A Korean patchwork patch

You’ll note that the Korean patchwork patches don’t look like the picture.  I didn’t read the instructions fully and the pattern was at 70% scale, so they came out too small.  I added the large dark green strips to make them 9″ squares like the other patches.

The quilt has 25 patches, five across by five down (thirteen that I made using the patterns and twelve that are simple squares).

The patches laid out on my table

The 25 patches assembled into the quilt top

It wasn’t quite the size I wanted when I sewed the patches together (alternating simple squares with assembled patches), so I added a green fleece strip around the edge.  I’ll use fleece for the backing, as well.  I’m not going to use batting because the fleece will be sufficiently warm and heavy.

The finished quilt top with the fleece border

I spent most of the weekend sewing and I was able to get a lot done, but there’s more to do.  I haven’t attached the back or done the quilting yet.  Those will likely be the subject of my next post.