Blog tags

I want to make the blog more reader-friendly, and I realized that tags are a good way to do this.  I’ve gone through all of my posts and added tags based on various themes. I’ll tag this post with all of them so you can more easily find anything you’re interested in, and my goal is to be more conscientious about tagging in the future.

In the course of doing all my tags, I realized that I posted twice about the Storm at Sea runner I made my parents, once in 2011 and again last December during my Advent posts.  Perhaps if I’d had a better tagging system I would have remembered that I’d done it before!  It was fun to go back and look at the old posts – I’d forgotten what some of the blocks were called and I had to read the posts to see which quilt I was writing about.  Most of my pre-blog quilts are on here, although I know of at least four that aren’t.  Perhaps those will be fodder for Advent 2014!

The tags fall into several categories: block type, type of item if it’s not a quilt, language if I was quilting in something other than English, etc.   The blocks I have thus far are as follows:

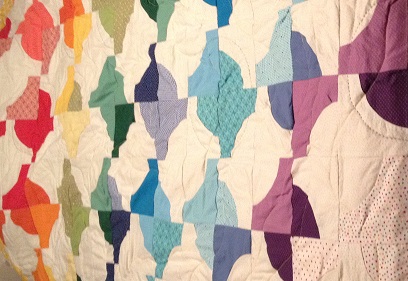
Drunkard’s Path – Storm at Sea – Hunter’s Star – Lone Star – hexagons – pinwheels – Steps to the Altar – Rail Fence -Windowpane – Log Cabin – “Elegance” fan block – Korean patchwork – Amish Square – Bow Tie block

If you happen to notice that I have the wrong name for a block or if there’s another name for it, please let me know!  In one case – the wedding quilt I made for my friend N last year – I’m not sure if there is a name for this kind of quilt.  (https://habibihomemade.wordpress.com/2013/07/16/wedding-quilt-for-n-and-a-part-i/)  If there is a name, please share it with me.

I made a tag for doll quilts, since I make so many of them, and if I used a particular block I tagged that as well.  I may have missed some, so leave a comment if you notice that a block went untagged.

Tags for non-quilts include, in no particular order: pot holders; kitchen/household; holiday; decor; pillows; napkins; clothing; ornaments; aprons.

I’d forgotten how many pillows I’d made, for example.  Kitchen/household covers pot holders, napkins, and aprons; aprons fall under clothing, too.  Decor includes pillows, runners, and wall hangings, but runners and wall hangings don’t have separate tags.  Holiday includes ornaments and stockings, the latter of which also don’t have a separate tag.  If you think it would be helpful for me to make a runners tag or a wall hangings tag or a stockings tag, let me know.  If you see anything I haven’t tagged that you think I should – a quilting design or a specific stitch or whatever – just leave me a comment.

Hopefully this way my blog will be much easier to navigate.  I like to read other quilters’ blogs and I’ve learned not just from what other people are making but from how they’re blogging about it.  Tagging struck me as a relatively easy way to be more accessible.  This is for you, so feel free to give me your input.  If you want a “wedding” tag or a “birthday” tag or some other category that you think would be useful, I want to know about it.

Enjoy!
Baby quilt for N and J – Part V

Today: the hand quilting on Baby!N’s quilt!

Once again, I have insufficient pictures.  I don’t know what I was thinking!  I had an issue with my camera and maybe I took the pictures and then I wasn’t able to transfer them to computer.  Either that, or I just didn’t take enough pictures.  This is a pity, because the quilting I did is adorable.  You’ll just have to take my word for it.

I decided to quilt butterflies.  I’d been thinking about butterflies even when I started working on the quilt.  I used the yellow corners of the quilt as blank canvases for my butterflies, and I quilted them with green and purple thread.  I cut butterfly shapes out of paper and traced the shapes on the quilt.

IMG_7789

I did purple wings with green bodies and vice versa.

IMG_7790 IMG_7791

Apparently I didn’t take pictures of any finished butterflies.  I’d also quilted smaller butterflies – two large butterflies or three small butterflies on each corner.

I didn’t take a full shot of the finished quilt either.  Major photographic fail this time.  You’ll have to take my word for how cute the whole thing looks!

Tune in tomorrow!  We’ll have a change of project.

Baby quilt for N and J – Part IV

First of all, happy second Sunday of Advent!  Did the first week fly by or what?

I said that today we would cover the quilt assembly for Baby!N’s quilt, but that was a lie, because apparently I have no pictures of that.  I actually made this quilt months ago, by the way.  I know Baby!N was due in the fall and I also knew that I would be moving, so I put together the whole quilt top in June.  I don’t even remember when I did the quilt assembly – maybe July 4th weekend?  Definitely on my parents’ ping-pong table.  Normally I’m good about taking pictures, but in this case I failed.

Since I don’t have quilt assembly pictures, I’ll talk about the machine quilting instead.

I can tell you that I wanted a rainbow kind of backing fabric.  I had rainbow striped wrapping paper – with wide stripes – and I thought that it would make a cute quilt back, so that’s what I wanted.  As luck would have it, at my quilt guild they bring in vendors and at one of the spring meetings the vendor had fabric just like that.  So that’s what I bought.

IMG_7764It’s pretty, right?

I machine quilted the center of the star.  I made a geometric design, using a ruler and silver pencil to mark out the lines.   You can see the lines in the picture below.

IMG_7752


Here are some close ups of the design:

IMG_7754 IMG_7755 IMG_7756


I used purple thread for the quilting.  Here’s the center:

IMG_7761


Here’s a shot of the full design:

IMG_7762


How cool does that look?  I love how it came out.

More close ups:

IMG_7758 IMG_7760


I’m so happy with the way the quilting came out.  With a design like this, there’s a risk that it could end up overdesigned, and I do sometimes fall into that trap, but I think in this case I hit the perfect balance.

Tomorrow: the hand quilting.

Baby quilt for N and J – Part III

Assembling the quilt top!

In the last post, I showed you the pieces and explained how you sew them on the diagonal.  So I ended up with eight rectangles, which get sewn together on the diagonal to create four squares, the four pieces of the quilt.  Each rectangle will form a point of the star.

Here are the pieces.  In the top two pictures, the rectangles have been sewn together – you can see the seam running through the yellow squares, which will be the corners of the quilt.  In the bottom two pictures, you can see very large yellow rectangles.  When those are sewn together on the diagonal, a lot of that yellow will get cut off.  I am afraid I’m not explaining this well, so I recommend referring to the book.  It has diagrams.

IMG_7734

IMG_7735 IMG_7736 IMG_7737

When I had my four large squares, I sewed them together to finally make my star top.  I think this is the best picture of it.

IMG_7739

How cool does the star look?  The center is shades of purple (they might look a little blue-ish in the picture, but they’re purple) with points made of yellow, green, and purple diamonds, on a yellow background.  As always, I have a mix of prints.  There’s that banana print I mentioned – it’s in the top left point.  Maybe I’ll work in a close up when I cover the quilting.

Tomorrow: quilt assembly!

Baby quilt for N and J – Part II

Today: the sewing!

The star quilt book instructions say to cut rectangles, and then sew the rectangles together on a diagonal.  Then, you end up with a lot of leftover fabric, which allows for extra projects (like doll quilts: https://habibihomemade.wordpress.com/2013/11/19/doll-quilts-part-iv-2/).

I would sew along the diagonal, as direction, and then sew a second seam approximately an inch to the side of the leftover fabric.  Then I cut between the seams.  This way, I had my excess fabric all sewn together for future projects.  I pressed the seams and then I pressed them open.

IMG_7725 IMG_7726

The excess pieces:
IMG_7727

I didn’t take a picture of them pressed open.

Here are some chaotic pictures of the partially-assembled blocks laid out on my couch:

IMG_7730 IMG_7729 IMG_7728

The star is made of eight rectangles that get sewn together on a diagonal to make the four quarters of the quilt.  What you see above isn’t even the eight finished rectangles.  I had simply piled up the pieces that went into each rectangle.

Here’s a picture of two parts of a rectangle pinned together to be sewn on the diagonal:

IMG_7731

I think the picture is too faint to see where I traced the diagonal line from the top left corner to the bottom right corner.

The pictures below shows the two seams after they’ve been sewn, from both sides of the rectangle.

IMG_7732IMG_7733


Tomorrow: assembling the quilt top!


Baby quilt for N and J – Part I

My friends N and J had their second baby girl in October.  Yay!

The second quilt I ever made was for N and J’s wedding.  One of the first baby quilts I ever made (maybe the first?  or the second?) was a quilt for N and J’s baby C.  They are now in possession of three Rozsamaria originals.  🙂

Here are links to my posts on the other two quilts:

https://habibihomemade.wordpress.com/2012/11/06/baby-quilt-for-a-little-girl/

https://habibihomemade.wordpress.com/2012/09/11/my-second-quilt-ever/

(Side note: Per the above post, I promised to write a post about a runner I made for my parents and I don’t think I ever did that.   Perhaps that will have to be an Advent post…)

For their new baby, N (I’ll call her Baby!N to differentiate between her and her mother, N), I wanted to use this quilt book: “Big One-Star Quilts by Magic” by Nancy Johnson-Srebro.  You’ll recall that I used that to make a quilt for my aunt M:

https://habibihomemade.wordpress.com/2012/12/18/fabulous-all-purple-quilt-part-i/

(This post is filling up with links already!)

N doesn’t like all-pink for girls.  (The quilt I made for their first baby, C, has a windowpane pattern using a yellow banana print as a base, with squares in primary colors and blue and yellow flannels for borders.  I love the banana print.  I have very little of it left now, several years later, but I wanted very much to use a piece of it in the new quilt for baby N.) I spent some time thinking about a color scheme and I finally decided on green, purple, and yellow.

Here are all the cut pieces:

IMG_0380

Look at the bottom left hand corner at the small piece of yellow fabric on top of the green piece.  I don’t know if you can tell this in the picture (I suspect you can’t) but it’s the banana print fabric that I used to make the window panes in C’s quilt.

Tomorrow: the sewing!

Fabulous all-purple quilt – part II

This week, the quilting on Aunt M’s quilt:

I quilted the spokes of the star by machine.  I outlined each one, quilting approx. a quarter inch from the edge of each piece.

I only seem to have taken one close-up picture of this quilting, and unfortunately it showcases the bunching at the center points.  I’m not great at lining up triangles and other seams.  I should have probably tried to iron the center flatter or at least pinned it better so that the bunching didn’t happen, but I didn’t.

It looks better on the back.

This shows the quilting on the whole star/pinwheel.

My sewing machine has a decorative scalloped stitch, which I decided to use on the inner border, the very pale purple.

I think it looks really pretty on the back.

As you can probably see, the scallops aren’t evenly sized.  It’s kind of difficult to control the movement of the quilt through the needle and the speed.  It’s easier if it’s just one piece of fabric instead of three layers.  People assured me that the variation looks intentional.

Having finished the machine quilting, I began the hand quilting.  I started with a fleur de lis.

The paper fleur de lis pattern I used

front

back

Next I did a treble clef.  Aunt M is very musical and sometimes still treats us to a little piano music.

I also quilted little musical notes, freehand.

I quilted concentric stars (can concentric be used to apply to non-circular objects? I’m not sure but I shall use it here):

I’ve always wanted to try sashiko quilting.  I think it’s such a pretty style.  I’ve never tried it before, but I had printed out a pattern that looked like it would adapt well to sashiko – and because I could draft it myself without too much difficulty.

The pattern I drafted on paper and then drew onto the quilt with pencil

The completed sashiko quilting

I’m really proud of it.  It’s not traditional sashiko, I don’t think.  I just adapted the technique as best I could.

Last but not least, I quilted all of our initials into the quilt.  I quilted Aunt M’s initials and her husband and children’s initials on larger squares, and then the rest of us got squeezed onto smaller patches of solid fabric.   Below is a selection:

Aunt M’s patch – she got a little heart, too

I made a quilt tag, which I’ve never done.  I used a fabric pen and wrote the date of Aunt M’s birthday, her name, and my name, then I hand-appliqued the patch to the back.  (I actually did this before I’d sewn the three layers of the quilt together, but I forgot about it when I made the first post two weeks ago.

I gave Aunt M the quilt for her birthday and insisted that she use it and not simply display it somewhere.  I made it for her to use it.  🙂

The finished quilt

Fabulous all-purple quilt – part I

I wanted to make a quilt for my Aunt M for her birthday.

Her favorite color is purple, so I used all purple in the quilt.  Purple fabric, purple thread for the quilting, everything.

I have a quilting book for large star quilts, called “Big One-Star Quilts by Magic” by Nancy Johnson-Srebro.   I picked out block five.  I don’t remember why I picked that one, in particular.

The block

I then chose my fabrics.  The block calls for four fabrics, but as is usually the case with my quilts I don’t have enough yardage of my fabrics, so instead I used a variety of purple fabrics.

Fabrics, sorted into coordinating piles, on my couch

The pieces for the star, cut and laid out

The pieces are rectangular – the instructions in the book said to cut rectangles and then sew them diagonally, from one corner to another, creating a rectangle with two triangles and leaving two leftover triangles.  (I used the leftovers to make patches that I will use for some future project.  I want to make a crazy quilt for myself, but I have other projects on my to-do list right now, so that will have to wait.)

The instructions from the book – in case my description wasn’t clear (only this picture is also blurry)

I made a mistake with my sewing.  You’re supposed to sew half of the pieces diagonally one way and half of them diagonally the other way, to form a star that’s a mirror image of itself.  I sewed all of them the same way, so I couldn’t make the perfectly symmetrical star.  It came out looking slightly more like a pinwheel, but it’s still pretty.

The row of star points, in identical form rather than half with the point on the left and half with the point on the right

Two star points sewn together

Not the asymmetry

Now, I will stop pointing out my mistakes and point out what I did right.  The star looks so pretty!

The completed star

The star isn’t large enough to make the size quilt I wanted.  The book has instructions for queen- and king-sized quilts, but as I said I didn’t have enough of the purple fabrics I wanted to do that, so instead I made a small quilt with a border.

I chose a simple block from my “501 Quilt Blocks” book.

I don’t seem to have taken pictures of the completed blocks prior to sewing them into the quilt top, so this will have to do.

I sewed a border around the star and then added the blocks in a new border.  I added additional rectangular pieces between the blocks and solid squares at the corners.

The completed quilt top

Next post: The quilting!