Pot holders for C and J

This summer is flying!  I just returned from a relaxing vacation with my family.  We went to the beach for a week and I was able to do some hand sewing and hand quilting on a couple of projects that you’ll see down the line. (I’m working on a ton of different things right now, but a bunch of them are presents, so their appearance on the blog will be delayed.  It’s almost astounding to me how many different half-finished projects I have right now.  Usually I have a quilt I’m working on and maybe something small, but right now I’ve got eight things that are in progress – a bunch of which are doll quilts for quilting practice – and two finished presents, one of which you’ll see next week!)

This week I want to show you two sets of pot holders I made for my cousins C and J.  I posted about the apron I made C for her graduation.  These pot holders were their birthday presents.  (I hadn’t made them pot holders for Christmas.)  J’s birthday was months ago (I missed it – not unintentionally; I just didn’t send her a present) and C’s birthday was more recent, but I knew I wouldn’t see either of them between C’s graduation and Christmas, probably.  Rather than mail something late to J I figured I’d just make them something and give it to them in person.

Both C and J like the color purple so I picked purple fabrics for them.  For J I picked this pretty Japanese-inspired fabric.

For C I used this set of coordinated fabrics.  I thought the Japanese-inspired print stood on its own but for C’s pot holders I wanted a design.  I layered the fabrics and then cut them into triangles, then rearranged the triangles so that four different prints appeared in each set.  It makes an art deco-y fan design.

These are the fronts and backs of C’s:

I knew I was planning to bind these – as practice (these are the first things I bound, by hand or machine).   I also knew I wanted to quilt them.  I could have probably still made straps like I did for the pot holders I made last Christmas, but instead I wanted to make a sort of pocket to slip your hands into.  I had seen that somewhere online – I think here: http://www.ohfransson.com/oh_fransson/2010/04/potholders.html.  So I picked matching fabrics for the outer pocket and contrasting/coordinating fabrics for the trim and binding.

When I layered the pot holders, I used scraps of leftover batting and that Insulbright stuff.   The Insulbright has to have the shiny layer facing the hot surface to reflect the heat, so I made sure then I made my pot holder sandwiches that the Insulbright shiny side faced outward toward the fabric, not toward the batting.  Then I did my quilting – kind of a grid on the darker purple Asian-inspired print and straight lines within the fan on the lighter purple prints.   I think it’s hard to see on the Asian-inspired print in the second picture – the thread doesn’t stand out enough – but I used purple thread for both.

I trimmed each outer pocket piece.  I wanted the pot holders to be on point, so I trimmed the outer pocket pieces by cutting off a corner where the hand will be inserted.

I think there’s an easier way to do the trim than what I did.  What I should have done was lay the outer pocket fabric down, right side down, and then match the trim fabric up to the edge, also right side down; I should have sewn along the edge, then flipped it over, turned the excess trim fabric under, and sewed it down over itself.  I did it the hard way, like this –  see how I have the trim fabric over the edge instead of lined up?  I don’t know what I was thinking.  That was harder when it came to matching up the lines.

Also, I wish I’d used longer pieces of trim fabric and made that cut for the hand wider.  C’s pot holders are a tight fight.  I could get my hands in and I don’t think her hands are larger than mine, but they don’t slip on easily.  Part of the issue there was also that I hadn’t bother to calculate seam allowance when I was making my fans and I lost more than I’d expected when it came together.  J’s pot holders are approximately 8″ and C’s are closer to 7″, if I remember correctly.

When it came time to add the outer pocket fabric I was careful to put that on the side away from the Insulbright.  I pinned the outer pocket pieces down and prepared for the binding.

I used extra pieces of the fabrics for the binding.  I think I used 2.5″ pieces and it actually wasn’t quite wide enough because I had the layer of batting and the layer of Insulbright.  insulbright is quite stiff.  I had a little trouble with my binding because of that.  I used a whip stitch to sew the binding down on the back, which blended in nicely with some of the fabrics but showed on the others.  I switched to a running stitch next time I bound a quilt and I like that better.

Here are the finished pot holders for C, showing the fronts and the backs.  I think you can probably see the whip stitching on the bindings.

I apparently didn’t take pictures of the finished ones for J after I’d sewn down the binding.  (Sometimes I wonder why I take so many pictures of one thing and then forget to take a finished picture.)  I was quite happy with them!  My cousins liked them, too, and they were easy for them to pack and transport back to their homes.
 

Blog tags

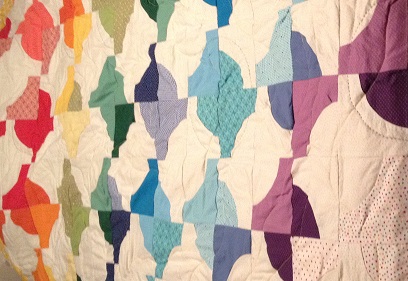
I want to make the blog more reader-friendly, and I realized that tags are a good way to do this.  I’ve gone through all of my posts and added tags based on various themes. I’ll tag this post with all of them so you can more easily find anything you’re interested in, and my goal is to be more conscientious about tagging in the future.

In the course of doing all my tags, I realized that I posted twice about the Storm at Sea runner I made my parents, once in 2011 and again last December during my Advent posts.  Perhaps if I’d had a better tagging system I would have remembered that I’d done it before!  It was fun to go back and look at the old posts – I’d forgotten what some of the blocks were called and I had to read the posts to see which quilt I was writing about.  Most of my pre-blog quilts are on here, although I know of at least four that aren’t.  Perhaps those will be fodder for Advent 2014!

The tags fall into several categories: block type, type of item if it’s not a quilt, language if I was quilting in something other than English, etc.   The blocks I have thus far are as follows:

Drunkard’s Path – Storm at Sea – Hunter’s Star – Lone Star – hexagons – pinwheels – Steps to the Altar – Rail Fence -Windowpane – Log Cabin – “Elegance” fan block – Korean patchwork – Amish Square – Bow Tie block

If you happen to notice that I have the wrong name for a block or if there’s another name for it, please let me know!  In one case – the wedding quilt I made for my friend N last year – I’m not sure if there is a name for this kind of quilt.  (https://habibihomemade.wordpress.com/2013/07/16/wedding-quilt-for-n-and-a-part-i/)  If there is a name, please share it with me.

I made a tag for doll quilts, since I make so many of them, and if I used a particular block I tagged that as well.  I may have missed some, so leave a comment if you notice that a block went untagged.

Tags for non-quilts include, in no particular order: pot holders; kitchen/household; holiday; decor; pillows; napkins; clothing; ornaments; aprons.

I’d forgotten how many pillows I’d made, for example.  Kitchen/household covers pot holders, napkins, and aprons; aprons fall under clothing, too.  Decor includes pillows, runners, and wall hangings, but runners and wall hangings don’t have separate tags.  Holiday includes ornaments and stockings, the latter of which also don’t have a separate tag.  If you think it would be helpful for me to make a runners tag or a wall hangings tag or a stockings tag, let me know.  If you see anything I haven’t tagged that you think I should – a quilting design or a specific stitch or whatever – just leave me a comment.

Hopefully this way my blog will be much easier to navigate.  I like to read other quilters’ blogs and I’ve learned not just from what other people are making but from how they’re blogging about it.  Tagging struck me as a relatively easy way to be more accessible.  This is for you, so feel free to give me your input.  If you want a “wedding” tag or a “birthday” tag or some other category that you think would be useful, I want to know about it.

Enjoy!

Pot Holders – Part VII

Happy fourth week of Advent!  It’s a pretty short week – Christmas is almost here.  We’ve also reached the end of the pot holders.  Somehow a full week of pot holders seems fitting.

This final set of pot holders is for my Aunt D and my Uncle S.  Aunt D loves bees and the whole idea of making the pot holders came from an idea I had to make her two pot holders, one with a bee hive on it and one with a bee on it.  I scrapped the bee hive idea and instead made one pot holder that I hand quilted a bee onto, and another pot holder in a blue and yellow print. Aunt D uses those colors in her home decor so I thought it would match.  I’ve saved this post for last because I only finished the hand quilting on the bee on Wednesday or Thursday and I didn’t actually finish the pot holder until Friday.  I was going to split it into two posts, but I’ve been trying to do a longer post each Sunday and I figured we can have an extra long post on our last Sunday.

Here are the fabrics I started with.  I think I mentioned at some point that I had intended to make little loops for hanging the pot holders out of ribbon, hence the ribbon in the picture below.  (I later discarded the idea.)

Assembly:

I’ve marked out the bumble bee in silver pencil.  You may note that the final design differs slightly; when I described it to Z, he felt very strongly that a bee should have a stinger, so I added a small stinger, as well as antennae, none of which appear in my drawing.   It’s obviously not a very accurately drawn bee, but I think it’s cute.

For the blue and yellow print, I originally chose the same crisscrossing design I’d used on some of the others.  You’ll see later that I changed this design slightly, too.

I chose a royal blue thread for the blue and yellow print.

At this point, I decided that the royal blue looked navy.  (You may remember that I felt the same way making T and B’s pot holders.)  I switched threads to a brighter blue that matched the print better.  I also changed my design slightly.   I don’t know if it shows up in the picture, but I decided that rather than using the crisscrossing pattern, I would quilt the square on point that the pattern had created at the center of the pot holder.  I then drew lines where the on-point square hit the big X, making another square inside the square on point.

Those are my Yankee pajama pants (and feet) in the background.

I did the machine quilting with the lighter thread in one continuous movement.  I would do the square on point, then the inner square, then the square on point, then the inner square, all the way around twice.  I think you can see what I mean in the picture.

Here’s all the quilting done:

Now, the bee:

Here’s the little stinger.  I made it very small on purpose.  I wanted it to be cute, not threatening.

The finished bee:

I added the strap:

Finally, all of the pot holders are finished!

Pot Holders – Part VI

More pot holders!  This set is for my sister, N.  She loves moose.  I made her a moose quilt once.  I collected moose prints for several years and finally for her birthday a few years ago I made her a quilt entirely out of moose fabric.  I’m not sure I ever blogged about it – I’ll have to look into that.  Anyway, I had so much moose fabric that there’s still some leftover, which I used for the pot holders.

The fabrics:

In progress:

Marked for quilting – as you can (hopefully) see in the picture, I marked a square in the center of each pot holder.  I went with the simpler quilting pattern in order to show off the prints.

I quilted them with a light green thread that matches the grass/background on both prints nicely.

I’ve only got one more set of pot holders – probably everyone is sick of reading about them by now.  Personally, I’m excited to gift them!

Pot Holders – Part V

Today, I’m showing pot holders for my cousin T and her husband B.  You may remember from the quilt I made for them a couple of years ago that T’s favorite color is green and B’s favorite color is blue.  I wanted to make them pot holders with their favorite colors, but I wanted them to kind of match – like Aunt M’s did.  I ended up picking fabrics from a 6-piece fabric collection I’d bought with a peacock theme.

Aren’t they beautiful?  I love these fabrics.  I will definitely be using these again.

I went with the simpler quilting again, just the square in the center.  I chose royal blue thread but it came out more like navy, so I wish I’d picked a more vibrant blue.

They look great, don’t they?

Pot Holders – Part IV

This is truly the week of pot holders.  Today I’m featuring the pot holders I made for my brother R and his fiancee M.  You may recognize the fabric – I used it to make napkins for Anlichan’s brother and his wife when they got married back in the spring.  (https://habibihomemade.wordpress.com/2013/04/23/wedding-present-for-anlichans-brother/) I’m reusing it here because a) it’s beautiful fabric and b) M has a very sophisticated, classic decorating style and I think this fabric matches that.  You may also note that this fabric is the same as one of Aunt M’s fabrics but in a cream/red palette instead of a cream/purple palette.

First, the fabric:

Like I said, gorgeous.  I love it.  I wish I had more.  🙂

I made my sandwiches:

I marked them for quilting using silver pencil.  I used the same crisscrossing geometric pattern I’d used for Aunt M’s pot holders – basically, I drew a square one inch from the edge.  Then I drew diagonal lines from corner to corner.  Then, I drew lines parallel to each corner-to-corner diagonal, two inches apart.  That created the crisscross.

I quilted with a cream colored thread.

Here’s a picture of the partial quilting:

Here’s one of the pot holders, completely quilted:

I had to do a little more work to make my straps because the fabric I had leftover wasn’t wide enough.  I had to sew together two narrower strips to make one strip that was sufficiently wide enough.  These are the finished strips, ready to be sewn again lengthwise to form the straps on the pot holders.

Here’s a finished pot holder:

Pot Holders – Part III

Today I’m featuring the pot holders I made for my Uncle P.  I used plaid fabric because that’s neutral and masculine.  (Uncle P isn’t married; most of the pot holders I made were for couples and, honestly, I chose my fabrics based on the female half of the couple’s aesthetic preferences.)

I followed the same procedure as before: I made my little sandwich of fabric, batting, and insulating batting, and then I sewed around the edges.

Once I turned the pot holders right side out, I quilted them.  I did a simpler design than for Aunt M’s potholders – just a square, drawn two inches in from the outer edges.  I used blue thread.  The only problem I had was that the fabric is woven and it stretches more easily than non-woven fabrics do, so my traced line for the quilting moved a bit as I went along.  I think you can see that in the picture.  Lastly, I sewed on the straps.

I think my pot holders look really cute, but they’re larger and stiffer than most pot holders and I’m afraid that might make them hard to grip.  If that’s the case, people can always use them as hot plates (trivets) instead.


Pot Holders – Part II

I apologize again for the technical issues I’ve been having.  Yesterday we stopped right before I did the quilting on Aunt M’s pot holders.

Here are the crisscrossing patterns I did:

IMG_1362

IMG_1363

Then I wanted to add the the straps.  I cut out extra pieces from the fabrics I’d used, approximately 6″ wide and 11″ long (maybe a little longer).  I folded them in half lengthwise and sewed along the long edge, then turned them inside out and ironed them flat.

I took my pot holders, now quilted but still with the openings on parallel sides.  The battings were poking out a little bit and I cut them down so that I could fold the fabric in.  I inserted one end of each strap into each opening and pinned, then sewed down.  I made sure that the strap was on the non-insulated side.

IMG_1364 IMG_1365

Voila!  Pot holders.

Pot holders – Part I

Now that we’ve finished Z’s quilt, I’m moving into Christmas presents. First up: pot holders.

I don’t have a particularly large family, but most of my relatives live within 45 minutes for each other, and they’re very close knit.  It means there’s a lot of gift giving.  Everyone gets presents.  To try to allay the cost of all the presents, I try to make presents rather than buy them.  This year I decided to make pot holders.

As you know, I prefer not to post about gifts until the recipients have received them, but I purposely haven’t told most of my family about the blog just in case – since I’m frequently making gifts for them.  I think it’s unlikely any of them will stumble upon it between now and Christmas.

I started by buying the insulating kind of batting that I’ve seen in quilting catalogs.  When I ordered it online, the website said to use an additional layer of regular batting, too, so that’s what I did, but I’m not sure that’s necessary.  I used InsulBright but I’m sure there are other brands.

IMG_1275

My original plan was just to make square pot holders, but the InsulBright instructions said to direct the shiny side of the insulting batting toward the heat source, because that side reflects heat.  That made me worried that, if someone held the pot holder with the non-shiny side facing the hot surface that they might get burned.  I thought about how to designate a right side and a wrong side of the pot holder, and I finally decided to add straps to the “wrong” sides of the pot holders.  You’ll see that coming up.  I made six sets of pot holders and I’ll cover one set each day.

I’ll start with the pot holders I made for my aunt M (and my uncle R).  You’ll remember that Aunt M loves the color purple and I made her an all-purple quilt last year.  I chose purple fabrics for her pot holders, too.  It’s a joint gift, but I’m afraid I prioritized Aunt M’s style over Uncle R’s.  I don’t think he’ll mind.  Here are the two fabrics.  I had originally planned to make little hanging loops, hence the ribbon, but I scrapped that plan once I decided to make the straps.

IMG_1294IMG_1260

I wasn’t sure how big to make the pot holders and I decided on approx. 9″ square.  (I think normally pot holders are more like 7″ or 8″ square.)  I cut out two 10″ squares from each of the purple fabrics.  I laid out the regular batting, then the InsulBright with the shiny side facing up, then one fabric square (right side up), and lastly one fabric square (right side down), so I had a four-layer sandwich.  I pinned the layers in place and cut around the edges.

IMG_1292 IMG_1291

I marked my sandwich with pins to denote where I should sew around the edges and where to leave the edges open.  This was for two purposes: first, so I could turn my sandwich right side out, and second, to leave space for where I’d be inserting the straps.

I sewed around the edges, leaving approximately 3″ open on parallel sides of each sandwich.  Then I turned them right side out.

IMG_1327

Next, I did the quilting.  I quilting most of the pot holders by machine, including Aunt M’s.  I traced geometrical designs with silver pencil.  I think the above picture is too small for the designs to show up, unfortunately, so you’ll have to take my word for it.  I sewed the designs with purple thread.

IMG_1350

I’m afraid I’ll have to continue this post tomorrow, as I’m having an issue uploading my pictures to the site.  Hopefully I’ll be able to resolve it tomorrow and I can show you the quilting.