June Charity Sewing

Habibis, I have to confess that June was the first month in which I didn’t keep my resolution of dedicating one sewing day a month to charity sewing.  I was trying to meet an end-of-June deadline for something (which I missed anyway), and I had so few sewing days that I wasn’t willing to sacrifice one for charity sewing.  That being said, I did do a little bit of charity sewing.

Yes, that’s right, the Handstitched projects are back!  This one was designed to be a tote bag, but I don’t need an embroidered tote bag, so I decided to make a doll bed instead.  Months and months ago I made my little EPP hexagons, all in green/leafy prints, and cut out my light blue square to serve as the background.  Finally in June I pulled it out, embroidered the trunk with a stem stitch, and started to attach my hexagons.  I’m almost done.  I may do a little more embroidery and then I’ll add some kind of border and sandwich it to get it quilted.  I’d love to have a couple of finished doll quilts when my guild meets in September, but we’ll see how summer sewing goes.

I’ve seen other people sew their hexagons on by sewing across from corner to corner, and I love that look.  In this case, I wanted to make sure the ends of my embroidery were covered up, so I sewed around the edges.  In the Handstitched course, Rachel had suggested pre-attaching hexagons that would be adjacent, prior to sewing them down, but I didn’t bother with that and just sewed one on top of the other.

Medallion baby quilt for P and J’s baby – Part I

Hi habibis!  The month of May has been quite busy so far and I never got around to my second post last week, nor will I be participating in the Bloggers Quilt Festival this spring. It’s just too much.  I hope I can make up for it with this bright and cheery baby quilt I made!

My friend P and her husband J just had their first baby!  Baby S is adorable and I was so excited to make her a present.  I decided to use some of the scraps from P and J’s wedding quilt, which are lime and teal, and add some pink and a little orange.  They live in a tropical place and I wanted bright tropical colors.

I mentioned in my Handstitched posts that I’d always wanted to make a medallion quilt, and I started with making the dogwood blossom center for this one, too, in solid teal on a lime and teal print.  (This is the one where I had trouble with the wax paper applique.)  Then I added a border in the same lime and teal print.

For the next border I pulled out my scraps from P and J’s quilt.  It was a hexagon quilt, so I ended up with a lot of little triangles leftover from cutting out the triangles.  I sewed the triangles together in pairs to make little rectangles.  I cut them down to all be the same size and sewed them into strips.  I added a bright print at the corners.

I used a cute print from my Aunt D’s stash with the lime and teal print for the next border.

I had two leftover pinwheel half hexagons from P and J’s quilt, which I used as the centers for the next border, framed by a cherry blossom print and a coordinating coral print from the same set.  (I kept sewing them at the wrong angles and having to rip them out.)

For the fifth border, I used lime and teal solids.

The sixth and final border is strips of orange, yellow, green, and teal.

It’s pretty cool-looking, right?  It’s crazy busy, but my quilts generally are.   I think the center and the first three borders are cohesive, and then the outer three borders are less so, but I like it anyway.


Octopus Baby Quilt – Part II

Hi habibis!  Welcome to part II of the octopus baby quilt I made: applique.

I traced a piece of white fabric in my best approximation of a sailor hat.  I sewed it, right sides together, to a scrap of muslim or some kind of light fabric.  Then I cut a slit in the muslin and turned it inside out so I’d have finished edges.  I embroidered the lines in a variegated blue thread.  Then I machine appliqued it using white thread.

When I got close to finishing the applique I stuffed batting in and then sewed it closed.  I hadn’t done this before – I made it up as I went along – and I’m sure there are better methods of doing this, but it worked.

Next I moved on to the fish.  I used all yellow and orange fabric scraps.  I cut them into various sizes of squares.  I sewed them to more little scraps of muslin, same as with the hat, and used the same method to turn them right side out and get the finished edges.

I embroidered little eyes and smiling mouths using the variegated blue thread.

I made little tails out of scraps of yellow and orange fabric.  I folded small squares or triangle scraps, right sides together, to make a smaller triangle and sewed around the edges, leaving one side open to turn them inside out.

I sewed the open sides of the tails closed.  Then, once I decided the layout of the fish, I pinned the tails appropriately, matching yellow to yellow and orange to orange.  Using coordinating thread, I sewed down the center of each tail, so the side points aren’t attached to the quilt.

Next I appliqued the fish.  I sewed three quarters of the way around each fish, attaching it to the quilt stop.  I stuffed batting into the opening, and finally I sewed the fourth side closed.  (Again, using coordinating thread – yellow for yellow and orange for orange – because I wanted the thread to blend in, not to highlight the applique method.)

Lastly, I covered the rough edges of the octopus in a zigzag with lime green thread.  I think I’m getting better at the zigzag/satin stitch on my machine – look, I’m even using the right foot!  (Boy, does that make a difference.)  I started doing a satin stitch by hand, but it took way too long, so I went back and did the zigzag all the way around, covering my initial stitches.  (I’d done the left side of the head and part of a tentacle, and that was it.)  I hand stitched the one line below to delineate between two different tentacles, one behind the other.

The center of the quilt with all the applique finished:

Tomorrow I’m going to post about my incoming/outgoing totals for the month of April, and next week I’ll post more about this quilt.

Octopus Baby Quilt – Part I

I’ve been working on this quilt since January!  Now I can finally share it with you.  In this post, I’ll share the design  of the quilt and the applique I did.

I’ve known for a long time that I wanted to make an octopus quilt for this baby.  When Sew Fresh Fabrics was closing and having its big sale, I bought a ton of blue Kona solids and some green for this quilt.  I used Kona’s Jade Green for the octopus.  The blues for the ocean background are various shades of Kona solids and one batik-y blue that I had in my stash.  I envisioned the ocean background being more improv pieced and wonkier, but I guess (being relatively new to that) I manage that better working with scraps than when cutting from yardage.  I wish now that I had cut much small pieces to do the improv piecing, but instead I cut long strips.  Some of them are angled but not enough to really look intentional.  Oh well!  It still looks pretty cool, right?

The octopus is appliqued using fusible applique.  I traced the octopus shape I wanted on the my fabric, then cut it out and laid it onto the applique paper and cut it out again.  I know that’s not what you’re supposed to do, but the octopus was larger than one sheet of paper.  It worked out alright, except some of the edges weren’t covered 100%.

Before I appliqued the octopus, I traced the eyes and then embroidered them.  It’s just the outlines.  I’d considered filling the outlines in but I decided I liked how it looked.  I embroidered a smiling mouth, too.

Next week I’ll share more about the applique!

Appliqued Doll Quilt

My doll quilt involved some applique practice and getting rid of scraps.  My guild makes stockings and stuffed animals around the holidays, and a couple of years ago I wanted to make stuffed animals but I didn’t realize that I needed to blow up the pattern to a larger size.  The pieces came out so small and I gave up on the stuffed animals.  (I think I made one tiny dinosaur.)  I had pieces cut out, including pieces to make a stuffed dog.   I also had a blue circle shape – leftover from this present I made for Anlichan.

I took the two ear pieces and sewed them right sides together, then turned them right side out. I turned the open end under and stitched it down to the dog body piece.

I had already embroidered the dog’s eye and nose when I was going to make the stuffed animal originally, so I didn’t need to worry about that.  I machine appliqued the dog to the blue circle with yellow thread using a zigzag stitch. (I’ve since learned that it works better if you use your satin stitch foot!)

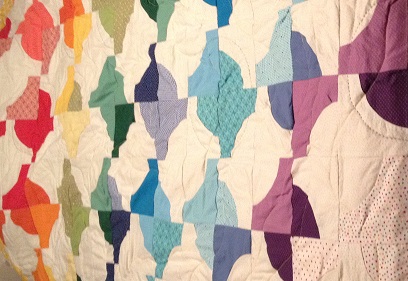
I fused that to a large square of the polka dot fabric leftover from my polka dot Drunkard’s Path comforter.  I used a blanket stitch to hand applique it down.

I used batting scraps and a square of the shirting fabric that I’m still trying to get rid of to make the quilt sandwich.  I quilted a spiral from the circle outward to the edges.

Here’s how the quilting looks from the back:

Then I squared it up and I added the binding.  I used the leftover binding from the American flag quilt I made.  I hadn’t measured it to make sure it was long enough, but I got lucky and it was slightly longer than I needed.  (I didn’t want to make binding, and the red, white, and blue looked cute with the blue and yellow fabrics in the quilt.)

I realized as I was sewing the binding down that the shirting fabric had a little stamp on it, and that the marks showed.  So I made a little quilt tag to cover it.  It says “For someone special.”  Maybe I should make little tags for all of my charity quilts in the future.