WIP Wednesday: Hexie doll quilt

Hi habibis!  My hexie doll quilt is definitely a WIP.  I make a little bit of progress every week.  I’m in the final stages of the planned embroidery – filling in some of the leaves with satin stitch.  When that’s done, I’ll layer it and get to quilting!

Hexagon wedding quilt – Part III

This week I want to talk about the machine quilting on the hexagon wedding quilt I made for C and J. I did machine quilting on two sections of the quilt – first on the center with the hexagons, and then on the borders. I started with the center hexagon.  I traced lines (I think an inch? maybe?) from the outer edges of the hexagon.  I did it in purple thread.  (Note: Looking at my pictures, I see that I traced the center hexagon and the ring surrounding it, then quilting the ring surrounding it, and then went back and quilting the center hexagon.  I can’t remember why.)

Next I did the light blue ring of hexagons around the center.  First I traced lines (an inch – I’m pretty sure it was an inch) around the outside of the center hexagon.  I did two more rounds of quilting in this ring of hexagons – one round of quilting an inch in from the outer edge of the hexagons and one round of quilting touching the corners of that, making a large hexagon.  I did that in light blue thread.  I think you can see that in the pictures above as well. Then I moved to the purple ring and I did two rounds of quilting, along the inside edge and the outside edge of the ring.  (It’s hard to describe the quilting designs I did here, but I hope the pictures make it clearer.)  I like how the quilting came out – it’s very geometric and cool.  I did that in purple, and then the blue ring in my royal blue thread.

For the purple half-hexagons along the top and bottom of the quilt, I did a line following the half-hexagon edge of each one, in purple thread.

I also still had clusters of blue hexagons in the corners to be quilted.  I made this kind of weird shape:

For the inner border, in the blue and white print, I took navy thread and I followed the line of the triangles up and down the sides of the quilt.

I made this design along the top and bottom of the inner border, mirroring the line of the quilting on the hexagons forming the border. I don’t know how else to describe it.

That left the top and sides of the navy border.  I considered using this motif, which I had used on Z’s quilt, but it was too wide.

I chose this narrower one, instead.  I used my template plastic to make the templates.

I started going across the top, with a light and a darker purple thread.  They both read too pink for me – I think they both had red undertones that came out more strongly against the blue background.

I switched to bluer purples for the sides but they still look rather pinker than I wanted.  Perhaps I should have chosen blue threads instead, but it still looks nice.  It wasn’t quite what I was going for, but I guess I really don’t own any blue-purple threads.

Here you can see the contrast in the thread colors and where I switched at the corners.

Here are some pictures of the back:

A picture of the finished quilt, looking lovely, if I do say so myself.  I used my parents’ pool chairs for the pictures (outdoor pictures! rare for me!).  (The bottom looks weird because I covered up C and J’s names.)

The end!  Next week we’ll have something different.

Hexagon wedding quilt – Part II

A couple of weeks ago I posted about how I pieced the top of the hexagon wedding quilt for my friend C and her now-husband J.  I forgot to show the back I pieced from large pieces of purple fabrics:

I also forgot to post that I added a navy border around the edges.

I did all of that in January and February, believe it or not.   Then I put it aside and worked on my other projects until I was able to go to my parents’ house in March and put it together.  I took a day off before Mom and I went on our first quilt retreat to do that.

I’ve showed you how I use the ping pong table to put the quilts together.  This time I taped the batting down to keep it flatter – I’ve since been given a tip to unfold the batting the day before so the folds have time to relax, so in the future I’ll be doing that (and the tape, probably).  I laid the quilt top over the batting and rolled the two layers into the center.  Then I laid down the backing and unrolled the batting and quilt top over it.  I safety pinned the three layers together.

I made this quilt before I learned how to do binding – I know!  I learned how to do binding approximately 24-36 hours after I put this quilt together.  So I folded the edges under the way I used to and sewed them down.  It’s my last non-bound quilt, ever.

I only did a little bit of hand quilting.  C is 100% Italian and J is half Italian, and I wanted to put a special message for them on the quilt.  I asked around for what you would say in Italian when people got married and the consensus, from my cousin T and coworkers who speak Italian, was “Auguri,” which means congratulations.  (I checked with C’s father, as well, in case there was a special regional word that might be used instead, and he agreed with “Auguri.”)  I chose my pretty blue variegated thread and I quilted “Auguri” and their names and the wedding date onto the bottom border of the quilt.  I left the rest of the border for machine quilting, and I’ll post about the machine quilting next week.


Hexagon wedding quilt – Part I

I hope everyone had a great holiday weekend!  I got a lot of work done on various projects, but for the next couple of weeks I want to post about a finished quilt.

My friend C just got married and I made her and her now husband, J, a quilt for their wedding present.  I actually started it months ago – back in January – and I put the layers together in March and did most of the quilting at the March quilt retreat I went to.  Now that the wedding has happened I can finally post about it!

C’s favorite color is purple and J’s favorite color is blue.  I had an idea that I wanted to do hexagons, because (as you’ve heard me mention) I love hexagons.  Remember when I was working on my quilt for myself?  I picked out some of those fabrics after I had cut the pieces for C’s quilt.  I also made this before I had my hexagon tool, so I cut a triangle out of template plastic and used that.  I used the triangle from the pinwheel quilt I made for P and J, even though this one isn’t pinwheels.  I measured the height of the triangle, cut strips of that width, and then cut my triangles out.


Once I had my piles of triangles, I started sewing them together.  I sewed two of each print together, then ironed and added a third to form all of my half hexagons.

I had cut extra triangles  (it never hurts to have too many!)  which  I’m saving for a doll quilt or something.  They’re probably buried somewhere under a pile of other fabric.  (Speaking of doll quilts, I haven’t made one in ages.  That’s on my to-do list for the summer.)

Here’s my sketch for the design of the quilt and how many hexagons and half hexagons I needed.

When it came time to do the layout, I separated the hexagons by color and shade.    Purples went in one pile, light blues in another, and dark blues in a third.  (This is where I weeded out some of the extras.)  I had this one print, which had blue and a lot of purple in it but is actually on a background that reads grey to me.  I think it’s beautiful but I couldn’t put it in any of the three piles, so I chose it for the center.

I ringed that with my six light blue hexagons, and around those I arranged twelve of my purples, trying to alternate between lighter and darker purples.

I reserved a set of four hexagons that are all from the same collection, closer to fuchsia.  Here’s a picture of one of those prints, so you can see what I mean about the shade, and maybe pick them out more easily in the full layout.

I arranged my dark blues in an outer ring.  I took the reserved fuchsia half hexagons and placed them along the top and bottom (half of each along the top and the bottom, in reverse order – so that the print at the bottom left hand corner is the same as the half hexagon at the top right hand corner, and vice versa).  I filled in the remaining spaces with blue hexagons.

For the border I chose this blue print.  I cut out triangles for the edge of each hexagon on the end of a row.

I sewed it all together by row, then sewed the rows together.  (You can also arrange your half-hexagons vertically and sew them in columns but doing it horizontally makes more sense to me.)

I did my best to keep any directional pattern, of which I had a few, facing “up.”  Some of the prints are striped or stripe-adjacent and I arranged the triangles so that the stripes would emanate from the center.  I took a bunch of close up pictures of those, so I’ll include them here.  (You can never have too many pictures, right?)  I think some of the effects are cool.

I arranged the one below so that all of the red would be at the center.

The print below was arranged so everything would sort of be “up.”

Here’s the completed quilt top, ready to be sandwiched and quilted – but that’ll be another post.


Charity quilt – part IV

Done and done!

This weekend my mom and I went on another wonderful quilt retreat.  It was so lovely and relaxing.  I worked like crazy and I finished my charity quilt!  (Also, apparently I was wrong about the quilt recipients – they’re for summer camps for kids with cancer.)

When you last saw it, I had put my quilt sandwich together.  I had also made my binding, but I didn’t include a picture of that in the last post.  (I didn’t go with my original plan for scrappy binding – I used a soft grey.)

I took everything to the retreat with me, where I began my quilting.

I hadn’t decided how to quilt it, so I showed it to my mom and she gave me the idea for diagonal lines, running in parallel to the seams, like this:

I spaced them unevenly for some visual interest, using light grey thread.  I thought it needed a neutral.  I’d thought about using light blue thread but there wasn’t any blue in the center section, so I went with the grey instead.  In some places the the quilting went into the border because I was using a different machine and hadn’t adjusted to an automatic reverse button.  I have a Kenmore and I need to push and hold the reverse button, but when I release it the reversing stops.  I didn’t bring the machine to the retreat; instead, I used my mother’s spare machine, which is a Viking that belonged to my grandmother before she died.  We’ve never used it before.  The machine has an automatic reverse where you have to take the foot off the pedal and then press the button.  Then it still goes forward a stitch before it begins to reverse.  Then you have to repeat the process to get it to go forward again and I didn’t always hit the button hard enough or remember to take my foot off the pedal.  I have it mostly figured out now, but I probably won’t be using the machine again for months, by which point I’ll have to get adjusted to it again.

I wasn’t going to extend the quilting into the blue border (intentionally) – I was going to do some other design in the blue border – but I changed my mind.  I stuck with the grey thread.  I continued the parallel lines.

I had one spot where the seam hadn’t caught one piece – I don’t know how I didn’t notice it until I was quilting.  I hand-sewed it closed with the grey thread.

For the side sections, I did a kind of zig zag design in parallel to the sides of the hexagons.  I traced lines 1.5″ in from each edge.

For the top and bottom sections, I continued the same quilting design into the hexagons above and below the side sections.  I did the same design for the other blue hexagons.  For the remaining orange pieces I quilted an X across the center of each one.  (What would you call the shape of the orange pieces, an hourglass?)  In the picture below you can hopefully see the design traced one of the orange hourglasses.  (I made a mark 1.5″ in from each edge and a mark in the center of the narrow part, then drew diagonal lines from one side to the other through the center.)

Here are pictures of the quilting from the back:

This is the first quilt I’ve ever bound.  I did it all by machine because I was in a rush.  (Also, because it’s a charity quilt.)  I sewed the binding onto the back first, then flipped it over and sewed it onto the front.  I used the grey thread for both just in case it showed.  (In a couple of places, it did.)  I didn’t sew the binding perfectly and I’m not sure if the soft fabric might be slightly to blame for that, but I’ll also get more skilled with this in time.  (I had a needle issue, too, which we fixed later.  It was my fault – I hadn’t taken out all the safety pins along the edge and I hit one.)  I didn’t finish the binding properly so there’s a bit of a bulge.

The quilt is finished!  Yay!  This one was a lot of stress.   I’m happy with the final product, but I wish I’d gone with something much simpler and less time consuming.

Charity quilt – part III

Hello all!  When we met last week I was rather stressed about finishing this quilt by my mid-June deadline, but circumstances have changed and I got an extra two days to sew this week.  I now have a completed quilt sandwich, ready for quilting and binding when I go on my quilt retreat next weekend!

Last week I had put together the center section and most of the side sections, but not the top and bottom.  I had plenty of leftover half hexagons.  (I still do!)  I alternated the orange and the blue plaid pieces so that the blue plaid formed a full hexagon.  I put a dark grey on each end, over the dark grey at the top of each side section so they matched up.

I measured how much space I needed to add as a border so that my side sections and my top and bottom sections would match up.  I used more of the light blue and added a small border – 1.5″ – all the way around.

One side of the quilt is longer than the other, so my blue border got somewhat cut off in a couple of places.  I thought I had a picture of it but I couldn’t find it.

I sewed the sections together to finish my quilt tops.  I had originally planned to add an additional solid border using a light grey fabric, but the top and bottom sections were large enough that the quilt top was already done.  It came out around 66″ by 88″.

I’d been saving a large piece of fabric for the back.  When I finally measured it, it was long enough but not wide enough.   I have seen other people add leftover blocks to their backs, which I always thought looks cool, but I didn’t think I would have time originally.  However, since I had the time and even more extra half hexagons, I had the opportunity to do so.  I sewed two more rows of half hexagons, alternating orange and blue plaid just like on the front.  There’s an extra orange half hexagon on each end to make it long enough.   I added two strips of the light blue and a wide strip of the soft light grey fabric, plus the large piece, to make it big enough.

I used the remainder of the grey fabric for my binding.  I was afraid it would be too soft for binding, that it might slip around or not hold well, but it seems like it will work well.

Normally, as you know, I like to put my quilts together at my parents’ house, but I didn’t have time for that.  There’s a studio near me where you can rent table space, which was my back up plan, but again I didn’t have time.   I had to resort to putting the quilt together on my floor, which required me moving all the furniture and cleaning the floor.  I safety pinned the quilt and now all I have to do is quilt and bind it.

My quilt top was almost as long as my batting, and it was a bit of a tight squeeze.   I don’t have extra batting like I normally would, and I know you’re supposed to have an extra few inches around on every edge, but I’ll survive.  I’m sure the quilt will still come out fine.

Here are all my leftover pieces – I’ll have to use them in some future charity project.


Charity quilt – part II

Happy Memorial Day!  I hope you’ve all had a lovely holiday weekend.

I know I haven’t posted about either of my big quilts in a while.  It’s because I have so much to say – and so little time to draft my posts – so instead I’ve been writing short little posts about presents I made for people.  Don’t worry, though, I haven’t been neglecting my charity quilt or the Hunter’s Star quilt!  I’ve been working on both of them, as quickly as I can.  I wanted to post about my charity quilt today because I did so much work on it this weekend.

The charity quilt has been giving me agita.  There are several issues at play here:

1. I have two months to complete this quilt, from mid-April to mid-June.  Two months is enough time to make a twin-sized quilt, but not when I’m out of town five of the weekends in between.  I should not have committed to this quilt, although at the time I don’t think I realized what my May and June would look like, and I was really excited to participate.   On the upside, the last weekend before the quilt is due will be my quilt retreat, so I’ll have time to work on it then.  However, I wanted to have the quilt top done this weekend and the quilt assembled before I went to the retreat, so I can focus on the quilting and the binding on the retreat; it’s increasingly looking like I not only won’t have my quilt sandwich assembled but I won’t necessarily have my quilt top done before the retreat.

2. I chose too complicated of a design, given my time constraints.  I love hexagons and I really wanted to do that, but hexagons require a lot of cutting and piecing.  I should have chosen something simpler, like a strip quilt.  It wasn’t until this Saturday that I realized how much trouble I was in due to the complicated pattern.  Over and over this weekend I bemoaned to myself the fact that I didn’t choose a simpler design.

3. I probably could have finished the quilt top this weekend, even with the complicated design, had I spent the full three days sewing and done nothing else.  However, I had some plans with friends and with Z and I lost about a day of sewing there.

Anyway, enough griping.  To the quilt!

I think I mentioned in my last post that I cut triangles for the hexagons and then at some point figured out that I could use my Hex’n’more tool to cut half hexagons, which would be faster.  So I ended up with a big pile of triangles and a big pile of hexagons.  I’d had some time to think about the design I wanted (because I had two travel weekends in between cutting and sewing) and I decided for to make a big block in the center with the triangles.  I decided to make stars with them – six pointed stars, made from a hexagon and then an additional triangle on each spoke, like this:

I made my stars and then filled in around them.  I ended up making six stars: a light grey stripe, a grey and orange stripe, a dark grey, two dark oranges, and a light orange kind of check.  In the picture above, I’ve already laid out three stars (which I later moved around) and the dark grey and dark oranges are still piled up.  I used a different light orange check and the remaining grey and orange stripe as filler.

I used up almost all of my triangles.  I have a few left over – they’ll be reappearing in some charity project or another in the future.  I sewed them into rows and added the blue triangles to the ends to square off the edges.  (They are also cut from a 4.5″ strip, just like my triangles and half-hexagons.  I cut the strip into 3.5″ pieces and used my Hex’n’more tool to cut two of the triangles from each piece.)

I don’t know if you can tell in the above picture, but the bottom row in the picture has a mistake.  The orange half-hexagon in the center is upside down.  Luckily I noticed it before I attached all the rows together and added the bottom three rows. (My bed wasn’t long enough so I waited to do the last three rows until the end.  The last three rows mirror the top three rows so I was able to follow that design.  It may not show up well in pictures; the light falling on my bed distorts the colors at the end near the window.)

All better!

Below is the finished center section.  This picture has even worse glare issues.  I managed to drop my camera while I was trying to take photos, and now the lens won’t open properly, so I switched back to my phone.  Hopefully I can get the camera fixed this week.

I’m pretty happy with the center.  I don’t love the color scheme but I do really like the star pattern.  I’ll be using that again.

The center measures approximately 30″ by 70″.  Since this needs to be a twin sized quilt, I pulled out my half-hexagons to figure out a design surrounding it.  My thought was to add a thin blue border matching the edge triangles, and also use the same triangles on the half-hexagons.  I haven’t done that yet – sadly I’m not at that point!

I started with the sides, which I wanted to be approximately 18″ by 70″ (they can be a little smaller because I’ll add the inner border and probably an outer border).  I wasn’t thinking about color combinations when I cut the pieces, and I really was not happy with layout I came up with.   This caused me additional stress on Monday afternoon, when I was already worried about timing.  I’ve never made anything that I thought was ugly, and I didn’t like what I’d put together.

I even went back to my remaining fabrics to see if I had enough to finish the quilt with just wide borders.  (I didn’t.)  So, unhappily, I put this section together – it will be to the right of the center.  (Or to the left – it doesn’t matter.)

Once I put it all together and added the blue triangles to the edges, I felt so much better about it.

Doesn’t that look better?  The blue really complements the orange nicely and it looks cool and modern, instead of “Halloween-y,” as my roommate put it.  I’ve stopped fretting about it.

I sewed those rows together and sewed each of the rows for the left side section, although I haven’t put them all together yet.  Note that the left and right sections are mirror images of each other.  (Do you ever count how much more you have to do by seams you have left to sew?  I have 17 seams to sew on the left side panel.)

So here’s what I still need to do:

– Come up with a design for the top and bottom sections. (Each section needs to measure approximately 10″ by 66″. I already have some idea of how I’ll use the rest of my half-hexagons, but I need to lay them out to actually see what they’ll look like.)

– Sew the top and bottom sections.

– Calculate how wide of an inner blue border I need in order for everything to line up (and hope I have enough of the blue to do that) and sew all the sections together.

– Assemble the quilt sandwich.

– Make my scrappy binding.  (I cut leftover scraps while I was cutting out my triangles and half-hexagons but I’m not sure there’s enough.  I’m planning to worry about it when I actually get to that point.)

– Quilt it.

– Bind it.

That’s a lot more to do!  I don’t usually sew much in the evenings after work because I don’t get home until pretty late, but this week I’m going to try to devote more time to that.  I think I can do those 17 seams tonight after work!  (I should add that I still haven’t finished my Hunter’s Star quilt, although I’ve done quite a bit of quilting on it and I might make that my post for next week.  I do want to share it!)  It’s a busy couple of months here.  I’m doing the best I can to finish everything.


Charity Quilt – part I

My quilt guild does a lot of charity work, and right now they’re having a charity competition.  They got a big donation of leftover shirting fabric from Van Heusen.  I paid $5 and got a bag of fabric to make a twin sized quilt.  The quilts are going to underprivileged city kids who go to a summer camp in the summer a summer camp for kids with cancer.  I got the fabric in April and it’s due in June. I’m really excited about the competition, but I’m a little bit afraid that I’ve taken too much on – I’m very busy this spring. I decided when they announced the competition that I would make a hexagon quilt.  I love the look of hexagon quilts, and now I have this new Hex N More tool.  (One of the ladies at the quilt retreat recommended it to me.) 
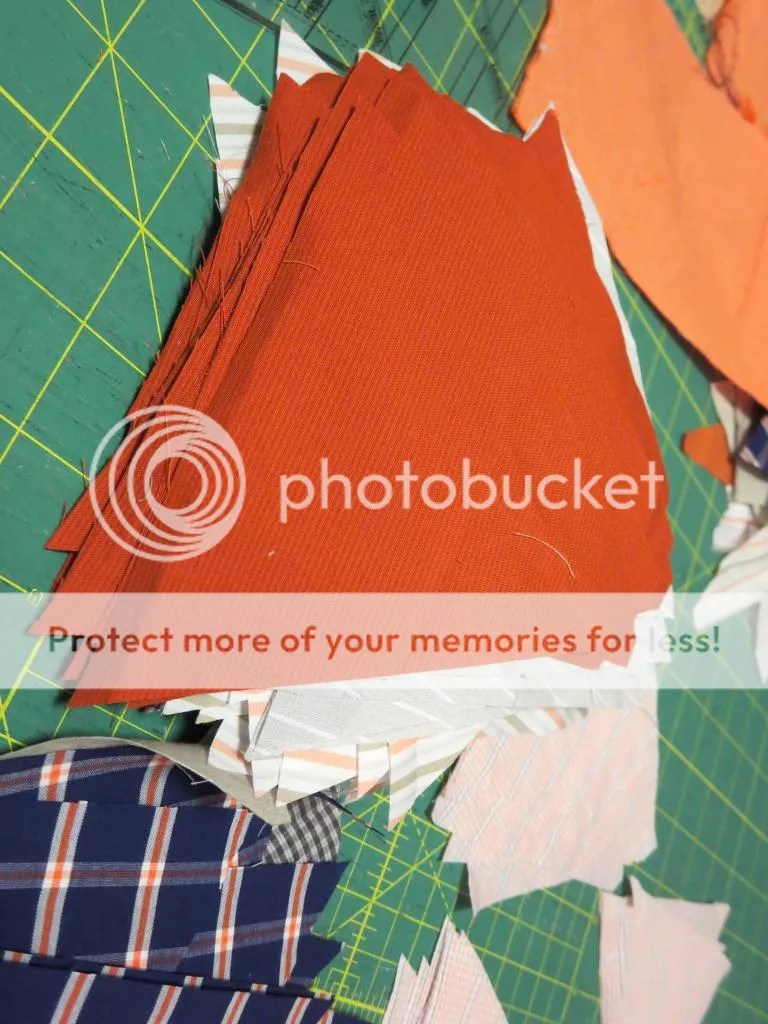
Here are the fabrics.  They’re very nice quality but the colors aren’t quite what I’d choose.  (I love orange but a couple of these oranges are kind of garish.)  I figure it should make a pretty masculine quilt, though. I started cutting triangles for the hexagons.  At some point I realized it would be faster to cut half-hexagons, only the striped fabrics would look cooler if they were cut as triangles and sewn with all the stripes going into the center.   Also, I’d already cut a bunch of triangles.  I decided to switch to half-hexagons, though.

I decided instead of making a design of all hexagons that are one size, I’ll use the triangles to make a center.  (They’ll come out slightly smaller than the hexagons made of half-hexagons.) I’ll make a narrow border and then fill the rest of the quilt with the hexagons made of the half-hexagons.  I think it’ll look really cool, assuming I have time to finish it!

Blog tags

I want to make the blog more reader-friendly, and I realized that tags are a good way to do this.  I’ve gone through all of my posts and added tags based on various themes. I’ll tag this post with all of them so you can more easily find anything you’re interested in, and my goal is to be more conscientious about tagging in the future.

In the course of doing all my tags, I realized that I posted twice about the Storm at Sea runner I made my parents, once in 2011 and again last December during my Advent posts.  Perhaps if I’d had a better tagging system I would have remembered that I’d done it before!  It was fun to go back and look at the old posts – I’d forgotten what some of the blocks were called and I had to read the posts to see which quilt I was writing about.  Most of my pre-blog quilts are on here, although I know of at least four that aren’t.  Perhaps those will be fodder for Advent 2014!

The tags fall into several categories: block type, type of item if it’s not a quilt, language if I was quilting in something other than English, etc.   The blocks I have thus far are as follows:

Drunkard’s Path – Storm at Sea – Hunter’s Star – Lone Star – hexagons – pinwheels – Steps to the Altar – Rail Fence -Windowpane – Log Cabin – “Elegance” fan block – Korean patchwork – Amish Square – Bow Tie block

If you happen to notice that I have the wrong name for a block or if there’s another name for it, please let me know!  In one case – the wedding quilt I made for my friend N last year – I’m not sure if there is a name for this kind of quilt.  (https://habibihomemade.wordpress.com/2013/07/16/wedding-quilt-for-n-and-a-part-i/)  If there is a name, please share it with me.

I made a tag for doll quilts, since I make so many of them, and if I used a particular block I tagged that as well.  I may have missed some, so leave a comment if you notice that a block went untagged.

Tags for non-quilts include, in no particular order: pot holders; kitchen/household; holiday; decor; pillows; napkins; clothing; ornaments; aprons.

I’d forgotten how many pillows I’d made, for example.  Kitchen/household covers pot holders, napkins, and aprons; aprons fall under clothing, too.  Decor includes pillows, runners, and wall hangings, but runners and wall hangings don’t have separate tags.  Holiday includes ornaments and stockings, the latter of which also don’t have a separate tag.  If you think it would be helpful for me to make a runners tag or a wall hangings tag or a stockings tag, let me know.  If you see anything I haven’t tagged that you think I should – a quilting design or a specific stitch or whatever – just leave me a comment.

Hopefully this way my blog will be much easier to navigate.  I like to read other quilters’ blogs and I’ve learned not just from what other people are making but from how they’re blogging about it.  Tagging struck me as a relatively easy way to be more accessible.  This is for you, so feel free to give me your input.  If you want a “wedding” tag or a “birthday” tag or some other category that you think would be useful, I want to know about it.

Enjoy!

Wedding quilt for P and J – Part III

Last but not least, the hand quilting:

I had two things I wanted to hand quilt.  First, their names, and second, a meaningful phrase.  (I had originally wanted to quilt their wedding date and two meaningful phrases, but I ended up limiting myself.  I had plenty to do already.)  I chose a variegated thread that’s in beautiful shades of teals – it matched the border fabric perfectly and because I did a whip stitch it was a thicker line and it didn’t blend in.

IMG_7592

I quilted their names and then I quilted a Latin phrase, “Ubi caritas et amor, Deus ibi est.”  It means “Where there’s charity and love, God is there.”  When P and I were in college, we used to sing a song with that phrase at mass.  It’s perfect for P and J, who are both very strong in their faith and who met doing service work.

IMG_7604

Here’s the finished phrase:

IMG_7646 IMG_7647 IMG_7648 IMG_7649

I kind of used a bubble print.  I intended a fancier script but it didn’t quite happen.

I made a quilt tag on the back of the quilt with their names, the date they got married, and my name.   I mailed it to them, only three months after the wedding, and I am pleased to report that they loved it.  By choosing their favorite colors I managed to match their decor without even seeing it.  🙂