Spry: turtleneck to a zippy hack

A few years ago, my now-betrothed presented to me a red turtleneck. (He went on vacation to Germany, and I asked him to buy me clothes from my favorite German store, anything he thought would suit me. And he brought me back FOUR amazing sweaters. How perfect of a man is that? To actually buy me clothes?? Clearly he is the most perfect man in the world.)  I loved the turtleneck, but didn’t wear as often as I should have, because the neck was a little tight, even for a turtleneck. Slowly I began to envision a hack…

Initially the plan was to turn the sweater into a cardigan. Then I opted to make it a zippered-hoodie type sweater. Then I realized the zipper I got is for cushions, ie it doesn’t come apart at the bottom. So now it’s a… faux-zippy sweater, I suppose.

I measured the sweater from top to bottom, and acquired the appropriate length zipper. I put the sweater on and positioned the zipper appropriately, and marked w/ chalk the line I wanted. (I off-centered it to make it futuristic and chic and edgy and stuff!) Luckily this was a ribbed sweater, so the line was very easy to cut. Next I pinned down the zipper, one side at a time, using lots and lots of pins and patience, and sewed the whole thing up in a relatively straight line. (I’m sure you can also just go ahead and sew on the zipper before you cut the shirt open, and then just cut around the zipper once it’s sewn into place. That would ensure that both sides are more equal. Using a zipper foot on the machine probably would have also helped things in general, except I don’t know how to use that yet. Next time!)

The zipper is khaki/beige. I used a red thread, mainly so you can’t see the stitching on the front, but also to add some contrast to the back, which is visible when the zipper is open.

plain jane turtleneck to versatile asymmetrical zippy

I dare say I’m rather pleased with the result, although I did end up stretching one side longer than the other. I like how now I can wear it still as a functional turtleneck, but also as something a little more fun. I also like that the zipper breaks the sheer redness of the shirt up a little (altho I love red, I know it can be a bit much at times), and adds something interesting.
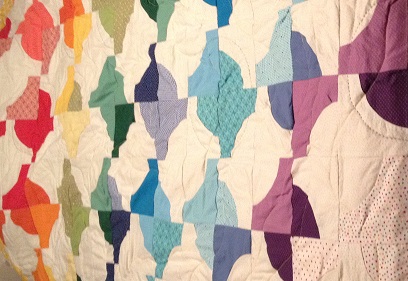
Rozsamaria: Completed quilt

I’ve finished my quilt for my cousin T and her husband B, just in time to give it to them at Thanksgiving.  I had the top assembled last time, but now it’s completely done.

I bought fleece to use as the backing for my quilt.  I bought green and blue felt (green is T’s favorite color and blue is B’s favorite color).  I was hoping to use only green for the back, but I didn’t have enough, so I cut two large squares from each and sewed them together.  Then, I laid the top over the back, right sides out, and pinned them together, beginning from the middle patch and working my way outward.  It didn’t come out completely smooth, but my pinning never does.

Once I had the layers pinned, I pinned the edges under and sewed them together.  Then I started the quilting.  I had alternated patched blocks with solid blocks, and I decided to do the quilting on the solid blocks.  With each block, I either quilted the outline of a graphic on the block or I traced a shape onto the block and quilted that.  For example, one patch had leaves on it and I quilted an outline of the leaves.  On other patches, I traced a flower or a heart shape from a quilting book (“Material Obsession: Modern Quilts with Traditional Roots” by Kathy Doughty and Saray Fielke) and used that as my design.  I bought special chalk pencils that are supposed to be water soluble and used that to do my tracing.  (Naturally, they aren’t quite water soluble, but I’m sure I’ll get used to working with them.)   I used different threads to pick out the colors in the patches.  Pictures below:

I outlined the hibiscus flower in navy thread.

I sewed a heart using blue thread slightly darker than the blue in this patch.

I outlined a couple of the stars in matching green. I'm not sure it shows up in this picture.

I quilted a flower in a deep pink to match the hibiscus flowers.

I used a pink thread that matched the lanterns in this print.

Again, I matched the pink thread to the flowers in the print.

I don't know if the blue thread shows up in this picture.

I outlined the scroll in a matching green thread.

I wanted to outline one of the birds, but I didn't think I'd be able to do it properly - I don't do that well with sewing on a curve - so I simply chose green thread and quilted a flower.

I outlined the leaves in green.

I did a flower in matching blue thread.

I quilted a star in gold thread.

I’m really pleased with the way it came out, especially since I finished it in time for Thanksgiving.

Spry: sewing paper

I caught a cold/severe sore throat this past weekend and spent most of it in bed or eating ice cream, looking longingly out the window at the gorgeous fall day that was sparkling outside without me.

When the ice cream had fortified me enough, I crafted a little and watched a lot of movies.

One of the things I did was hemmed the postcards for my save-the-dates. Yes, hemmed the postcards.

There are lots of paper-sewing tutorials/examples out there, and I’d been wanting to try it for a while. My betrothed and I are having a tiny wedding, and originally were going to have announcement cards printed… until I realized we’re only inviting about 30 entities (families/couples/singles who will write in their plus-ones, etc). So we decided to totally DIY the cards with what we had on hand, ie cardstock, my sewing machine, and our collaborative drawing skillz.

First I used spray-adhesive to glue two color-coordinated sheets of cardstock together (and people are not kidding when they say you should do this in a well-ventilated area. FYI the bathroom, despite having a vent, is not particularly well-ventilated, and the glue, being aerosol, will travel farther than you think it will, ie make the floor, sink, ETC rather tacky to the touch). After letting them dry overnite, I used our paper cutter to slice them into quarters (USPS regulates that postcards must be at, or under, 4.25inches wide.. which is a close shave for 8.5″ paper).

Then, sew baby sew! (The DIY-Bride book, for it’s sewn programs project suggests putting on “some high octane tunes” to keep momentum going. Although you can’t actually hear the tunes half the time when the sewing machine is going, it is nice to have those bursts of music… especially after I realized I was humming Ben Folds’ latest breakup song to myself, I quickly followed their advice and put on something more fitting.)

feed me!

The first one was a “first pancake” situation and not pretty, but after that, I got the hang of it and it was rather quick work.

color coordinated

I even got fancy and used different colors for the top and bottom threads so they contrasted better with the card colors! I think our color scheme is going to be a variation of pink/yellow and maybe a little blue? For our save-the-dates though, I didn’t have a pink thread that was pleasing to me, so I went for yellow and blue highlights.

all the pretty papers

Now, I send these blank beauties to my hubby-to-be so he can draw on them, and he’ll again send them back to me so I can add finishing touches to them… and then I’ll mail them.

If you’ve never sewn paper, I do indeed recommend it. It’s strangely satisfying, possibly because it’s a brittle medium, that won’t wrinkle or pull or pinch the way most fabrics tend to.

Quilt in progress! – Rozsamaria

Finally, I have a new project to share.  I’m making a quilt for my cousin T and her husband B.  I usually make a quilt when people get married or have a baby.  However, when they got married last year I didn’t have time to make them a quilt because I was working on a quilt for a friend’s family.  To make up for it, I’m making them a quilt for their birthdays and belated anniversary.  It needs to be finished by Thanksgiving, which is when we’ll be celebrating T’s birthday.   I was reluctant to include it in the blog because I didn’t want to ruin the surprise, but Thanksgiving is only a couple of weeks away and I figured T wouldn’t see the post before then.

T and B gave me a book about quilts (“Quilts Around the World” by Spike Gillespie) for Christmas last year, complete with patterns for 20 different patches.  I wanted to make a sample quilt, with one of each patch, but I didn’t have time.  I picked a few patches and did several of each, then filled the rest with 9” squares.   I made two patches using the bow tie pattern, six using the Amish squares pattern, and five using the Korean patchwork pattern.  T’s favorite color is green and B’s favorite color is blue, so those are the colors I used for the quilt.

The Korean patchwork pattern

A picture of the Korean patchwork pattern

The Amish squares pattern

The Bow Tie pattern

I used the same fabrics for each set of patches, so they coordinate.  The following are pictures of the different patches I made.

The bow tie patches:

The bow tie pieces partially assembled

The Amish square patches:

The Amish patchwork pieces, in assembly

The pieces for one of the Amish square patches

A closeup of another Amish square patch in assembly


I’m having some issues with WordPress, so I’ve only included pictures of two of the six Amish square patches.  Sorry!  Wordpress keeps eating my pictures.

The Korean patchwork patches:

A Korean patchwork patch

You’ll note that the Korean patchwork patches don’t look like the picture.  I didn’t read the instructions fully and the pattern was at 70% scale, so they came out too small.  I added the large dark green strips to make them 9″ squares like the other patches.

The quilt has 25 patches, five across by five down (thirteen that I made using the patterns and twelve that are simple squares).

The patches laid out on my table

The 25 patches assembled into the quilt top

It wasn’t quite the size I wanted when I sewed the patches together (alternating simple squares with assembled patches), so I added a green fleece strip around the edge.  I’ll use fleece for the backing, as well.  I’m not going to use batting because the fleece will be sufficiently warm and heavy.

The finished quilt top with the fleece border

I spent most of the weekend sewing and I was able to get a lot done, but there’s more to do.  I haven’t attached the back or done the quilting yet.  Those will likely be the subject of my next post.

Spry: felty flowers (flower pins part one)

So my office building is having a craft fair in December, so I’ve shayshayed myself into the line up.

This is my big break! Or really, my test run to see if the things I’m planning on offering as wedding favors are favored at all by the general populace.

a veritable garden

Flower pins (ok there’s a heart in there too). This weekend I played with felt, but I also want to play around with other fabrics, as well as paper, and becoming more daring with my use of beads and lace. I suppose these are prototypes in a way, but they’re a strong start? (The wedding is in June, so felt might be too “stuffy” by that time… but for a holiday craft fair, why not?)

Tutorial of I found for rose-like monochromatic puffs, apparently it’s called a box-fold; also, this is actually the first time I’ve made pom-poms. If you haven’t, I certainly recommend it. This is one way of making those four/three petaled flowers I’ve got, but really it’s easier just to cut out the flower whole and pinch in the center than bothering with individual petals.