Hunter’s Star Quilt – Part II

As I mentioned last week, I used this tutorial to put my Hunter’s Star quilt together: http://www.cascadequilts.com/2011/02/hunter-star-tutorial.html.  I found it to be really helpful.

I spent what felt like weeks and weeks (I think it was three weeks) cutting the pieces and sewing sections of the blocks.  I was planning to make 25 blocks in a five by five layout.  For that, I needed to cut 75 white squares and 75 blue squares, 150 squares total.  I believe, based on the weird surplus of pieces I ended up with later, that I doubled this and cut 150 of each color.

The instructions in the tutorial said to starch the fabrics before cutting them, but I misread that and cut my squares and then starched them.  I have never worked with starch before and I don’t like it.  I did my best to follow the instructions on the can but I may have done it wrong.  It made my iron sticky and I just didn’t like it.  I don’t plan to work with starch again if I can help it.

Here are a couple of pictures of ironing with starch.  Look at the all the residue on my iron!

The instructions said to take two out of every three squares, and set the third one aside.  I did that, and then I took my two-thirds pile and I stacked the squares in pairs: one blue and one white square each, wrong sides out.  I sewed around all four sides of each pair.  It feels weird to do that, instead of doing just one edge.

The next step was by far the most time consuming.  (Bear in mind, again, that I had done my math wrong and ended up with far more pieces than I should have, so I spent a lot more time doing this than anyone following the directions properly.)  I took my sewn-together squares and I cut them on the diagonal into four parts, using a ruler and my rotary cutter.  Then, I ironed them open, so I had small squares comprised of half square triangles. The squares were all approximately three inches square but not exactly so, and the instructions said to trim them all to 2 and 3/4″.  I thought this whole step (I guess it was really three steps) took forever.

Next week: the piecing!

Quilt retreat!

You get a two-fer of posts today!  I went on a quilt retreat with my mom this past weekend and I spent an extra day at my parents’ house (for both quilting and logistical purposes).  We had a blast.  We were one of three mother-daughter pairs on the retreat, believe it or not.  My mom learned how to quilt from a group of really talented women – they even taught us both how to bind.  I had never bothered to learn, but now I’m going to try it on a small project.  I think I get how to do the corners, but I’ll be honest, I’m going to look for shortcuts on how to finish the binding.  It seems really complicated.  It also seems like it’ll take a lot longer, but it does look so much nicer.  My mom has already announced that we’re going to go to the quilt retreat next year.  Yay!  I suspect she’ll turn out to be a better quilter than I am, should she make it her hobby.  She’s much more conscientious than I am.

At some point I’ll be posting about the projects I worked on.  I didn’t take the Hunter’s Star quilt because it wasn’t as far along as the quilt I’m making for myself.  That’s put together now and ready for machine quilting, which I’ll be starting soon – possibly this weekend.  I’m not planning to hand quilt it, so it’s basically almost done and I’d like to have it finished, but at the same time I don’t want to dawdle on M’s quilt.  I feel like I should finish the gift for him instead of focusing on something for myself.  (But I’m so close!  And if I finish it while it’s still kind of cold out it might be useful, you know?)

I also owe an apology to my local quilt shop – I talked to the ladies at the retreat, some of whom go to the quilt shop a lot, and they said I must have accidentally bought special sashiko fabric.  Apparently sashiko fabric is really expensive, but it must not have been marked as such, so I didn’t realize that.  Now I feel a lot better and I can go back to the quilt shop again.  I slandered them unfairly.

Anyway, the quilt retreat was wonderful.  Now I know more people at my guild, and I spent a really nice weekend bonding with my mom.  I learned some new skills and new tricks that will certainly feature in future projects and future posts.  Here’s to fellowship and quilting!


Hunter’s Star Quilt – Part I

I’m moving away from doll quilts, possibly for some time, although I hope to keep making them with my scraps.  I have a couple of quilts I’m working on now – both works in progress, one more so than the other – that I’ll be blogging about for the next month or two.  First on the list is a hunter’s star quilt.

I went to a quilt show last year with my mother and my aunt and fell in love with a quilt in blue, white, and yellow.  It looked like it had little white and yellow stars at the centers of blue and white squares.  I’d never seen anything like it and I took a picture, thinking that one day I might be able to make something like that (after years and years of practice and improved quilting skills).

Fast forward to last month.  One of my coworkers, M, does carpentry as a hobby.  He says it relaxes him, much as my quilting does for me.  He made a table for another coworker and he was planning to make a big chest for a third coworker to use as a coffee table or something.  She’s moving at some point and he decided to wait until she moves to make it.  In the meantime, M decided to make me a chest, too, something I could store my quilts in.  How could I say no?  I told him I’d make him a quilt as a thank you.

I told Z about M’s offer.  Z is normally interested in my quilts because it’s my hobby, but he doesn’t get excited about them.  He admires them and he really likes the quilt I made him, but it’s a passive kind of thing.  He’s not involved.  However, he got very excited about the quilt for M.  Z knows that M looks out for me at work. (M and I joke that he’s my mentor, but it’s actually pretty true.)  Z is a little protective of me and he appreciates people who look out for me, plus he really respects M.  Z never ever makes design suggestions but suddenly he was throwing out ideas.  Since he was so interested, I let him help me pick the design.  I asked M what colors he likes and he said “blue and white, or beige.”  Blue and white has a more visual impact and I was thinking of doing one of the quilts in my lone star quilt book – I thought a big star quilt in blue and white would look great.  Z didn’t love the patterns, though.  I finally showed him the picture of the quilt I’d seen at the quilt show and he loved it.

After some internet research, I figured out that it was called a Hunter’s Star pattern.  I also figured out that it was much more complicated than one of the lone star patterns.  (Moral of the story: Let a non-quilter choose your quilt pattern at your own risk!)  I had leftover white fabric from R and M’s engagement quilt (white on white with a star print) and I went to my local quilt store to buy navy fabric.  (It was $15 a yard!  I’m never going there again.  From now on, I shop online or buy when vendors come to my guild meeting.)  I found this tutorial from Cascade Quilts in my Googling, and I relied on it heavily: http://www.cascadequilts.com/2011/02/hunter-star-tutorial.html.

Hunter’s Star quilts are much more complicated than what I’m used to.  M finished the chest before I’d even finished cutting all of my fabric.  Look how gorgeous it is:

M put cedar inside, so everything smells lovely.

I don’t have any quilts to put in the chest, so instead I’m putting my linens in it.  I have a linen chest now!  How fancy is that?  (I live in a rather small city apartment – I’ve mentioned that before – and there is no linen closet.  Each bedroom has one tiny closet and the landlord built a small coat closet when we moved in.)  I filled the rest of the chest with all of the leftover batting pieces I had stored in the apartment.

I took the opportunity to reorganize my stuff a little bit once I filled the chest, and I’m making a lot of progress.  I wish I were more organized.  Thankfully J (my roommate) is very patient with my mess.  (She told me I’m better than I was in my old apartment, when I was living by myself, which is sadly true.)  I’m working on it!

This is such a long post already that I’m going to wait until next week to post about the quilt itself.  It is decidedly still in progress.  It felt like it took forever just to get all the pieces together, although in my defense I was working on a second quilt at the same time (and not in my defense, I definitely made a mathematical mistake – it wouldn’t be a rozsamaria quilt without a math issue, right?).

Next week (and probably the week after – and maybe the week after that, since I’m going to piece the back) will cover the piecing.  I won’t be able to assemble the quilt until Easter, because I need to do it at my parents’ house, so after I’ve finished blogging about the piecing I’ll switch and blog about the quilt I’m making for myself.

Drunkard’s Path doll quilt – Part II

My quilt guild collects doll quilts for the following charity: http://www.emergencydolldispatch.org/donate.html. They give dolls to children who’ve been abused and they like to give a quilt with each doll.  It’s a very worthwhile cause.

This week I’ll cover the quilting of the doll quilt.  I quilted it the same way I’d quilted my bedspread, with circles traced using a plate as a pattern.

As you can see, I made four circles, one at the center of each color block.  I used white thread.  I thought that would give me the cleanest look.

Here’s what the quilting looks like on the back:

The bottom right corner seems really puffy, which I guess means I did a poor job of pinning it flat, but that’s not  unusual for me.

Next week we’ll have a change of pace from the doll quilts.  I have a couple of in-progress quilts to post about, one for myself and one for a coworker.

Drunkard’s Path doll quilt – Part I

My quilt guild collects doll quilts for the following charity: http://www.emergencydolldispatch.org/donate.html. They give dolls to children who’ve been abused and they like to give a quilt with each doll.  It’s a very worthwhile cause.

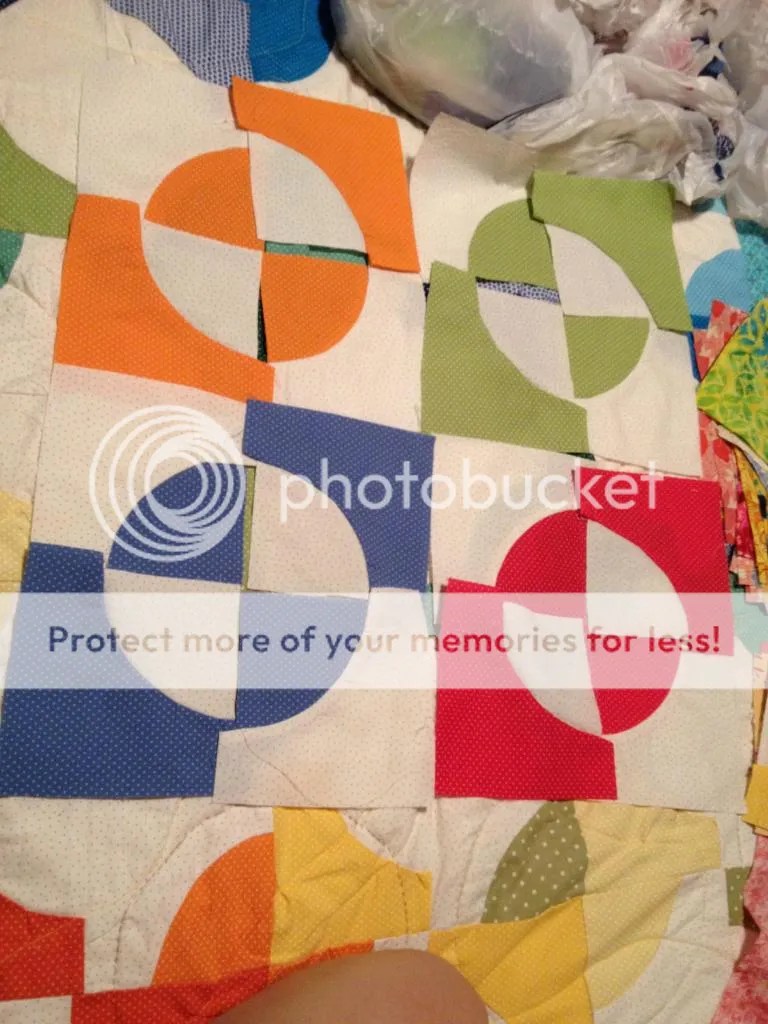
It almost seems inappropriate to make a doll quilt out of a pattern called Drunkard’s Path, doesn’t it?  I chose sixteen leftover patches from my quilt that sort of matched each other: orange, red, green, and blue.  I arranged them in a way that pleased me:

Then I sewed the strips into the quilt top:

I LOVE this and I would have liked to simply leave it as is, but it was only 20″ square.  I picked out a red print with white cherries, but I was afraid it looked busy and J (my roommate) concurred that it was way too busy for the lovely simple pattern.  After some consideration, I decided to use the white polka dot print in the patches as a border; J agreed that it would be much cleaner.

I pieced a back using two red prints (which, if I remember correctly, are from a 30s reproduction collection I bought at some point, but I could be wrong about that).

Here’s the assembled quilt top, pinned and ready for quilting.

Next week I’ll cover the quilting.