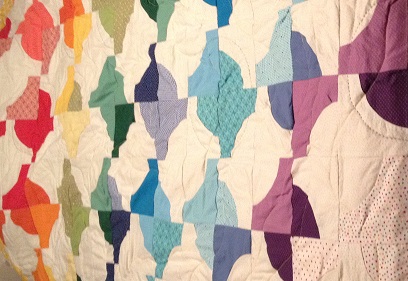
Actually free motion quilting!

Hi habibis! I know I said I’d be showing you some baby quilts, but I have to share with you that I am finally learning to free motion quilt!

I didn’t realize when I first started trying FMQ that you need a special foot for it. I couldn’t understand why people could do so much on their machines that I couldn’t do. I thought at first it was because I was using a home machine, and other people could do fancy things on long arm machines. Then I got FMQ books and learned that the problem wasn’t my skill level; it was my tools. My mom and I have three machines between the two of us, but none of them came with FMQ feet.

In the fall I finally ordered an FMQ foot for my Kenmore. I got it after Thanksgiving, but I was so busy finishing up Christmas presents that I didn’t have time to spare to learn how to use it. I finally put it on my machine after new year’s and began to practice.

Here’s my first piece. You can see that it’s definitely not perfect. My stitches are very uneven and some of them are huge. However, it’s definitely free motion quilting! I got really excited. (I announced it to Z and all he said was “are you being careful?”)

Here’s a shot of the other side:

I think I’m going to turn it into a tray mat for my grandmother. I actually picked out the fabrics with that in mind.

Here’s my second piece. I wanted to practice waves because I knew I wanted to FMQ waves on the pillow covers I’m making for our couch. This piece is a little rougher. This might become a dog bed.  I only layered one fabric and the batting for this, not two, so it’ll be more quilt as you go.


My attempt at stars:

Trying a little writing (it’s supposed to say “star”):

What I learned from making the “waves” above is that making a cresting wave shape is hard for me right now, so I did my waves differently on the pillows, more like the bottom row in this picture.

Every year I improve my quoting skills and I’m really excited to add FMQ this year!

Medallion baby quilt for P and J’s baby – Part II

Today I want to share with you the machine quilting I did on the medallion baby quilt.

I started with the center of the medallion, the dogwood blossom, and I machine quilted just to the inside of the dogwood blossom shape.  Then I did wavy free motion quilting in the lime green and teal floral border around it, using matching green thread.

For the second border, the one with the rectangles made of triangle scraps, I did straight line quilting in three rows around the inner edge of the border.  I stopped at each corner block, and then in the corners I did three more lines following the inner edge of each corner block.

In the third border, the blue floral print from my Aunt D’s stash, I did more wavy free motion quilting.  At the corners, one line of quilting dipped down into the second border, and the other line dipped out toward the outside edge of the border.

For the fourth border, the one with the pinwheels, I started by quilting the outline of the pinwheels in blue.  Then I traced overlapping half circles in the rest of the border and quilted them, again in blue.

For the fifth border, with the teal and lime solid fabrics, I did an interlocking geometric pattern.

I didn’t quilt the final border.


January and February Charity Sewing

Hi habibis!  It’s already March.  I’m pretty excited for February to be over – it’s already slightly warmer!  In the 20s and 30s instead of in the teens or colder.

One of my New Year’s resolutions was to set aside one day each month for charity sewing, and so far I’ve kept it.  In the last couple of months I’ve made this doll quilt, two completed baby quilts, and two quilt tops.  Today I’ll share the baby quilts and tomorrow I’ll share the other quilt tops.

I still had so much shirting fabric leftover.  I used some of it to make this striped quilt, and more for the backing.  I did wavy lines for the quilting.  I didn’t bind either of these – I just sewed them around the edges and flipped them right side out.  Some of the quilting got a little messy – in one spot I had to fold fabric over and sew down on top of it.  It still looks okay.

I thought this blue plaid would look adorable with the yellow polka dot fabric I have.  I added the yellow as borders at the top and bottom.  Then I quilted using the plaid as my guide.  I quilted vertical and horizontal lines, working from the center outward.  When I got to the corners I was tired of the vertical and horizontal lines, so I quilted different-sized squares in each corner.   I used yellow thread.

Here’s the quilting from the back:

Tomorrow I’ll show you a couple of quilt tops!

Nativity Wall Quilt for my Goddaughter N

Merry Christmas, habibis!  I hope you’re having a very happy holiday if you celebrate (and if not, happy Thursday)!

For my goddaughter N’s Christmas present I thought I’d give her something religious.  I was thinking I’d stop at the Catholic store in my parents’ town and then I remembered that I had bought a Nativity wall quilt kit years ago.  I think I’d originally planned to make it for my parents but I never got around to it, and it’s been sitting in my stash for some time.  I decided it would be perfect.

The kit consists of a panel featuring the Holy Family and the three Wise Men, in shades of blue and gold.  It’s beautiful!

The back is a starry print.

I added this silver-edged ribbon to make loops for hanging.

I did all my quilting in gold thread.  I tried to do some FMQ on it, more free-form than free motion I guess.  I quilted around the halos on the Holy Family, but I didn’t trace in advance, so they aren’t perfect curves.

\

I quilted inside the Star of Bethlehem, from point to point, although you can’t really tell.  I quilted around the blocks at the top and bottom of the panel.  I quilted along the edges of the center panel piece.  I had some bunching issues at the corners – the little finial kind of shapes – and I wanted to flatten them out as best I could, so I then went along the edges of the quilt in navy.

Can you see that in the above picture?  It did help.

Here are full shots of the front and back:

It’s really cute, right?  I wish it were less bunchy but that’s a chronic problem of mine, and it still looks great!

Wedding Knot: Love is the Tie that Binds – Part III

Hi habibis!  It’s Christmas Eve – Advent has flown!

Today, for our final Advent post, I’ll share the quilting for R and M’s wedding quilt, “Wedding Knot: Love is the Tie that Binds.”  See parts I and II here and here.

The quilting was by far the hardest part, on my little Kenmore.  As I mentioned before, I’d decided to downsize to a queen sized quilt instead of a king.   It’s still the largest quilt I’ve ever made. (Previously the largest quilt I’d ever made was their engagement quilt.) Here’s the thing: it’s still too large. I don’t have the space for a queen sized quilt. I’m sewing on a Kenmore on my childhood desk. That was a headache.

This is the quilt I’ve been practicing my FMQ for. I knew I wanted to do wavy lines on it. I tried different things on different doll quilts to see what I liked, and I settled on vertical wavy lines going down the “columns” formed within the pattern.

I started with the center and quilted wavy lines in gold thread. I quilted three lines going all the way from the top to the bottom.

Next I should have gone to the right and done the same, but I thought about it and changed my mind about the design. I decided I wanted to quilt the rectangles in matching colors. I started with the gold and quilted each section of the two gold rectangles with three wavy lines. I love how it looks where I turned the corners.

Next I did the same for the green rectangles. I did wavy lines on the remaining background cream fabric, in cream. (Now I wish I’d done the center in cream thread instead of gold, but the gold adds extra interest.)  I did the same around the borders.

I’ve seen quilters talk about how the quilting adds movement to their quilts, and that’s how I feel about this.

I love the look of it, but the quilting was problematic.  My skin is drier in the cooler weather so my hands got all scratched up from the pins.  Also, I had a lot of issues with bunching. My pinning wasn’t great. (My pinning is never perfect, especially on larger quilts.) The way I quilted it – sections of different rectangles at a time, which overlap – exacerbated that. Some of the cream sections bunched up against gold sections that I’d already quilted.  Just imagine how quickly I could have finished his quilt if I’d just done wavy lines across the stripes! But then it would be less meaningful.

Had I just quilted vertical wavy lines from the center outward I wouldn’t have these bunching problems, and maybe I wouldn’t have scratched my hands up so much, but I like this quilting better even with the bunching. I tried to compensate for the bunching by pushing the folds flat and sewing over them. I prefer that to the fabric being raised. Other people probably wouldn’t. Either way I get that it looks messy. (Actually I think sewing over the folds looks pretty cool and I’d like to experiment with that in a quilt sometimes.) None of my quilts will ever be perfect and I don’t mind that.  I obviously need to work on my FMQ, but as frustrating as working with such a large quilt was, I was pretty happy with the FMQ experience given my limitations.

The quilting took me approximately 10 hours.  I don’t know if that’s normal for such a big quilt, but I did simple FMQ.

I finished the quilt with binding made from the top green fabric.  I made R and M a tag with their names, the name of the quilt, and the date of their wedding.  Putting the binding on and sewing it down took approximately 6 hours.  Making the tag and sewing it on took 30 minutes, so the quilt took a grand total of 32 and a half hours.

Here are some pictures of the quilting.  I don’t have a picture of the finished quilt because it’s too big for my apartment.  Maybe my brother can take one for me.  I think he and M really loved the quilt, especially M, and her mom even said the same thing.  I gave it to them at their wedding brunch so I could see them open it.

Quilting in progress:

Close ups of the quilting:

Don’t the corners look cool?

The quilting from the back:

Thank you for joining me all Advent for these posts!  Thanks to Nikki and T-Rex, my guest posters!  I’ll go back to a more limited posting schedule soon – I’ll have a couple of extra posts in the next week, and then beginning January 6th (the Epiphany! the last day of Christmas in the church calendar) I’ll resume my regular Tuesday posting schedule.  I hope you’ve enjoyed the Advent calendar posts.  Enjoy any holidays that you celebrate – Hanukkah, Christmas, Kwanzaa – and have a safe and happy New Year!

Throwback Thursday: Moose Quilt for my sister N

Here’s the quilt I made for my sister N for her birthday several years ago.

N’s favorite animal is the moose. You may have noticed that if you’ve viewed my posts on the moose ornament, pot holders, and apron I’ve made her. This is the original moose present – you’ll recognize a lot of the fabrics. I spent several years buying up every moose print I could find, and by the time I got around to making her a lap quilt I had more than enough fabric to do it. I’ve still got leftovers!

The design of this quilt is pretty simple. It’s just a layout of 25 squares, five by five.  The center moose is from a woodland animals panel I bought specifically for the moose.  (It also had a bear, an elk, and a deer. I still had the rest of the panel in my stash last month and it went to my guild’s charity committee with some coordinating green solids – because I wasn’t a fan on those shades. I had thought to myself that maybe I could make something with the panel for charity but I decided I was better off donating it. Everyone has a different aesthetic and I thought maybe other people in my guild could make something awesome, whereas I would just be making “something” because the rest of the panel doesn’t inspire me at all.)

The cream print with the brown on the bottom row is actually coffee beans, but it reminded me of hoof prints so I pretended that’s what it was.

I quilted a very large meander in green thread, meant to resemble an animal’s wandering path.


I hand quilted the outline of the center moose and around the circle in the top and bottom center squares.

The quilt isn’t bound because I hadn’t learned how to bind.

I had completely forgotten what the backing fabric is; luckily, I took pictures of the quilting from the back.  I pieced a back using all sorts of woodland fabrics.  I think that bottom one with the snow came from a panel kit that I bought and took apart.  There’s some trees and leaves, wood grain, and non-moose animals (bears, deer, ducks, etc.).

How awesome does the back of the moose look?

I love how the quilt came out.  It’s very versatile, too – because of the color palette and the woodsy/animal theme, it’s not the kind of quilt that screams “GIRL.”

Another Doll Quilt

Hello habibis! If you’re in the U.S., I hope you voted (or will vote) today. One of the perks of being a civil servant is that I get the day off. (I know!! It’s not like I couldn’t vote before or after work, but a random Tuesday off is nice.) I’m going to see friends and go to the gym (and vote, of course!), but I’m  planning to use the rest of the day for sewing.

Speaking of sewing, I had a pretty productive weekend considering how much else I did. I worked on the magnum opus – more on that tomorrow – and I started the free motion quilting on my other big project that I haven’t shown you. It’s going pretty well so far!

As a quick reminder, voting has opened for the Blogger Quilt Festival!  Vote now through November 7th! I submitted my Drunkard’s Path polka dot quilt and the hand quilted wedding quilt I made for my friend N.  Check out the rest of the submissions here.

Today I’m showing you my final doll quilt. Like the other one, it’s both unnamed and unfinished. I still haven’t sewn the binding down. I couldn’t come up with a good name for it, either. I think not all of my quilts will be named and that’s okay.

I went through my stash and pulled together fabrics that I thought went well. I love this floral print but the color isn’t easy to match. It’s bluer than mint but too pale for aqua – I don’t even know what to call it. (I think it looks a little greener in certain lights than it photographed here.)  I thought it went nicely with the yellow print in both color and tone, so to speak.  It’s the same color – or almost – as the center circle it matches the blues in the house scene.  The piecing was simple – just a rectangle with borders, to highlight the yellow print.  I had trouble finding thread to match both fabrics, so I went with this teal color; it went nicely with the center fabric and I thought the deeper shade complimented my floral fabric.  (What kind of flowers are those?  They almost remind me of Queen Anne’s Lace, but I’m sure that’s not what they are.)

Here’s a close up on the center – it’s actually off-centered, but purposely so.

I started by quilting around the circle in the center, on the inner line and the outer line. My quilting isn’t perfect – I was eye balling it.    Then, since I wanted to practice my FMQ, I did a meandering line in the yellow.  I tried to highlight the flowers.  It’s not the neatest quilting ever but I thought it was pleasing.

In the border I did vertical wavy lines on the left and right side. For the top and bottom section of the border I tried meandering again but it looked terrible. I hated it.  Look how horrible this is.  What seemed pleasing in the yellow just looked messy here, with the thread so dark.  Stippling might have worked better.  As it was, it just upset me to look at.  I hate ripping out stitches, but I could not live with this attempt at FMQ.

I finally ripped it all out and replaced it with horizontal wavy lines. I hate ripping work out but it was worth it. I hated the way the meandering looked even more.  Now it’s more more soothing and pretty.

Here’s a view of the backing fabric and the quilting on the back.  I used the blue fabric from the front for binding, which I’ve attached but haven’t sewn down yet.  I’ll post again whenever I finish this quilt and the flight one.

Flight-themed Doll Quilt

Another doll quilt! I didn’t name this one.  I thought for a while about a name for it (Flying High was a contender -it makes me think of the Reading Rainbow theme song – and so war Soar) but nothing really fit.  I decided not all quilts need a name.  (To be honest, “Butterfly Dreams” is the first quilt I’ve ever named, I think; in the past I’ve always thought of the quilt as “so-and-so’s quilt,” whoever the recipient is.  I like the idea of naming quilts but I hadn’t really tried until recently.)

I started with the plane panel.  I rooted around for matching fabrics and came up with the navy I used for the border.  I have no idea how it got in my stash.  It’s apples? Or pears.  Or turnips? It’s produce of some sort.  Does it fit thematically with flying?  No, but the colors match, so I went with it.

I used this other navy (definitely leaves – at least I can identify that) for the back.

I’m practicing my FMQ!  More wavy lines.  I tried to do something more involved but I need to play around with my machine more before it’ll actually do that for me, so wavy lines it is.  They’re horizontal, with white thread – they’re supposed to look like flight, if you know what I mean.

I haven’t sewn down the binding yet.  I made it with scraps from the two navy fabrics. I see that I didn’t take a picture after I put the binding on, but since I haven’t sewn it down I guess that doesn’t matter much. I’ll do that eventually.  Possibly after Christmas.  Christmas is less than 10 weeks away!  I have so much to do before then.

Blue and Yellow Doll Quilt

Hello habibis! I hope you’re all doing well.  I got quite a bit of sewing done in the last week: my magnum opus, doll quilts, and a gift that you’ll see at some point. Today I’m showing off a cute little doll quilt. I used leftover scraps from various projects, including a couple of prints (one flannel, one not) from the baby quilt I made for my friends J and N’s older daughter. How cute are the nursery rhyme prints?

It’s a simple quilt – a center square and three borders, two of the striped flannel and one of the nursery rhyme characters.  I used more of the striped flannel for the back.

I quilted wavy lines in light blue thread to practice my free motion quilting.

I was pleased to have enough of the center fabric to make the binding.  I’ve added the binding but haven’t sewn it down yet. I don’t have any finishes I can share (all my finishes are gifts) so it’s WIP doll quilts or nothing today!

Purple Doll Quilt

Hello habibis!  Today is the last day of September and therefore the last day of National Sewing and Quilting Month.  Today I’m bringing you another doll quilt – and from start to finish!

I’m trying to practice free motion quilting right now, and what better way to practice than on doll quilts?  They’re small and easy to manipulate.  Here’s one I put together specifically for that purpose.  I cut strips of purple fabric of varying widths and arranged them like this:

You may recognize some of these fabrics from my cousin C’s apron – I had leftover scraps in weird sizes.

I layered it with this green print on the back.  It just happened that I had enough of it to cover the back, but in the end I was really pleased with the color combination.

I wanted to quilt this with curvy/wavy lines, which is what I’m practicing right now.  I used this purple thread.  I decided to do overlapping lines, and here’s the result:

Here it is from the back – I love the way the purple looks on the green.  For the binding I chose this purple (the backing fabric from my friend N’s wedding quilt, which I still have scraps of) and a matching purple thread.  Some of my corners weren’t perfect but I don’t mind.

I had a little bit of trouble with thread breakage and I think I need to adjust my settings.  I just got a couple of books about free motion quilting, so that should help.  I also took my machine in for a tune up, since I hadn’t had it cleaned or anything in the 7 years that I’ve had it.

I’m afraid I haven’t named this one – I wanted something that referenced the shades of purple, but I get a rather icy/wintry feel from the fabrics, especially the shimmery metallic one, and nothing that referenced ice or winter felt appropriate for a doll quilt.  So, it’s unnamed, but quite cute.