American Flag Pillow for Z’s Grandpa

I decided to make an American flag pillow for Z’s grandpa.  Z and his grandfather share a deep love of military and American history; they watch military TV shows and documentaries together, and Z’s father and his grandfather took him to see the USS Intrepid and submarines and other museums when he was growing up.  Z has many happy memories of such experiences with his grandfather.  (I’ll call him Mr. J for the purposes of this post – that’s shorter.)  I thought Mr. J would appreciate a nice flag pillow, something patriotic and something comfortable for propping up his legs or putting behind his back.  (Mr. J is almost 95 and he’s in excellent shape for his age, but he still has some aches and pains.)

I found this website with the dimensions for an American flag.  (I thought all flags had to have those dimensions, but then I read that those dimensions are only for offiical/military flags and otherwise the dimensions can be more like 3/5 or 5/8, and I don’t think it matters for a pillow, but I wanted it to be the right dimensions.)  I used the dimensions to calculate how wide and how long to make the stripes and the blue section.  I had bought a 14″ by 28″ pillow form, so I decided to aim for a 13″ flag with a border.  That made the math easy – each stripe was 1″ wide (so I cut them 1.5″ wide).  If the stripes were 1″ wide, then they needed to be 24 or 25″ long.  I pulled out all my red and white fabrics and cut the stripes from them.

The measurements for the blue section needed to be approximately 7″ by 10″, not counting seam allowance.  I chose this print featuring the American eagle and the flag.  I had wanted to use the print for Z’s quilt last year and misplaced it, so I was excited to find it again.  (I think I found it right after I finished Z’s quilt last year.)

So here’s the completed flag:

Then, I needed to make the border for the flag.  I had bought two military fabrics, one a US Army print with tanks on it on a black background, and one a US Air Force print with planes on it on a sky blue background.  I don’t think I bought them for this specifically, but I do think I had bought them with the idea that I might use them for something for Z or Mr. J.  I showed them to Z and asked him which to use, and he said the Air Force fabric.

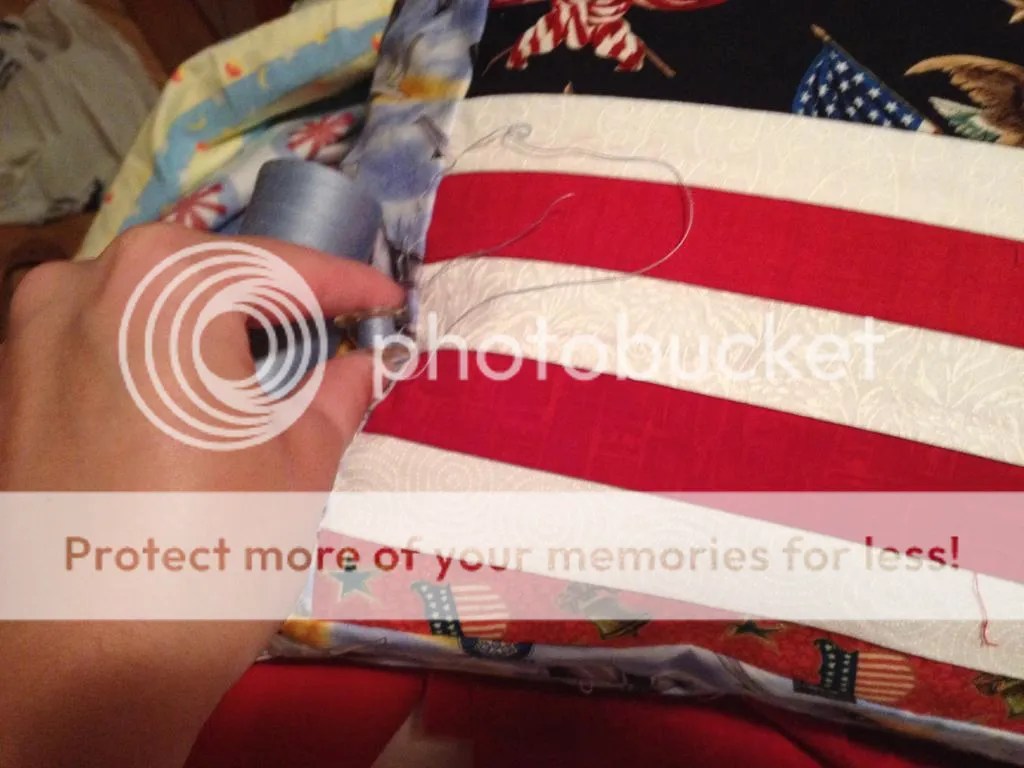
It was an excellent choice, because the sky blue color is really pretty and it offsets the colors in the flag nicely.  The sky blue is appropriate for a flag, too.  I used the rest of the fabric to make the back of the pillow.  I sewed it closed with matching sky blue thread because that’s easier than making flaps, and I figured Mr. J wouldn’t need to take it off the pillow anyway.

Here’s the finished flag pillow:

I am so pleased with how it came out.  I was going to save it for Christmas – I’m being very proactive with making Christmas presents this year – but Z said to just give it to him now; he might as well enjoy it.  We visited Z’s family this weekend (which was so lovely) and I brought it for him.  Mr. J was completely delighted.  He said it’s the perfect side to rest his book on while he’s reading.

Pot holders for C and J

This summer is flying!  I just returned from a relaxing vacation with my family.  We went to the beach for a week and I was able to do some hand sewing and hand quilting on a couple of projects that you’ll see down the line. (I’m working on a ton of different things right now, but a bunch of them are presents, so their appearance on the blog will be delayed.  It’s almost astounding to me how many different half-finished projects I have right now.  Usually I have a quilt I’m working on and maybe something small, but right now I’ve got eight things that are in progress – a bunch of which are doll quilts for quilting practice – and two finished presents, one of which you’ll see next week!)

This week I want to show you two sets of pot holders I made for my cousins C and J.  I posted about the apron I made C for her graduation.  These pot holders were their birthday presents.  (I hadn’t made them pot holders for Christmas.)  J’s birthday was months ago (I missed it – not unintentionally; I just didn’t send her a present) and C’s birthday was more recent, but I knew I wouldn’t see either of them between C’s graduation and Christmas, probably.  Rather than mail something late to J I figured I’d just make them something and give it to them in person.

Both C and J like the color purple so I picked purple fabrics for them.  For J I picked this pretty Japanese-inspired fabric.

For C I used this set of coordinated fabrics.  I thought the Japanese-inspired print stood on its own but for C’s pot holders I wanted a design.  I layered the fabrics and then cut them into triangles, then rearranged the triangles so that four different prints appeared in each set.  It makes an art deco-y fan design.

These are the fronts and backs of C’s:

I knew I was planning to bind these – as practice (these are the first things I bound, by hand or machine).   I also knew I wanted to quilt them.  I could have probably still made straps like I did for the pot holders I made last Christmas, but instead I wanted to make a sort of pocket to slip your hands into.  I had seen that somewhere online – I think here: http://www.ohfransson.com/oh_fransson/2010/04/potholders.html.  So I picked matching fabrics for the outer pocket and contrasting/coordinating fabrics for the trim and binding.

When I layered the pot holders, I used scraps of leftover batting and that Insulbright stuff.   The Insulbright has to have the shiny layer facing the hot surface to reflect the heat, so I made sure then I made my pot holder sandwiches that the Insulbright shiny side faced outward toward the fabric, not toward the batting.  Then I did my quilting – kind of a grid on the darker purple Asian-inspired print and straight lines within the fan on the lighter purple prints.   I think it’s hard to see on the Asian-inspired print in the second picture – the thread doesn’t stand out enough – but I used purple thread for both.

I trimmed each outer pocket piece.  I wanted the pot holders to be on point, so I trimmed the outer pocket pieces by cutting off a corner where the hand will be inserted.

I think there’s an easier way to do the trim than what I did.  What I should have done was lay the outer pocket fabric down, right side down, and then match the trim fabric up to the edge, also right side down; I should have sewn along the edge, then flipped it over, turned the excess trim fabric under, and sewed it down over itself.  I did it the hard way, like this –  see how I have the trim fabric over the edge instead of lined up?  I don’t know what I was thinking.  That was harder when it came to matching up the lines.

Also, I wish I’d used longer pieces of trim fabric and made that cut for the hand wider.  C’s pot holders are a tight fight.  I could get my hands in and I don’t think her hands are larger than mine, but they don’t slip on easily.  Part of the issue there was also that I hadn’t bother to calculate seam allowance when I was making my fans and I lost more than I’d expected when it came together.  J’s pot holders are approximately 8″ and C’s are closer to 7″, if I remember correctly.

When it came time to add the outer pocket fabric I was careful to put that on the side away from the Insulbright.  I pinned the outer pocket pieces down and prepared for the binding.

I used extra pieces of the fabrics for the binding.  I think I used 2.5″ pieces and it actually wasn’t quite wide enough because I had the layer of batting and the layer of Insulbright.  insulbright is quite stiff.  I had a little trouble with my binding because of that.  I used a whip stitch to sew the binding down on the back, which blended in nicely with some of the fabrics but showed on the others.  I switched to a running stitch next time I bound a quilt and I like that better.

Here are the finished pot holders for C, showing the fronts and the backs.  I think you can probably see the whip stitching on the bindings.

I apparently didn’t take pictures of the finished ones for J after I’d sewn down the binding.  (Sometimes I wonder why I take so many pictures of one thing and then forget to take a finished picture.)  I was quite happy with them!  My cousins liked them, too, and they were easy for them to pack and transport back to their homes.


Dog bed

I think I’ve mentioned before that one of my mom’s neighbors works with an animal shelter and they’re always looking for dog beds of any size.  I tend to make her weird lumpy things but she’s always delighted.  Here’s a big one I made – I pulled out some fabrics (all matching, purple plaids) and sewed them together to make a very large sack, and then I stuffed it with pieces of batting and stuffing and all the leftover threads and scraps that I’d collected.  Here are some pictures of the lumpy delight, in all its glory:

I hope the dog who received this was very comfortable.  I had plans for other dog beds – my old comforter is waiting to be converted – but I still haven’t gotten around to it.  Perhaps in the next month or so.

Finished Quilts

This morning I added a new page for finished quilts.  It’s something I’ve wanted to do for a while and this week I finally got around to it.  One thing I realized as I put it together is that I haven’t posted about a couple of early quilts I made.    Another thing I noticed is how bad I am about linking to previous posts about a quilt.  That’s something I need to work on in the future.

A positive that came out of it is that I can now look at almost all the quilts I’ve ever made in one place.  I remember most of them pretty clearly but I’d kind of forgotten a couple, and I was reminded how pretty they are.

I included any baby quilts/wall hangings that were made for babies, but no other wall hangings or other things that are quilted but not quilts.

I don’t post a lot of work in progress posts about my quilts because, as you can see, so many of them are presents.  I counted and I’ve made 23 quilts (not including the baby wall hangings) in the last 7 years, 20 of which were gifts.  Z doesn’t read my blog but some of my family knows about it, and so do some of my friends, and I never want to spoil the surprise.  I wish I could share more things with you in real time but it’s more important to me that my friends and family not stumble upon a surprise months before they get it.  For the same reason, I don’t post about my monthly goals or monthly finishes.  Half of what I’m working on right now are presents, including, as I’ve mentioned before, Christmas presents.  (Some of those things are for Z and his family, so you might see them on the blog well before Christmas.)  Anyway, I wanted to explain a bit of my methodology when it comes to posting.

Enjoy the finished quilts tab!

Floral Nine Patch Blocks

I’ve mentioned before that sometimes I’m not sure whether to post what I’m working on at the moment, especially when I have a backlog because I don’t usually post about presents before I gift them.  That was the case this spring, when I was working on the hexagon wedding quilt and various other presents for friends and family.  I ended up erring on the side of posting about the hexagon charity quilt and the Hunter’s Star quilt rather than posting about presents I had made and other small projects.  Now I have a bit of a backlog, so before I start posting about the new things I’m working on (I’ve already starting Christmas presents!  Plus I want to make more doll quilts), I want to post about a few things I did in spring.  I’m going to start with some floral nine patch blocks I made for my guild’s June block of the month.

My mom went to my quilt guild’s June meeting with me.  They always have a block of the month and I thought it would be fun if Mom and I had some blocks to enter.  You make as many as you want and then you enter a drawing – you get as many slips as blocks you made, and one person wins them all.

June’s block of the month was a floral nine patch made of three inch squares.  Three dark squares arranged on the diagonal and the other squares all light prints, to fill out the nine patch.  The light prints can be all different ones, but I used one dark floral and two light florals for each patch.  I laid them out in rows and chain pieced them.

My mom picked her colors and I put them together.  Here are hers:

These are the ones I made for myself:

I had forgotten I even had that burgundy fabric and I’m quite enamored of it.

We didn’t win the nine patches, but I hope whoever did liked the ones I made.  I cut pieces for more nine patches but ran out of time, so I suppose I’ll save them for doll quilts or something.